I denne sektion gennemgår vi, hvordan du indtaster og opdaterer din virksomheds grundlæggende oplysninger i Vendora360.
1. Klik på “Virksomhedsindstillinger”
Klik på “Virksomhedsindstillinger” i menuen til venstre for at åbne virksomhedens indstillinger. Herfra kan du administrere virksomhedens grunddata, brugere, afdelinger og andre centrale konfigurationer.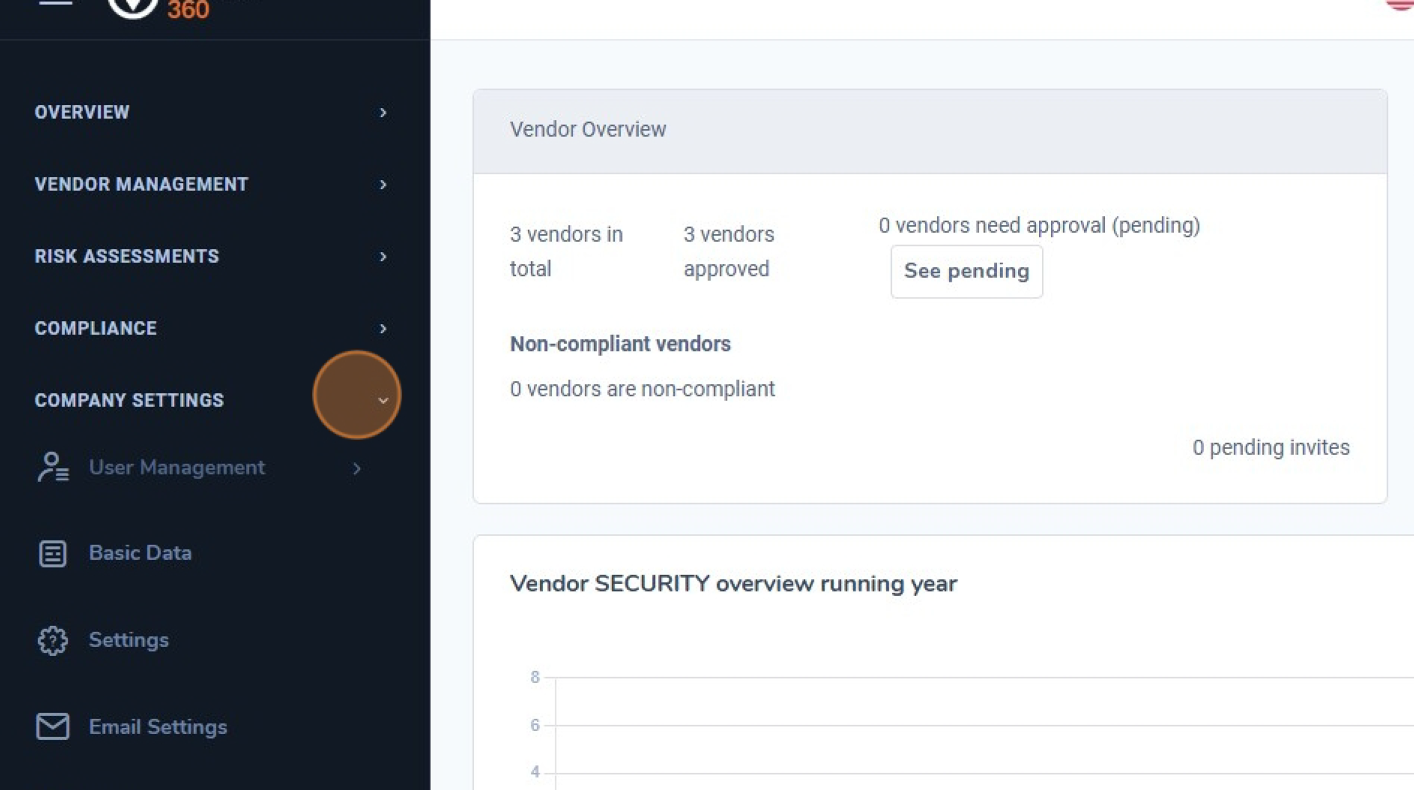
2. Klik på “Grunddata"
Vælg “Grunddata” under Virksomhedsindstillinger for at åbne indstillingerne for virksomhedens profil.
3. Vis og rediger oplysninger
Her kan du administrere virksomhedsoplysninger, herunder kontaktinformation, adresse, certificeringer, compliance-standarder og klimapåvirkning.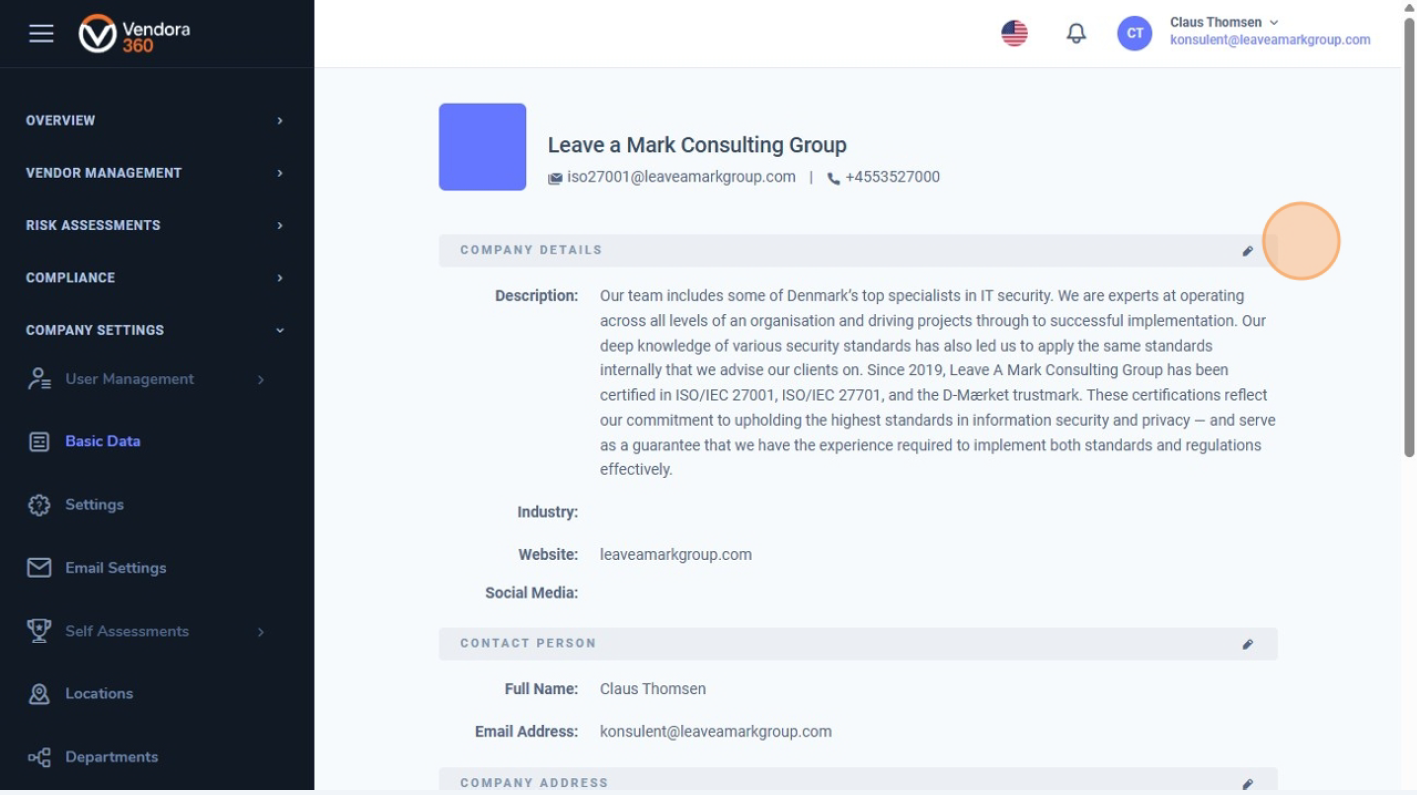
4. Rediger en sektion
Klik på blyanten til højre for det felt, du vil redigere.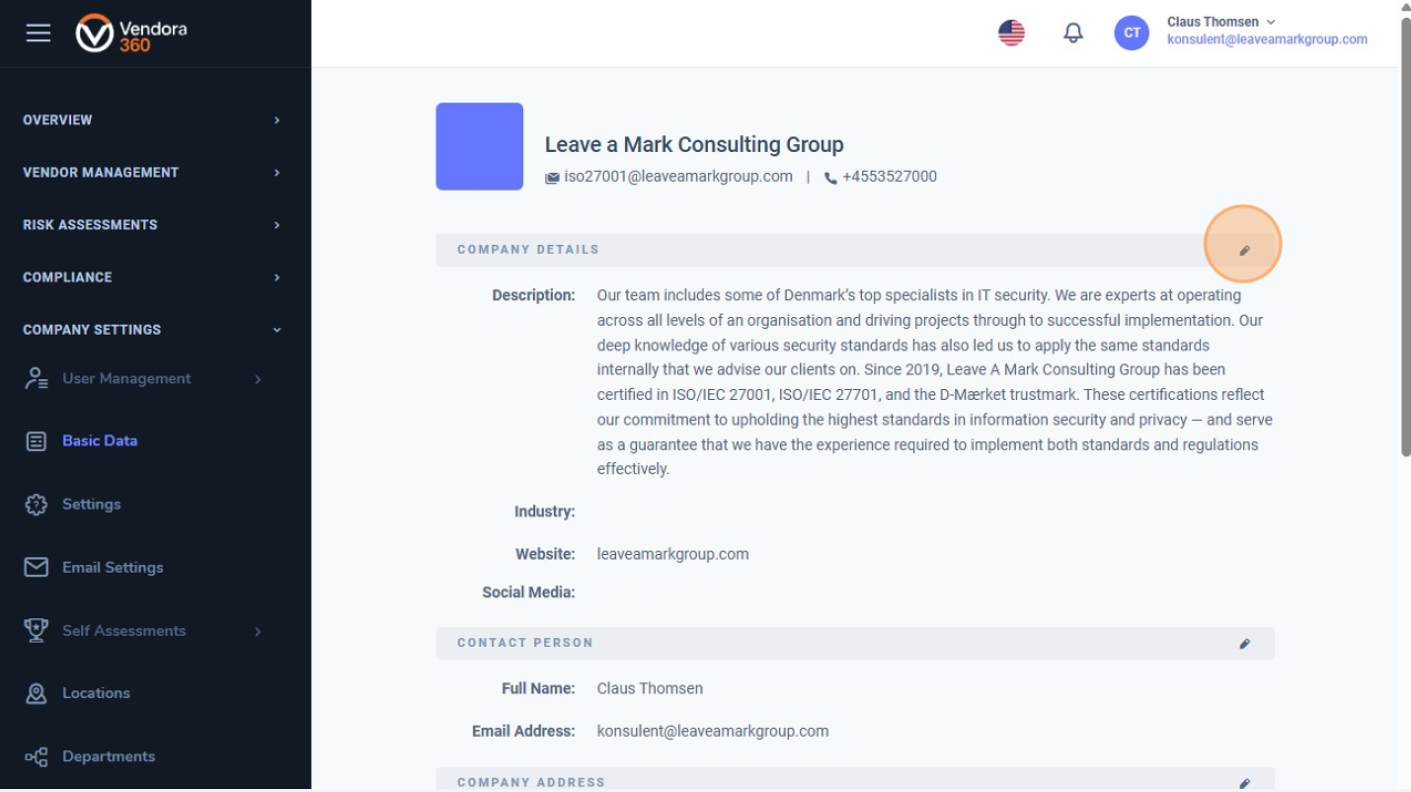
5. Opdater felter
Opdater oplysningerne og gem ændringerne.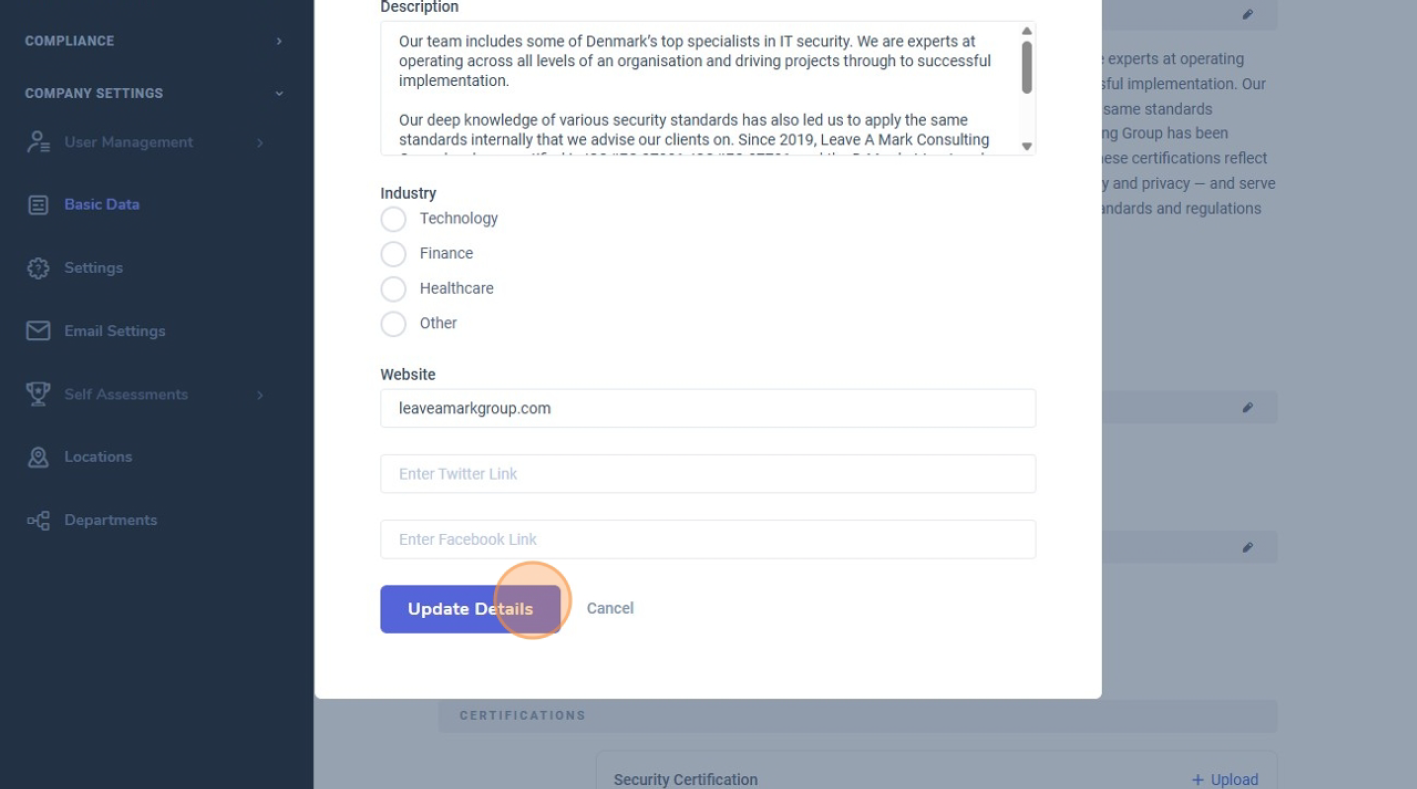
6. Hold dig opdateret
Sørg for, at din virksomheds grundlæggende oplysninger er opdaterede.
Dette sikrer præcise og professionelle indsigter på tværs af Vendora360.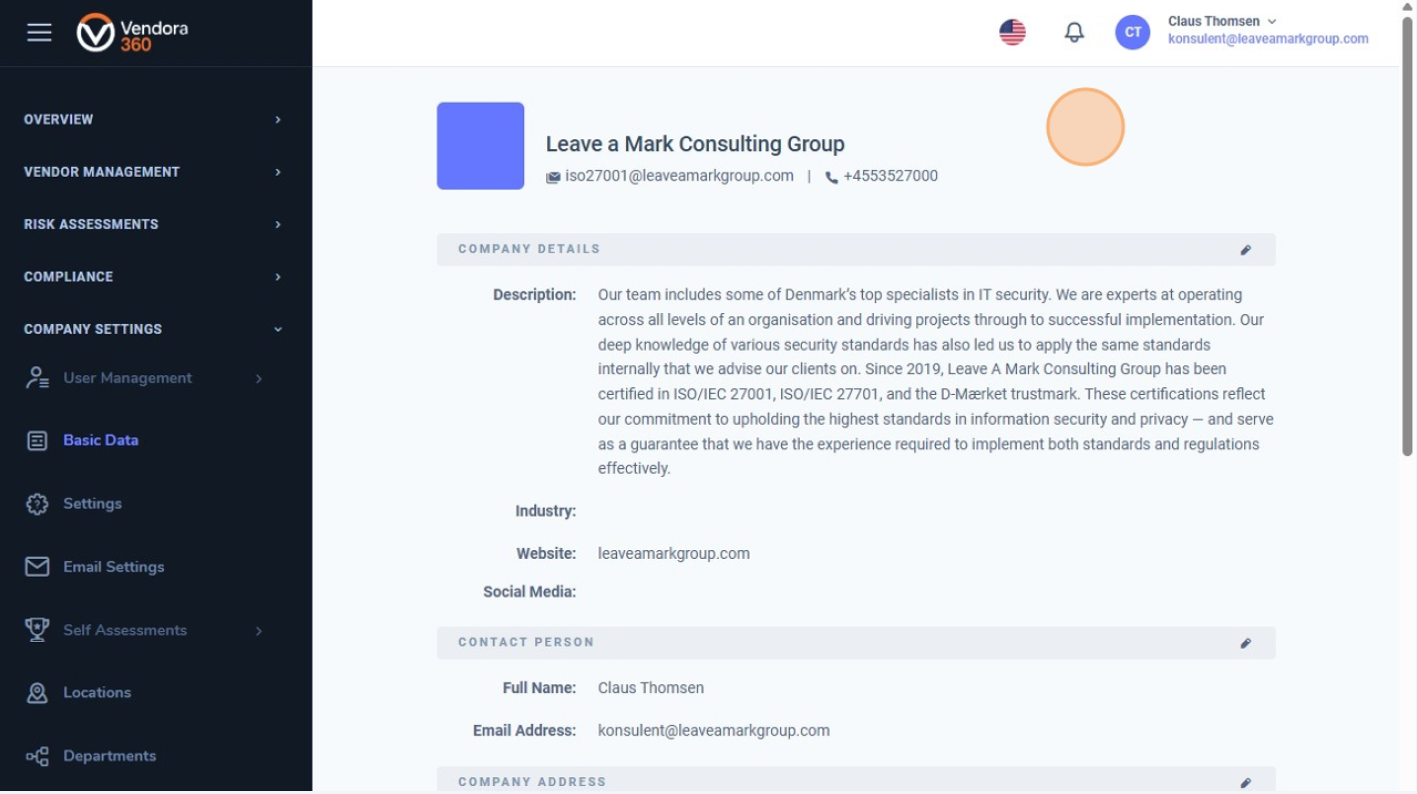
I denne guide gennemgår vi en virksomheds grundlæggende indstillinger i Vendora360. Disse indstillinger danner fundamentet for risikovurderinger og leverandørstyring.
1. Klik på “Virksomhedsindstillinger”
Klik på “Company Settings” i menuen til venstre for at åbne virksomhedens indstillingsmenu.
Herfra kan du administrere virksomhedens grunddata, brugere, afdelinger og andre centrale indstillinger. 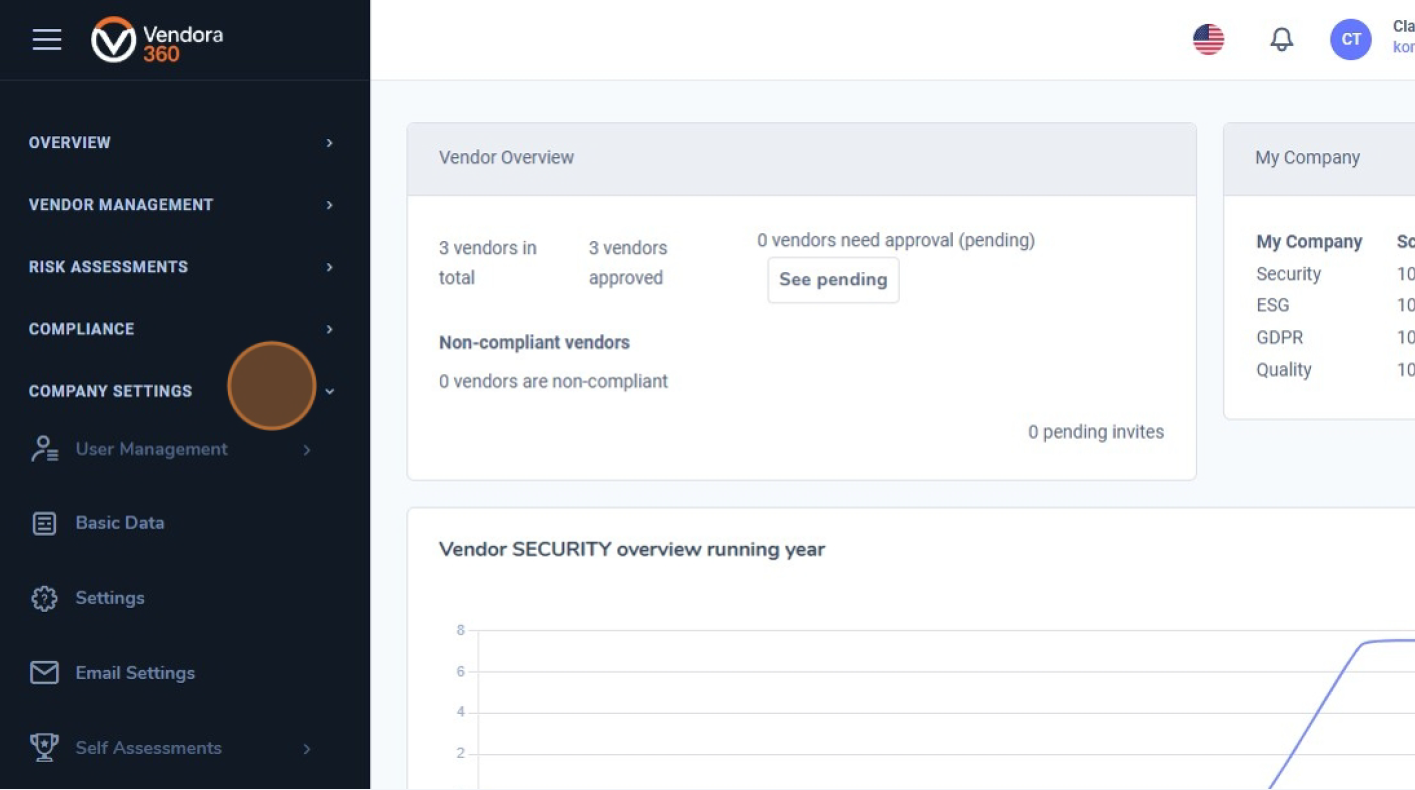
2. Klik på “Indstillinger”
Klik på “Settings” under Virksomhedsindstillinger for at åbne virksomhedens grundlæggende konfiguration. 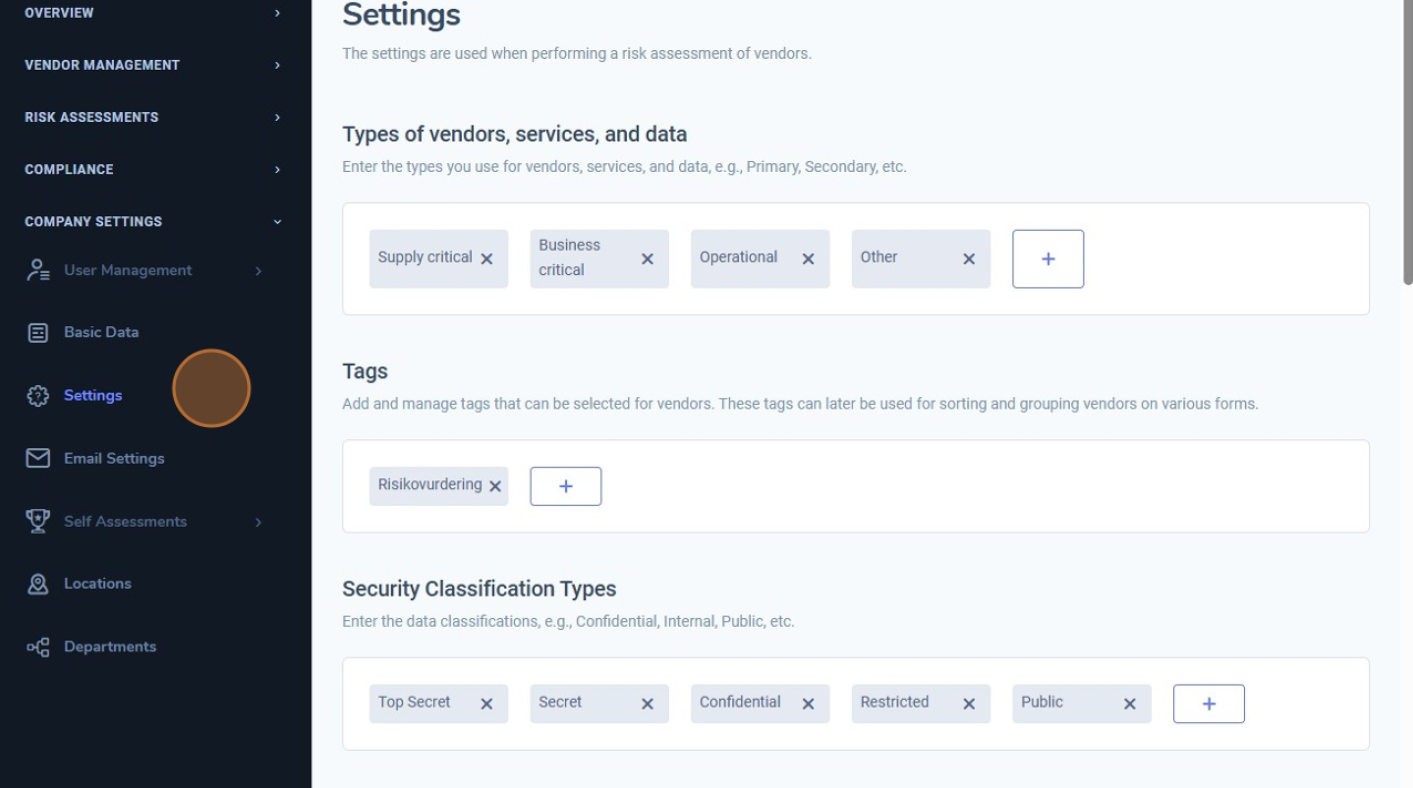
3. Definér leverandør-, service- og datatyper
Her kan du definere de leverandørtyper, servicetyper og datatyper, der anvendes i systemet.
Øverst på siden finder du leverandør-, service- og datatyper. Her kan du angive, hvordan leverandører og data skal kategoriseres – for eksempel forretningskritisk, operationel osv. 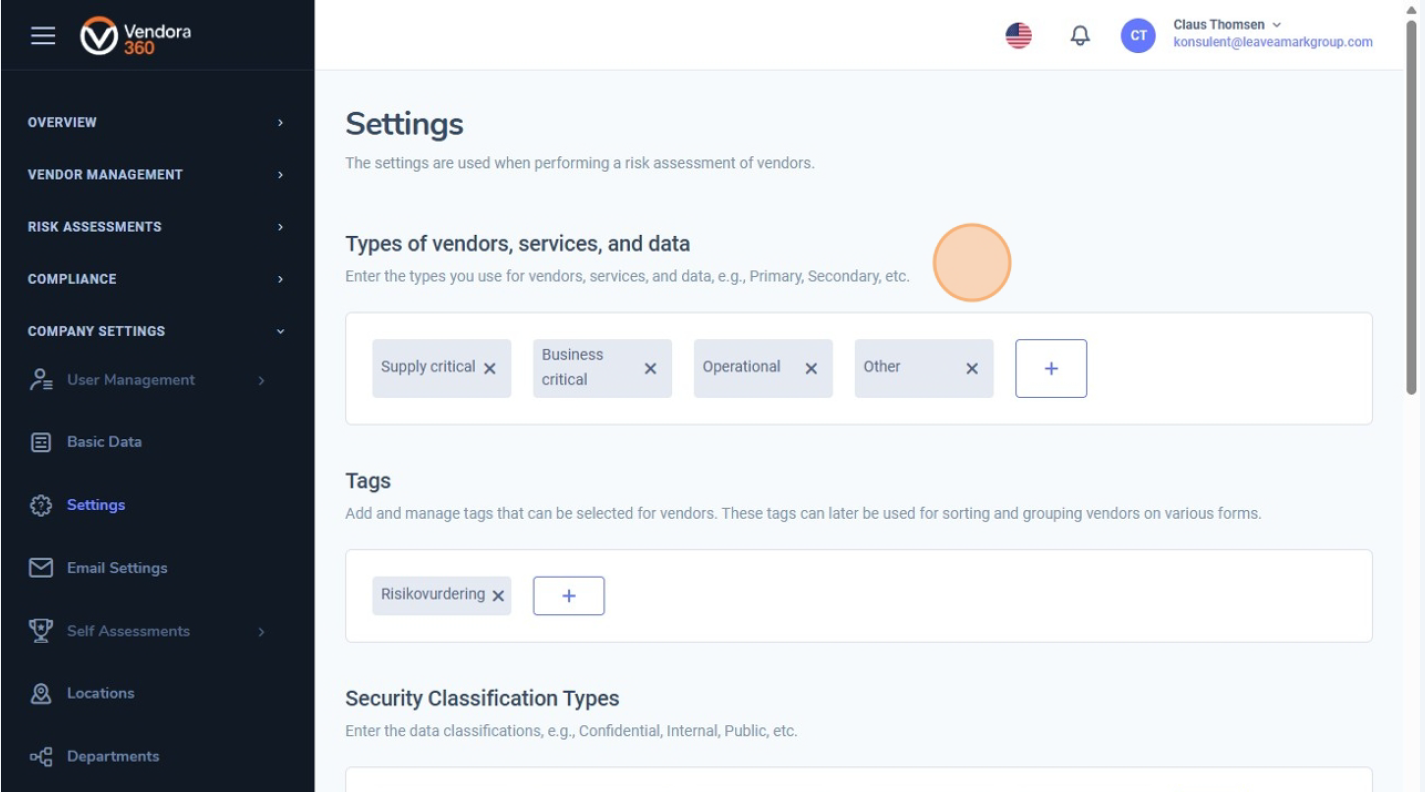
4. Tags
Længere nede på siden finder du “Tags”.
Her kan du tilføje eller redigere tags, som kan bruges til at sortere og gruppere leverandører, risikovurderinger og andre elementer i systemet. 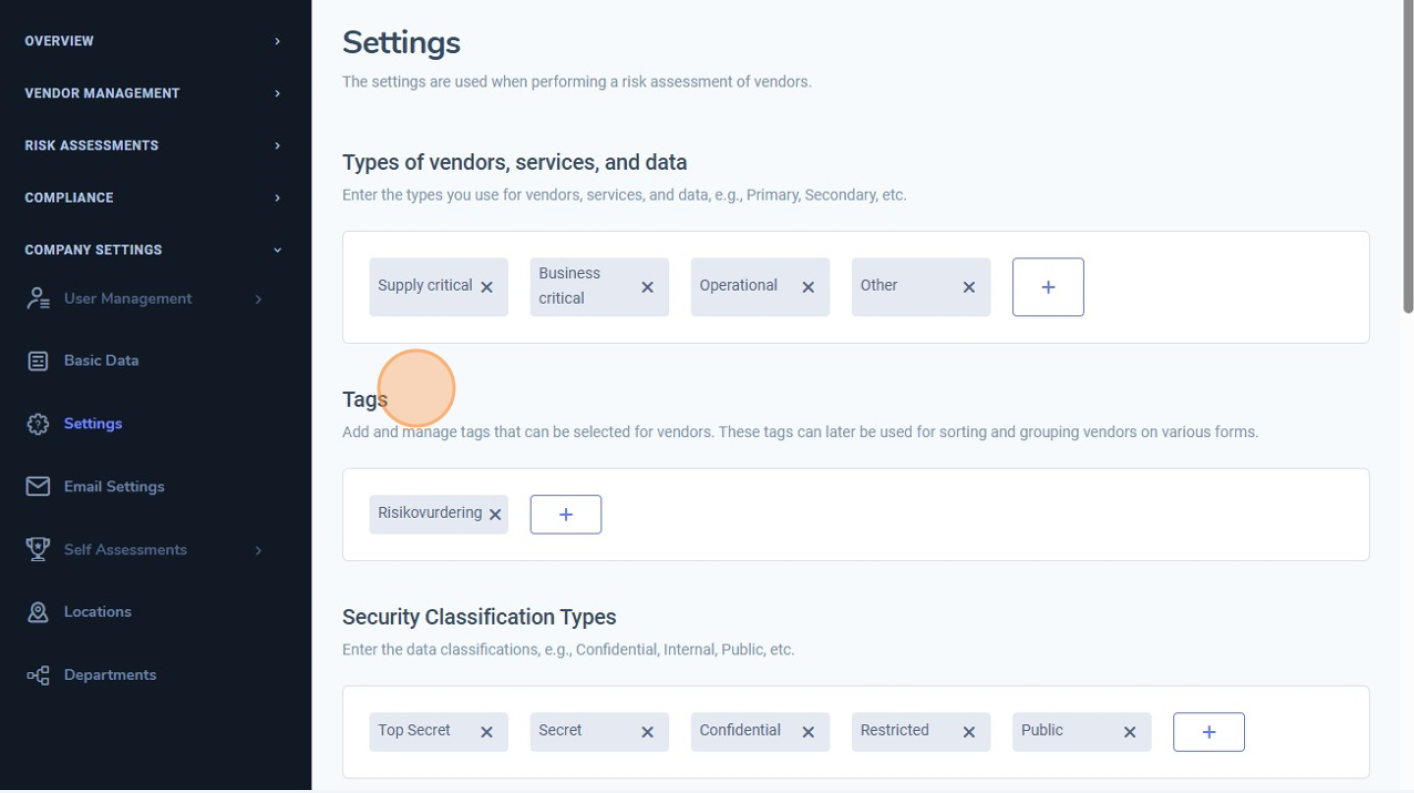
5. Sikkerhedsklassifikationstyper
Under “Security Classification Types” kan du oprette og administrere klassifikationsniveauer for virksomhedens data.
Disse niveauer angiver, hvor følsomme oplysningerne er, og sikrer korrekt håndtering af data i risikovurderinger og på tværs af systemet. 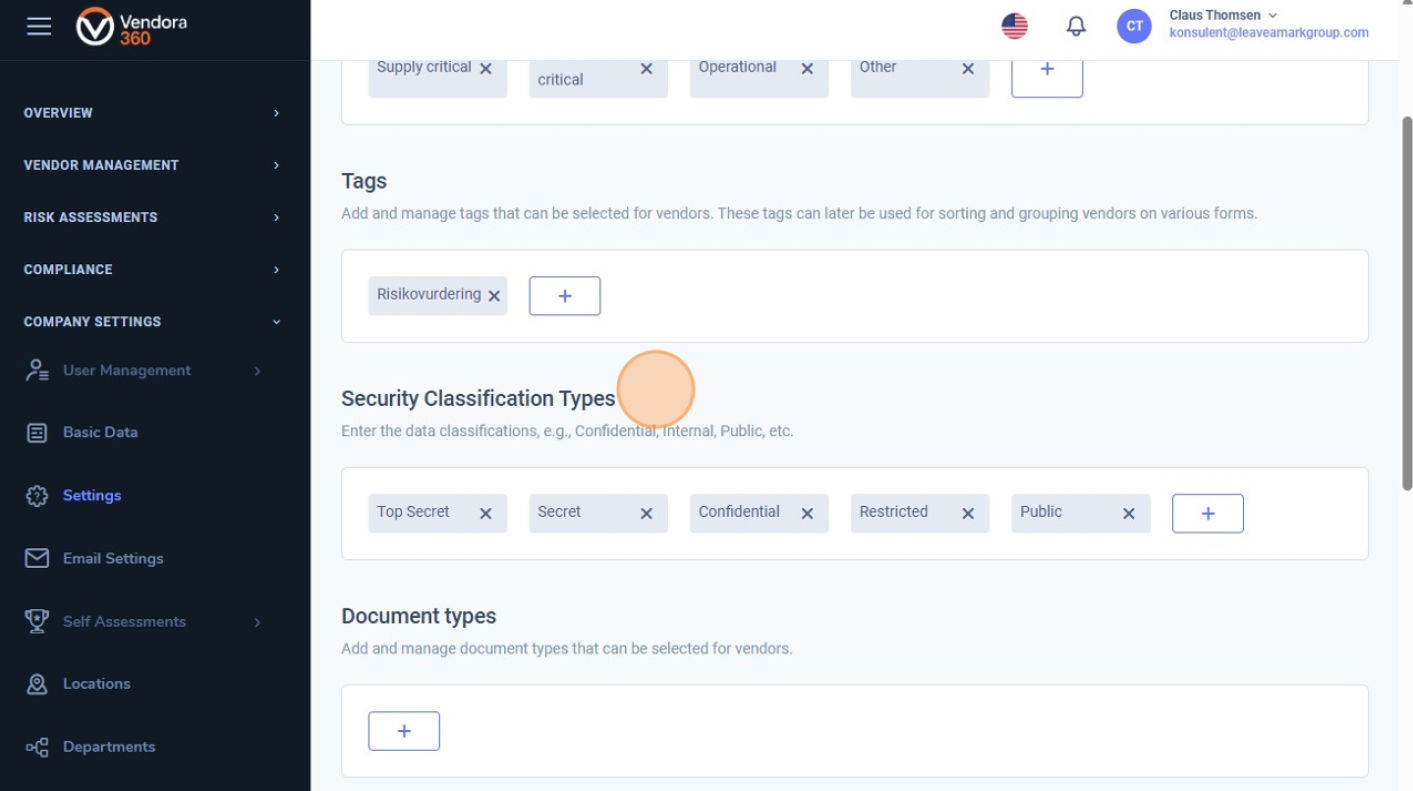
6. Aktivtyper
Længere nede på siden, under “Types of Assets”, kan du oprette de aktivkategorier, der anvendes i risikovurderinger.
Disse kan omfatte aktivtyper som hardware, software, processer og andre relevante kategorier. 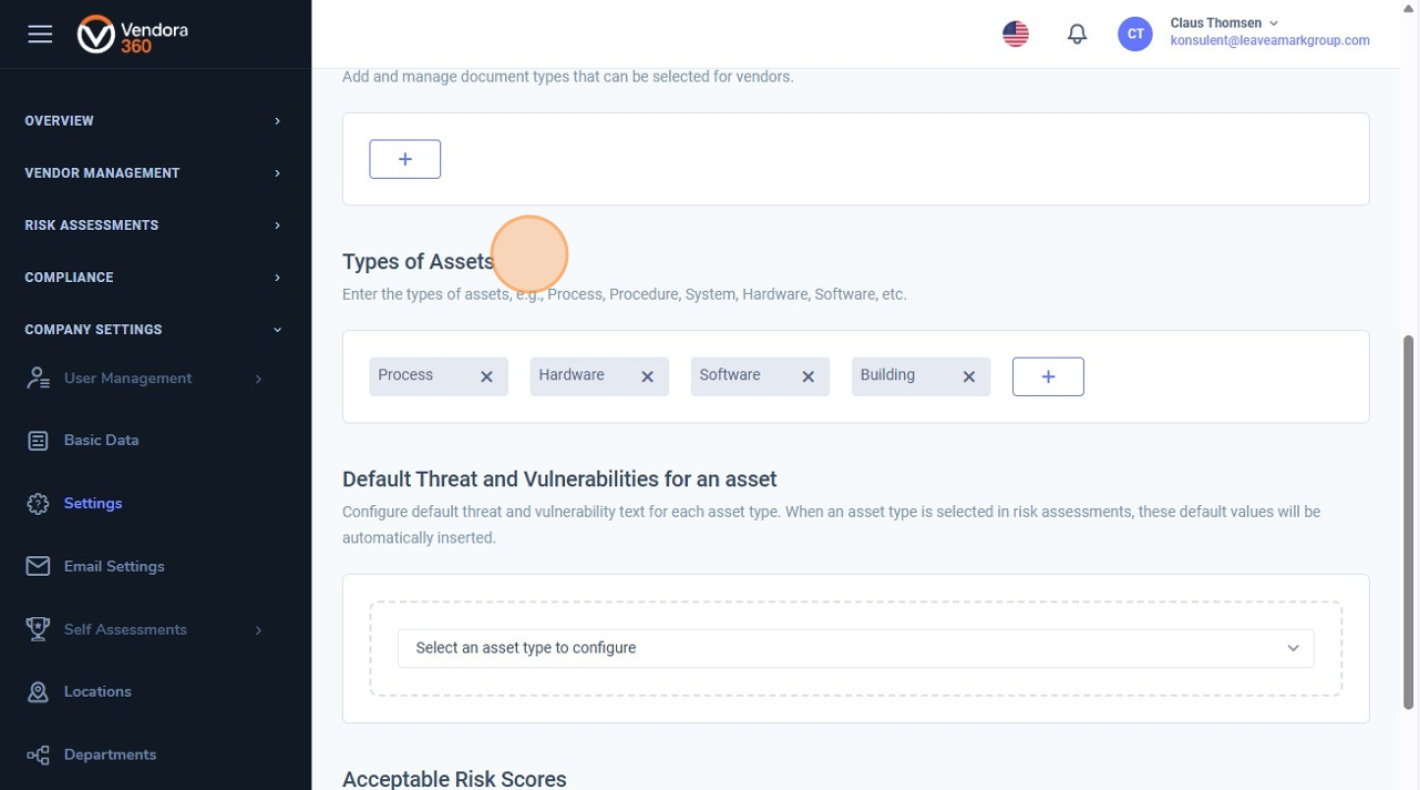
7. Standardtrusler og sårbarheder
Lige under Aktivtyper finder du “Default Threat and Vulnerabilities for an asset”.
Her kan du tilføje standardbeskrivelser for hver aktivtype, som automatisk indsættes under risikovurderinger. 
8. Acceptable risikoniveauer
Nederst på siden finder du “Acceptable Risk Scores”.
Her kan du definere, hvilke risikoniveauer der er acceptable i din virksomhed inden for områder som Sikkerhed, ESG/CSR, Finans, Kvalitet og GDPR. 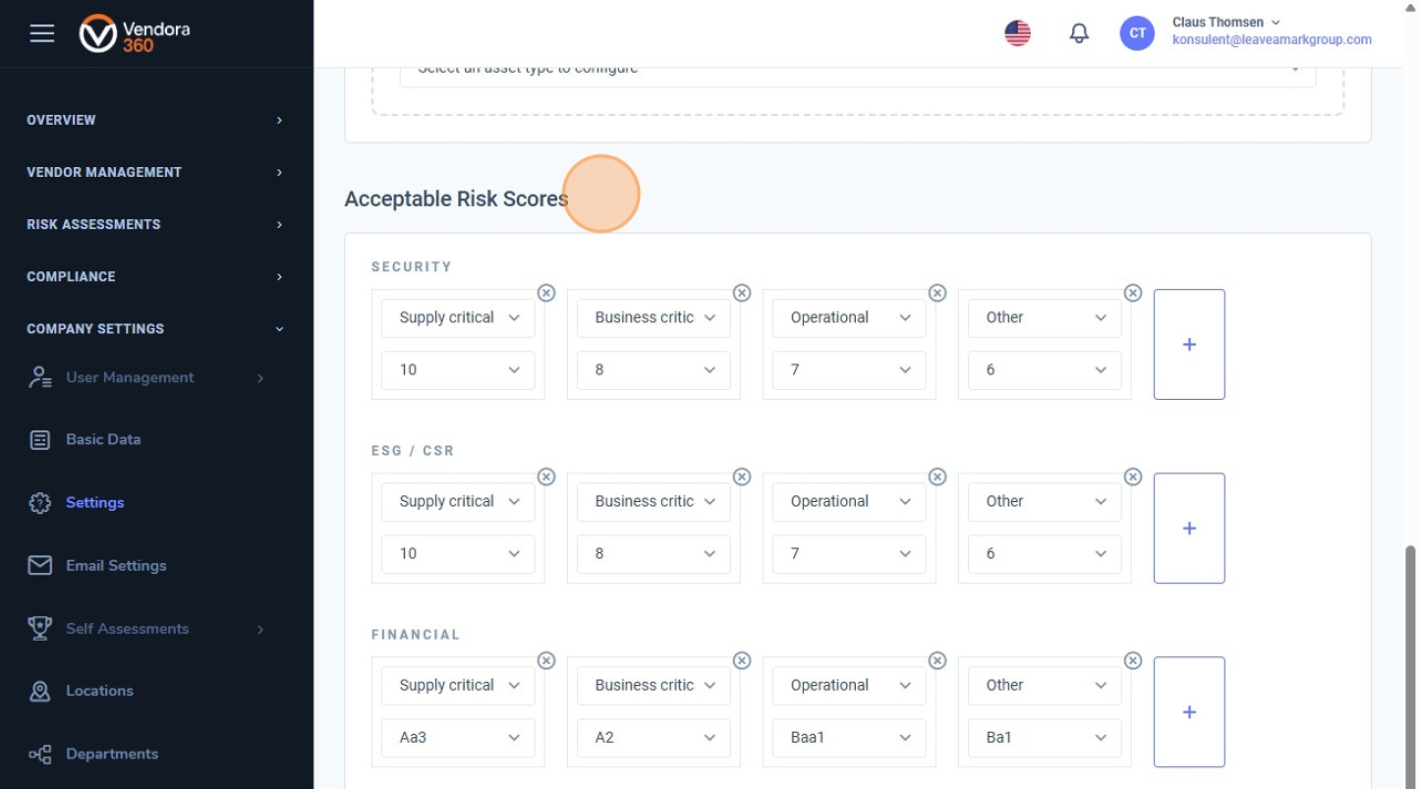
9. Konfiguration fuldført
Når de grundlæggende indstillinger er konfigureret, danner de fundamentet for virksomhedens risikovurderinger og leverandørstyring.
Disse konfigurationer sikrer, at Vendora360 fungerer i overensstemmelse med organisationens struktur, klassifikationer og risikomodeller. 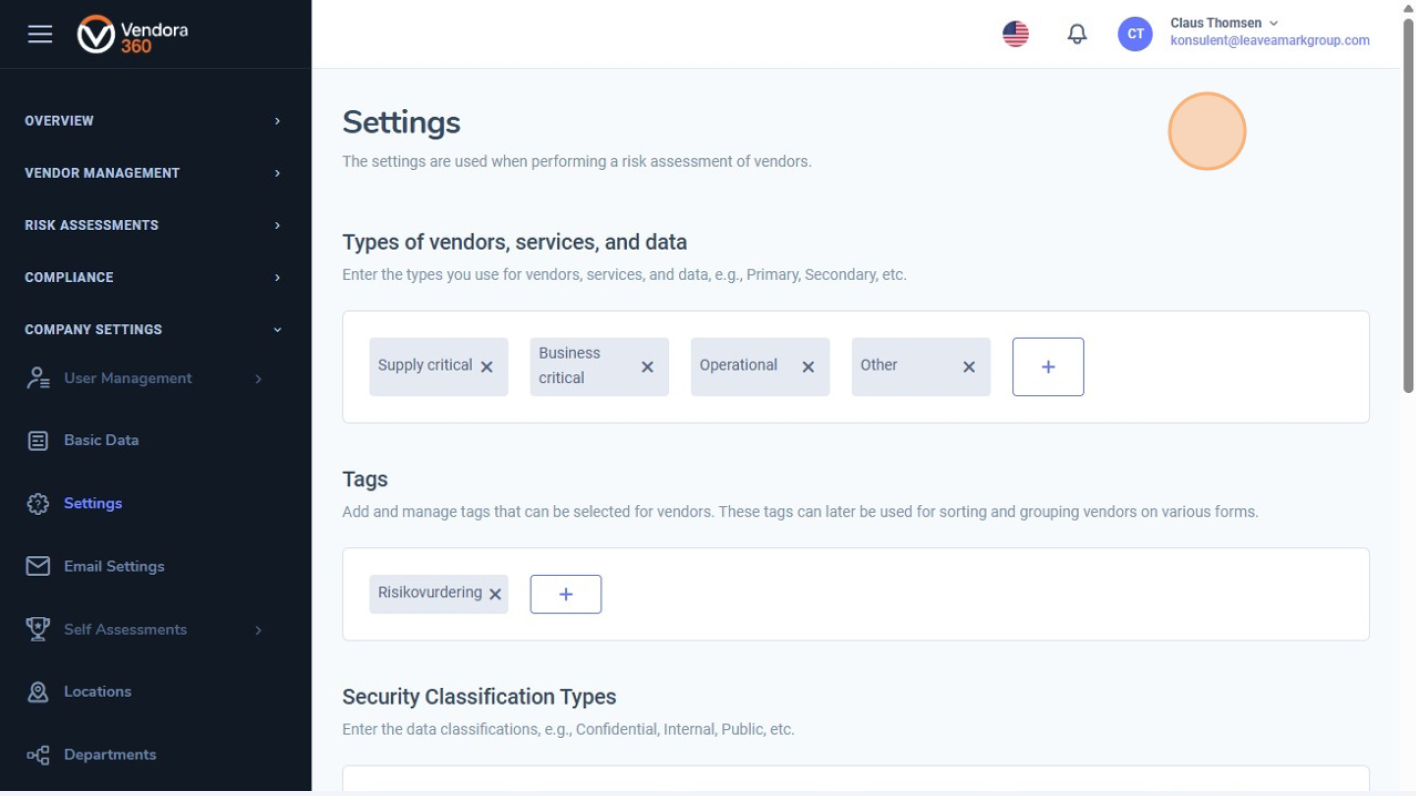
I denne guide gennemgår vi, hvor du opsætter virksomhedens lokationer og afdelinger i Vendora360.
1. Åbn lokationer
Når du klikker på “Locations” under Virksomhedsindstillinger, føres du til en side, der viser en oversigt over alle virksomhedens lokationer. 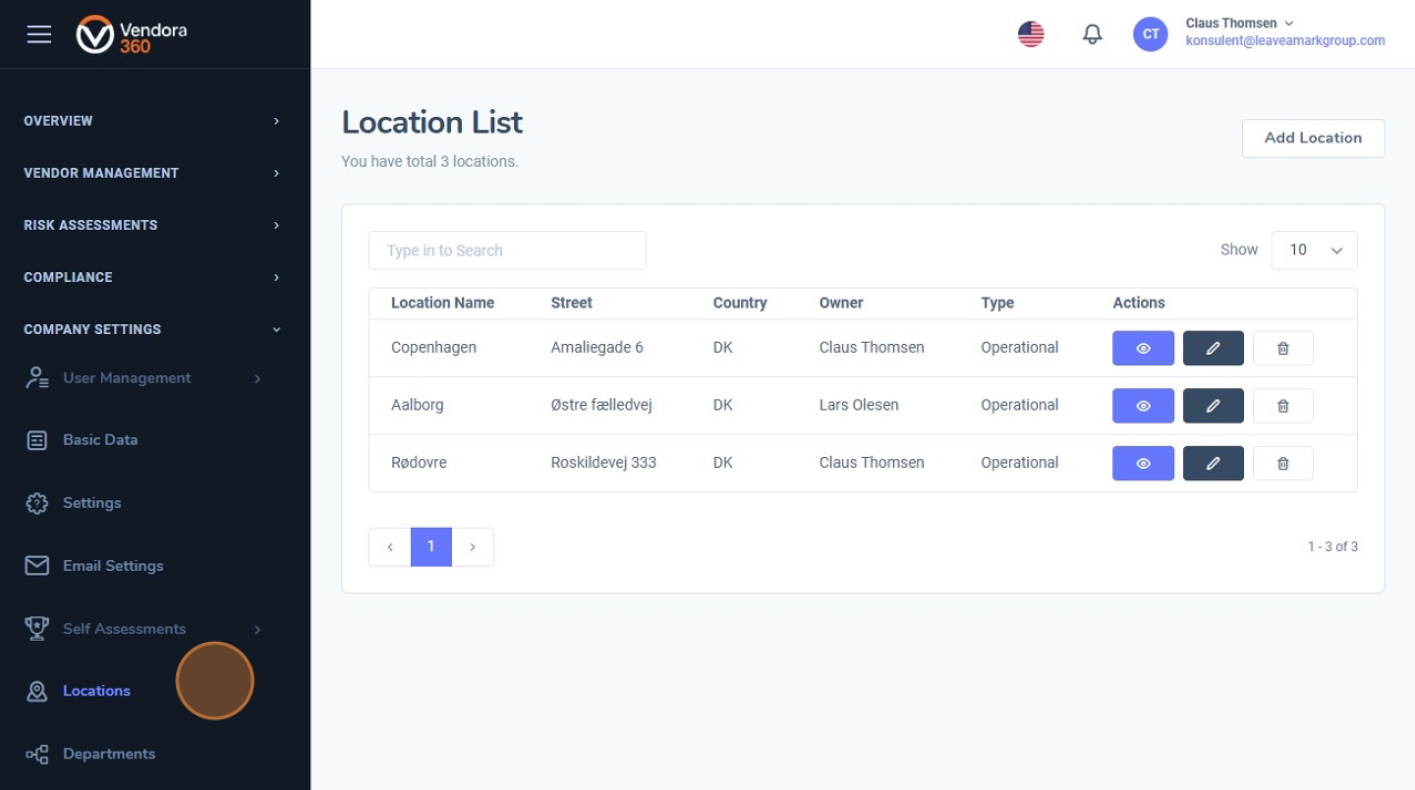
2. Søg og se lokationsdetaljer
Her kan du søge i listen og se detaljer såsom lokationsnavn, adresse, land, ansvarlig, type samt tilgængelige handlinger (vis, rediger og slet). 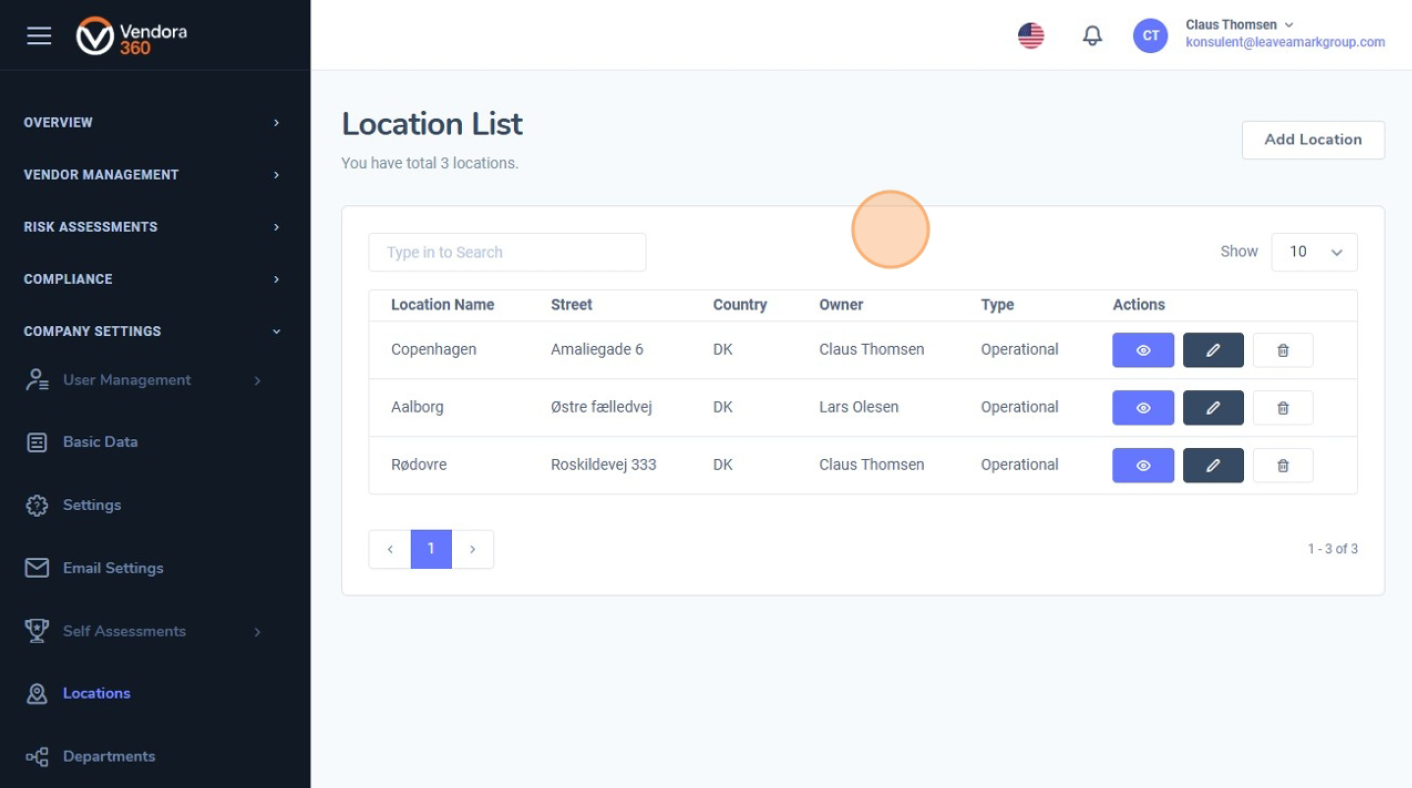
3. Tilføj en ny lokation
Fra denne side kan du også tilføje en ny lokation ved at klikke på knappen “Tilføj lokation”. 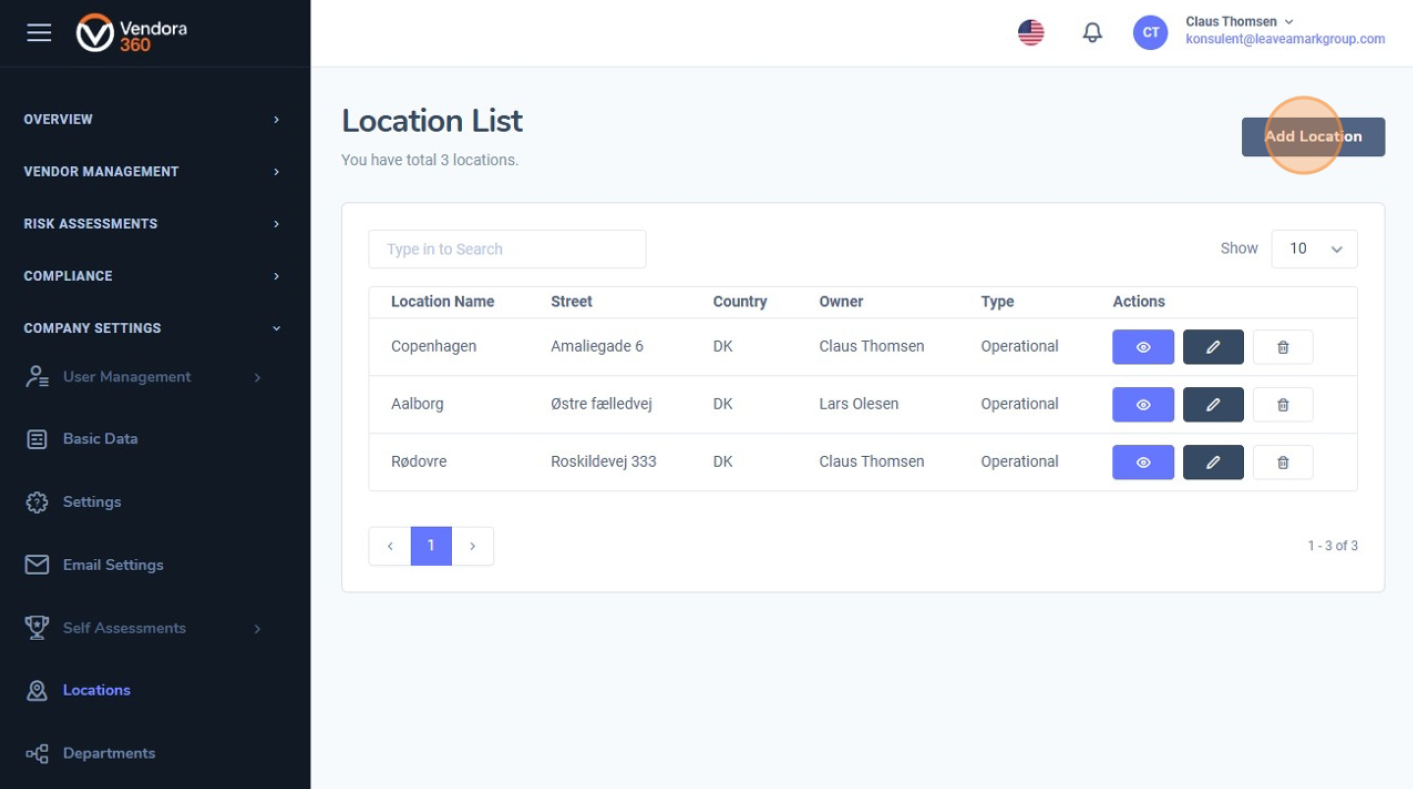
4. Se en lokation
Ved at klikke på øje-ikonet ud for en lokation kan du se en fuld oversigt over aktiviteter, der er knyttet til den pågældende lokation. 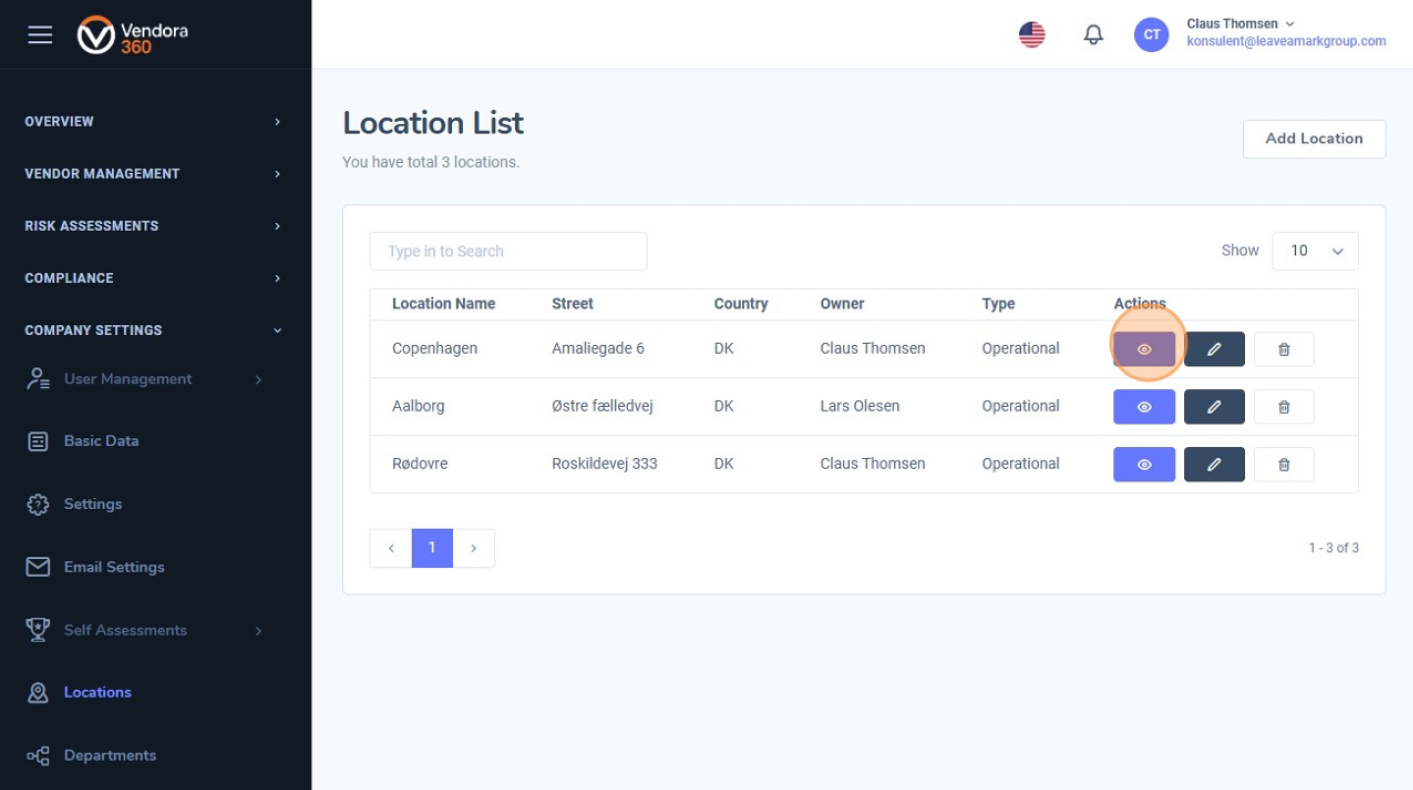
5. Se tilknyttede aktiviteter
Dette omfatter tilknyttede kontrakter, projekter, afdelinger og risikovurderinger, hvilket giver dig et klart overblik over lokationens betydning og rolle i organisationen. 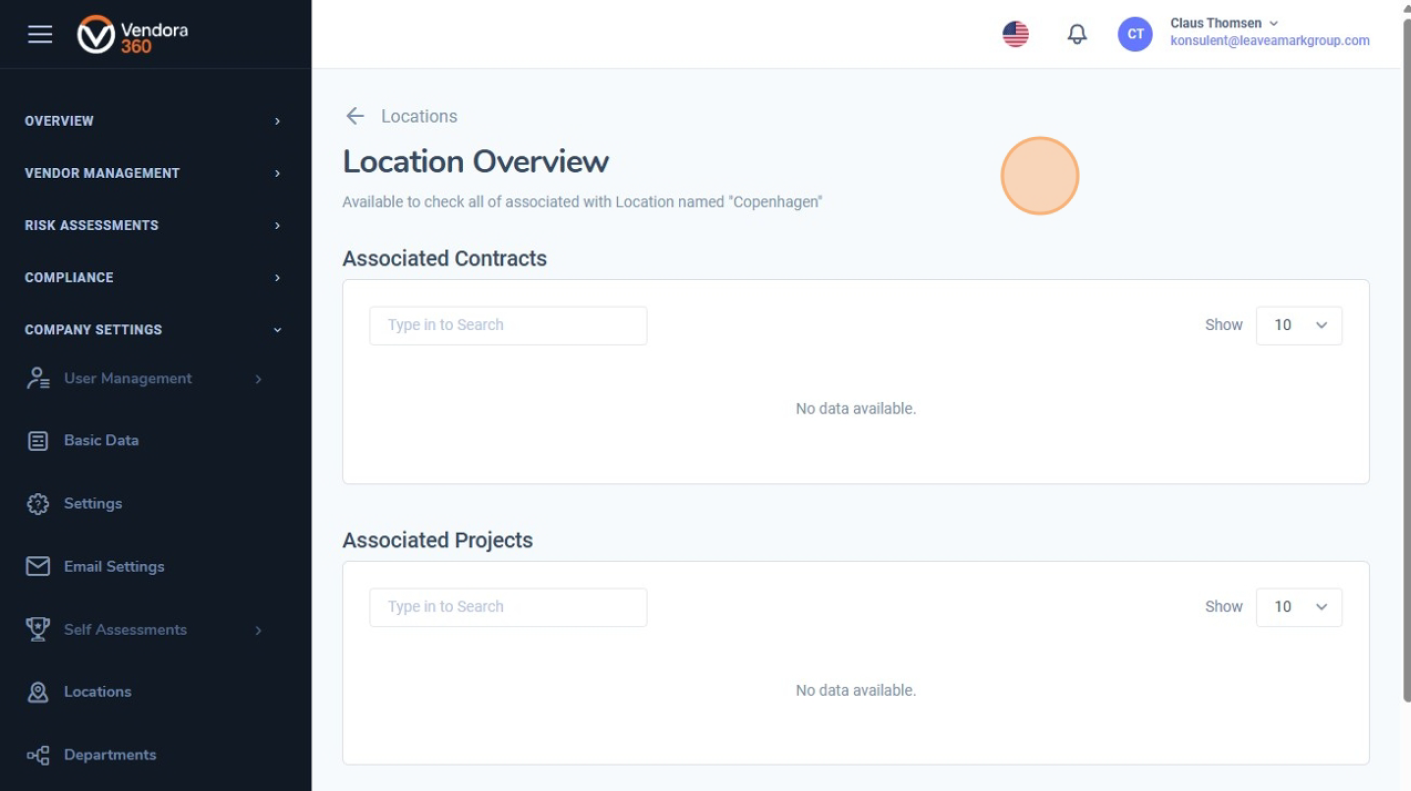
6. Åbn afdelinger
For at se alle afdelinger i virksomheden skal du klikke på “Afdelinger” i menuen under Virksomhedsindstillinger. 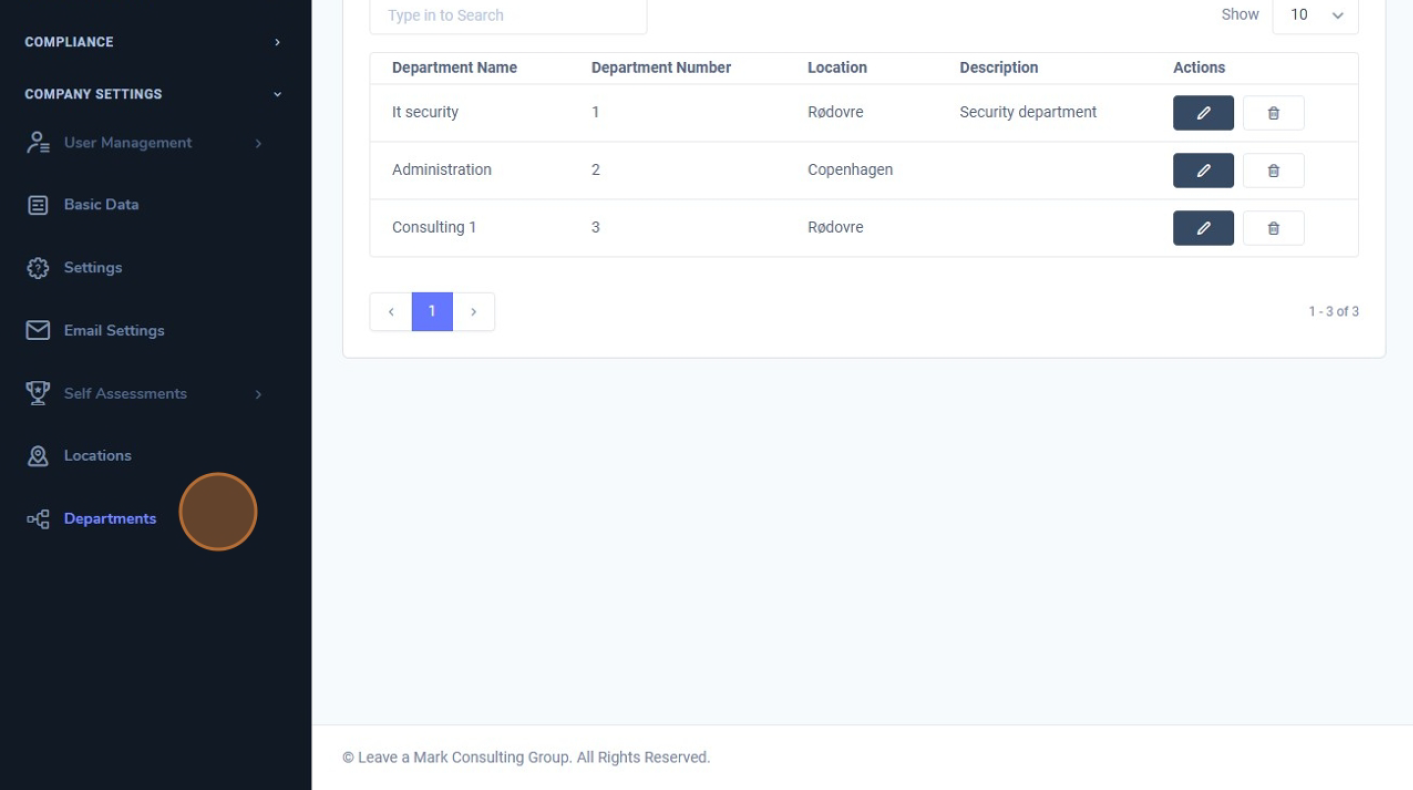
7. Afdelingsoversigt
Dette åbner en oversigt over alle afdelinger i organisationen, hvor du kan søge i listen og se detaljer såsom afdelingsnavn, afdelingsnummer, tilknyttet lokation, beskrivelse samt tilgængelige handlinger. 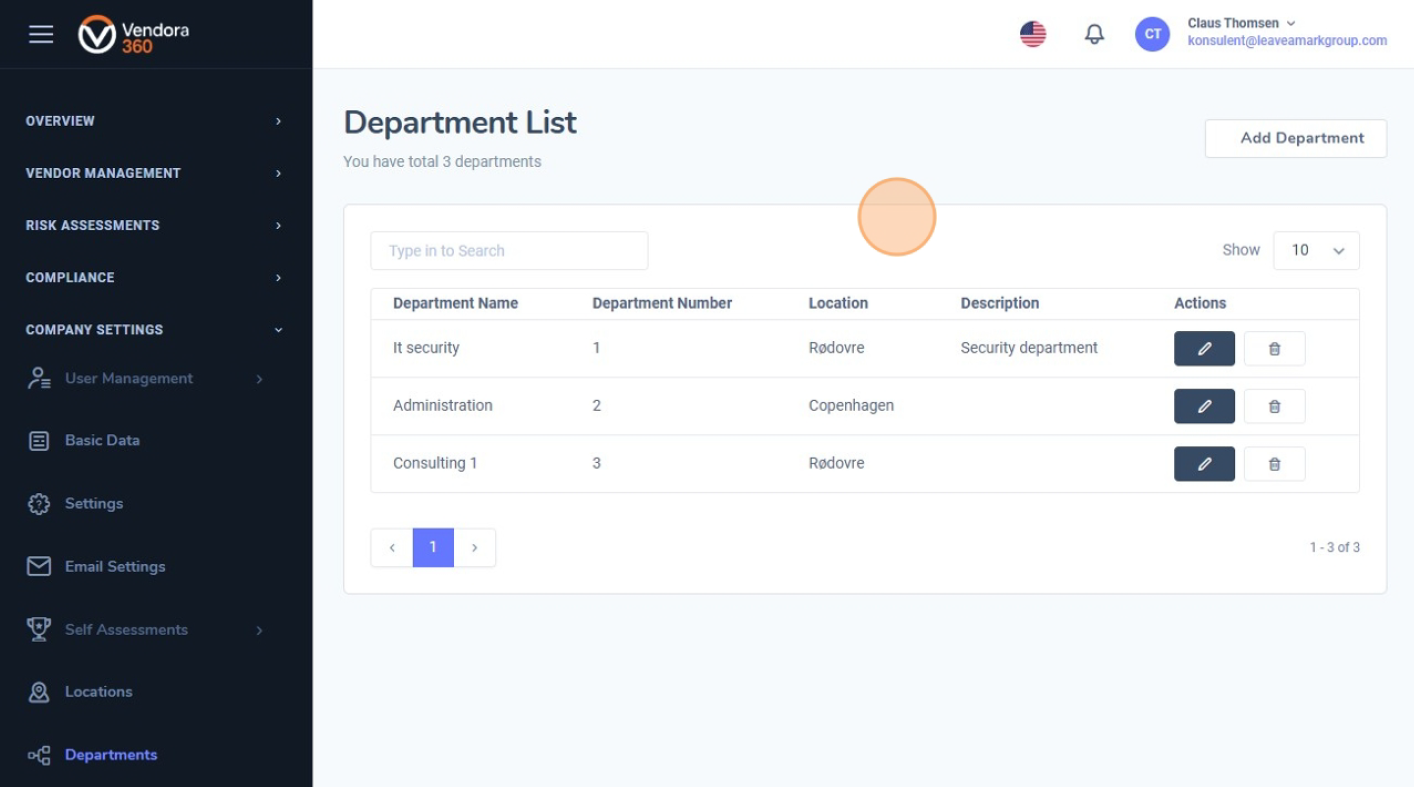
8. Tilføj en ny afdeling
Ligesom på lokationssiden kan du nemt tilføje en ny afdeling ved at klikke på “Tilføj afdeling”. 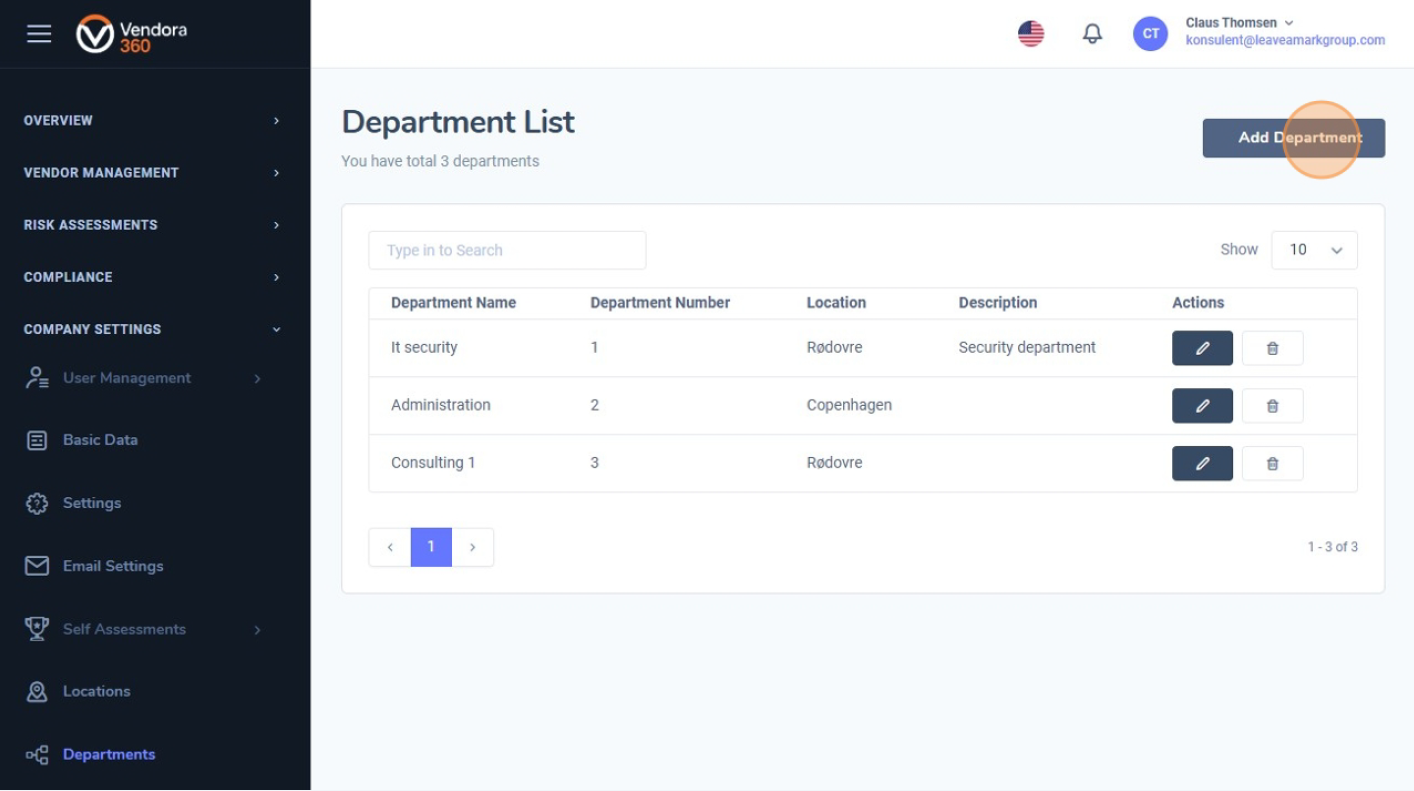
9. Struktureret overblik over lokationer og afdelinger
En klar struktur for lokationer og afdelinger gør det nemmere for organisationen at tilknytte leverandører, risikovurderinger, kontrakter, projekter og andre aktiviteter til de korrekte enheder.
Dette bidrager til velorganiserede data og giver et tydeligt overblik over ansvar og relationer på tværs af organisationen. 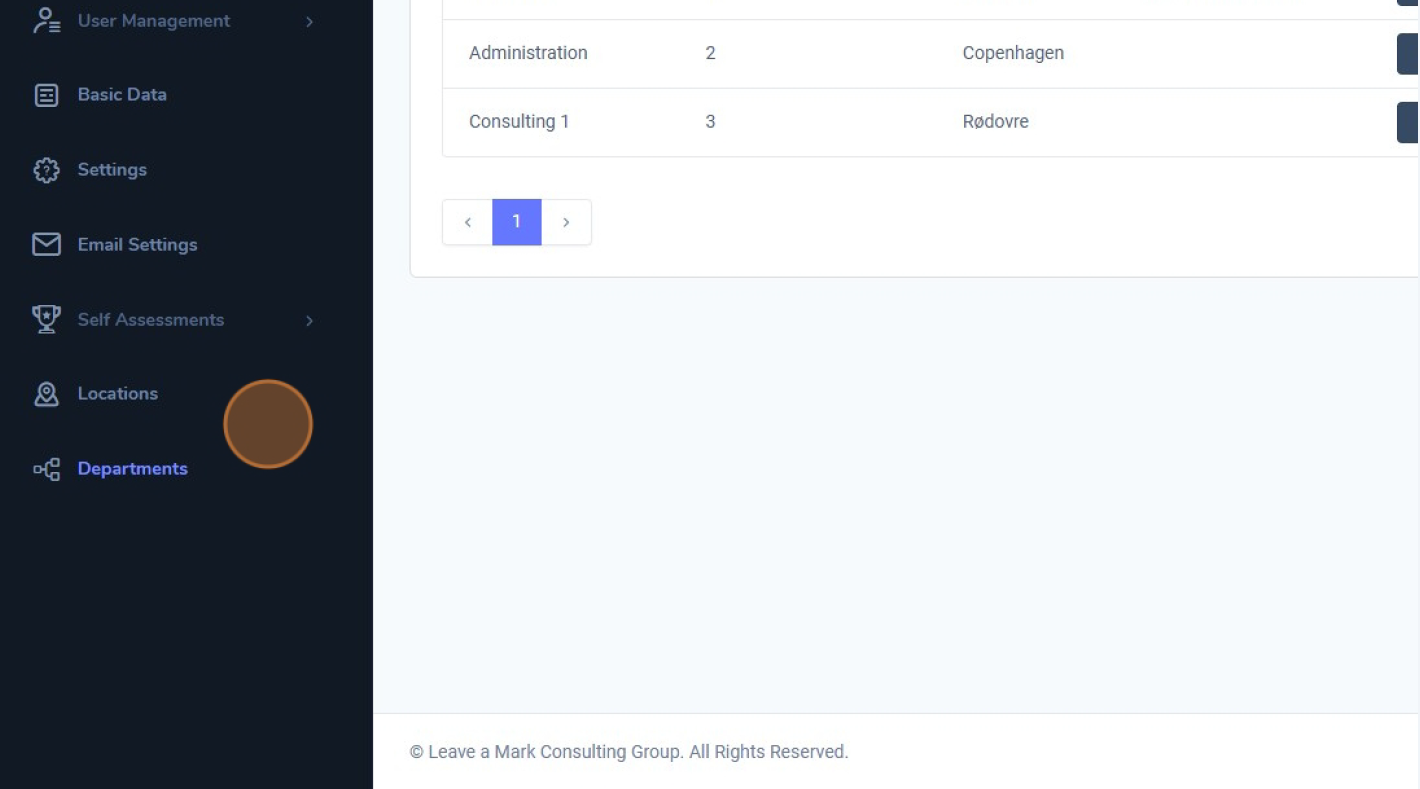
I denne guide beskrives, hvordan brugerroller og rettigheder opsættes i Vendora360, og hvordan de anvendes til at styre adgange og handlinger i systemet.
1. Se alle eksisterende brugerroller
For at se alle eksisterende brugerroller skal du gå til Virksomhedsindstillinger og vælge “Brugerroller” under Brugeradministration. 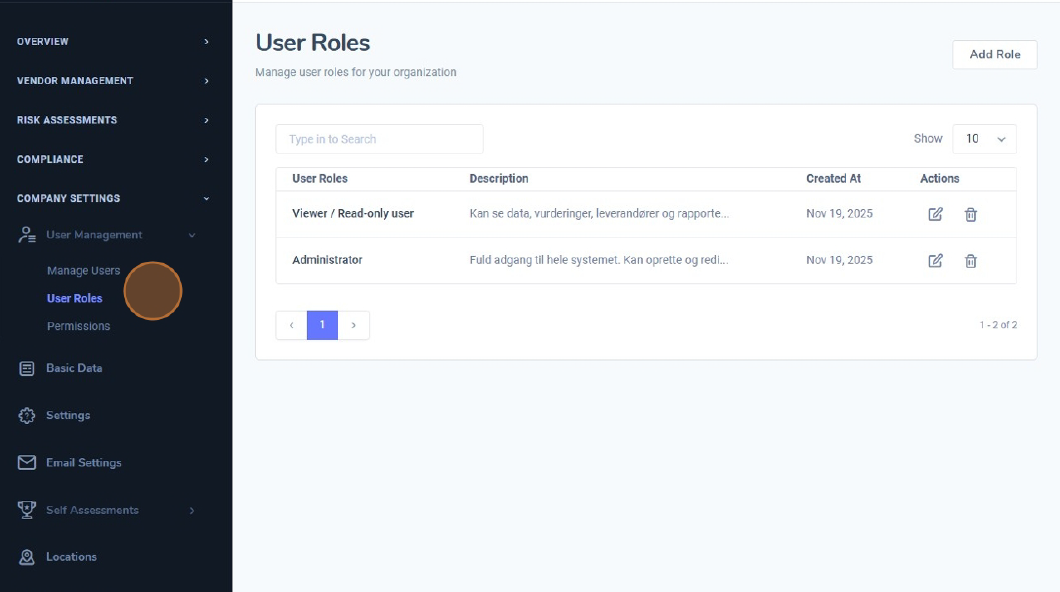
2. Oversigt over brugerroller
Denne side giver et overblik over alle roller i systemet, herunder rollenavn, beskrivelse, oprettelsesdato samt muligheder for at redigere eller slette roller. 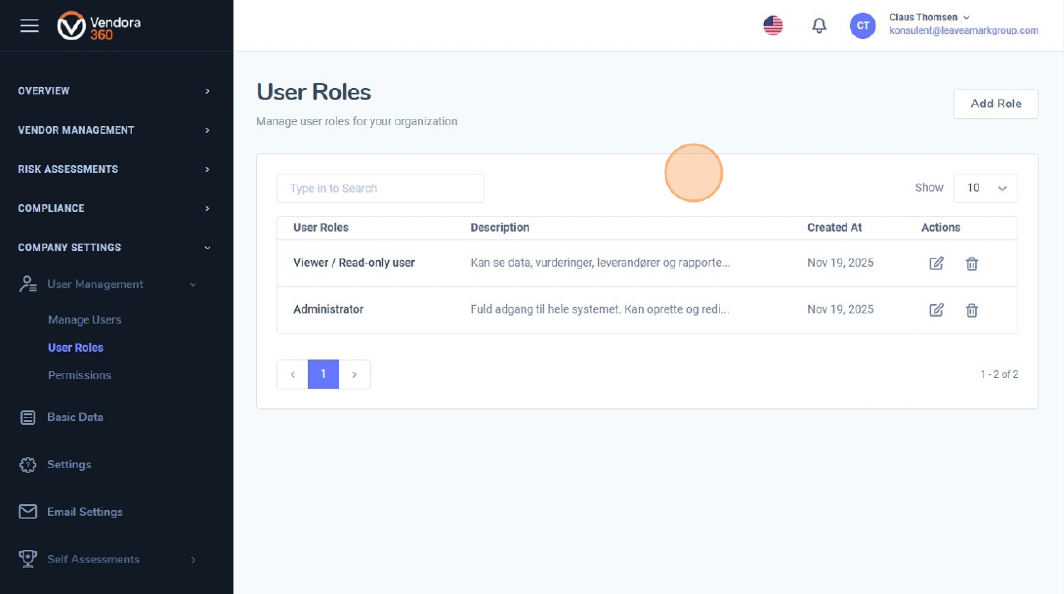
3. Opret en ny rolle
I øverste højre hjørne kan du oprette en ny rolle ved at klikke på “Tilføj rolle”. 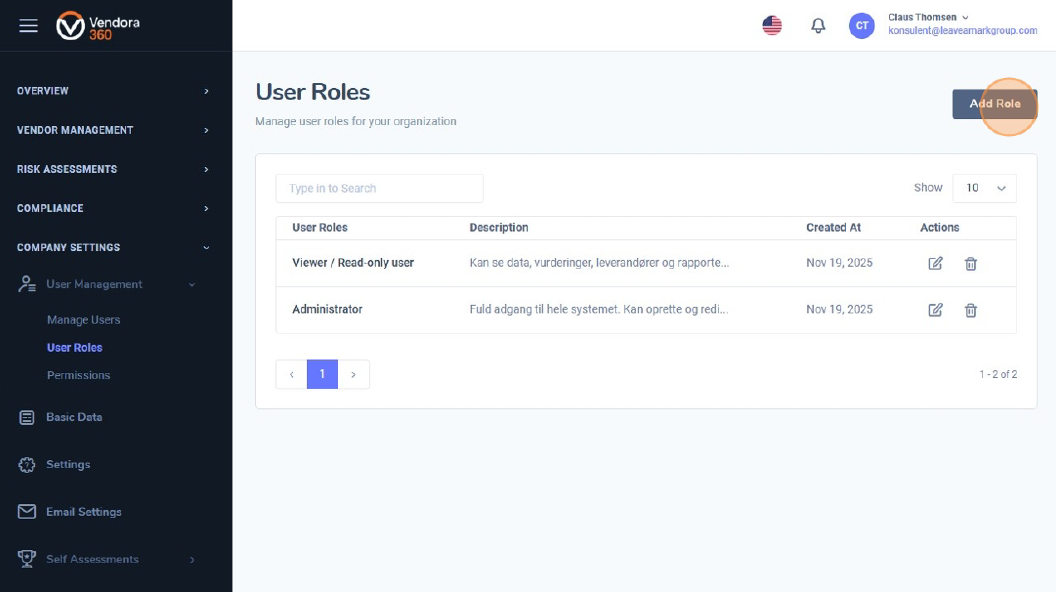
4. Redigér en eksisterende rolle
Klik på redigeringsikonet ud for den rolle, du ønsker at opdatere. 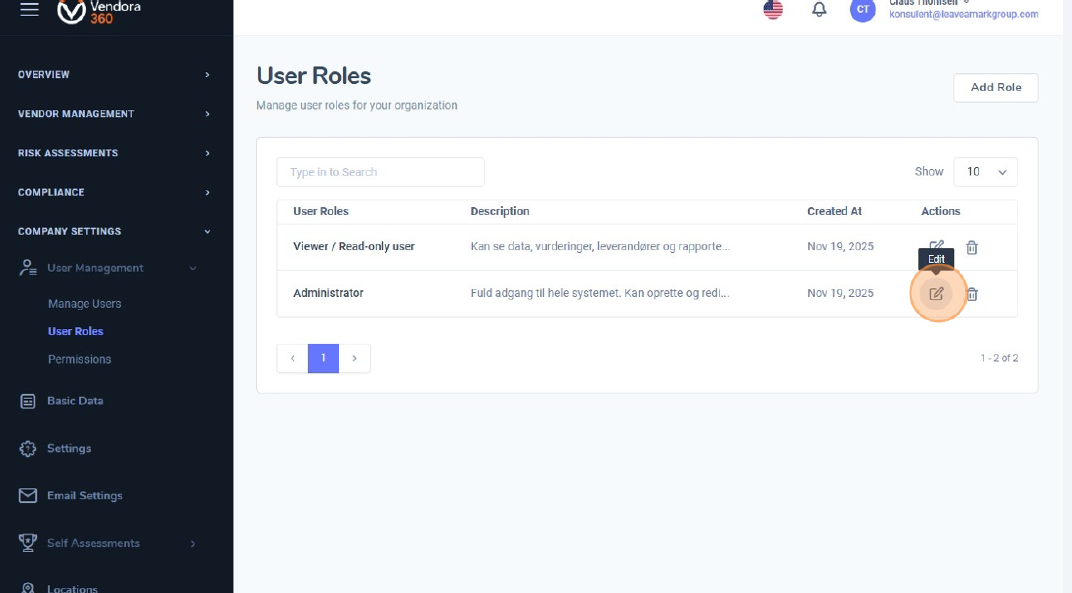
5. Redigér rollenavn og beskrivelse
Du kan nu ændre rollenavnet og opdatere beskrivelsen for tydeligt at definere, hvilke rettigheder og funktioner brugere med denne rolle skal have. Klare beskrivelser gør rolleadministrationen nemmere på tværs af organisationen. 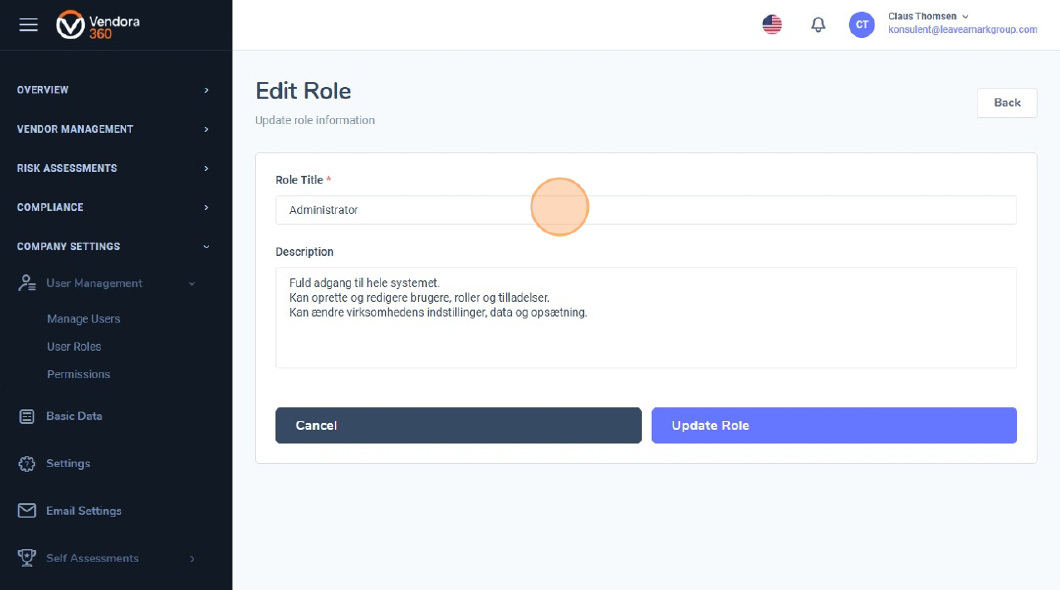
6. Åbn “Rettigheder”
For at give eller begrænse adgang til bestemte dele af systemet skal du åbne “Rettigheder”. Her kan du angive detaljerede rettigheder for hver rolle. 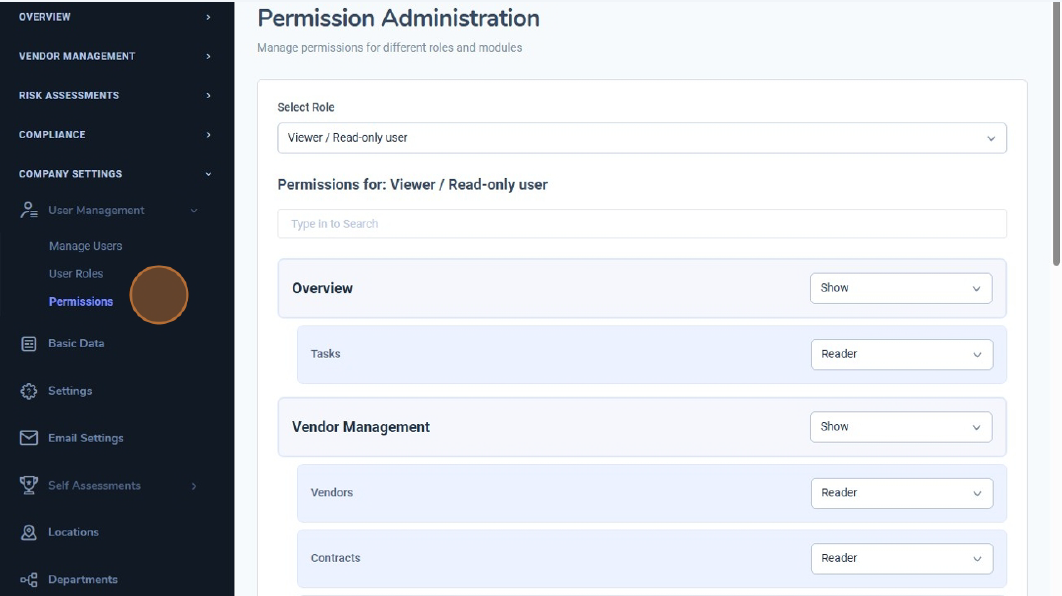
7. Vælg den rolle, der skal konfigureres
På siden Rettigheder vælger du øverst på skærmen den rolle, du ønsker at konfigurere. 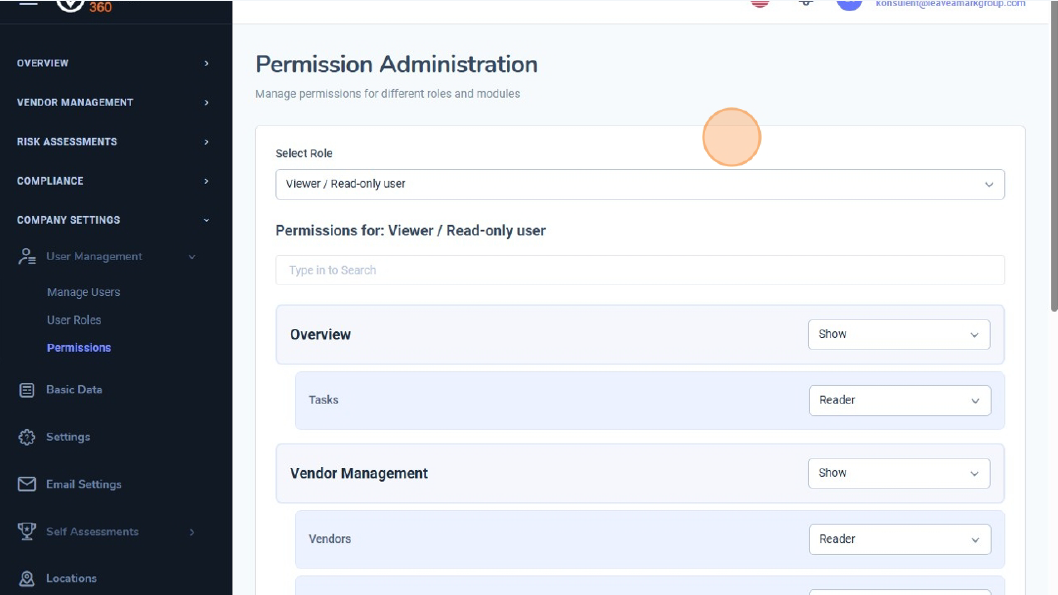
8. Vis eller skjul hovedmoduler
For hvert hovedmodul (fx Overblik, Leverandørstyring, Compliance, Virksomhedsindstillinger) kan du vælge mellem:
• vis – modulet er synligt
• Skjul – modulet er skjult
Dette afgør, om brugeren kan se modulet i sidemenuen. 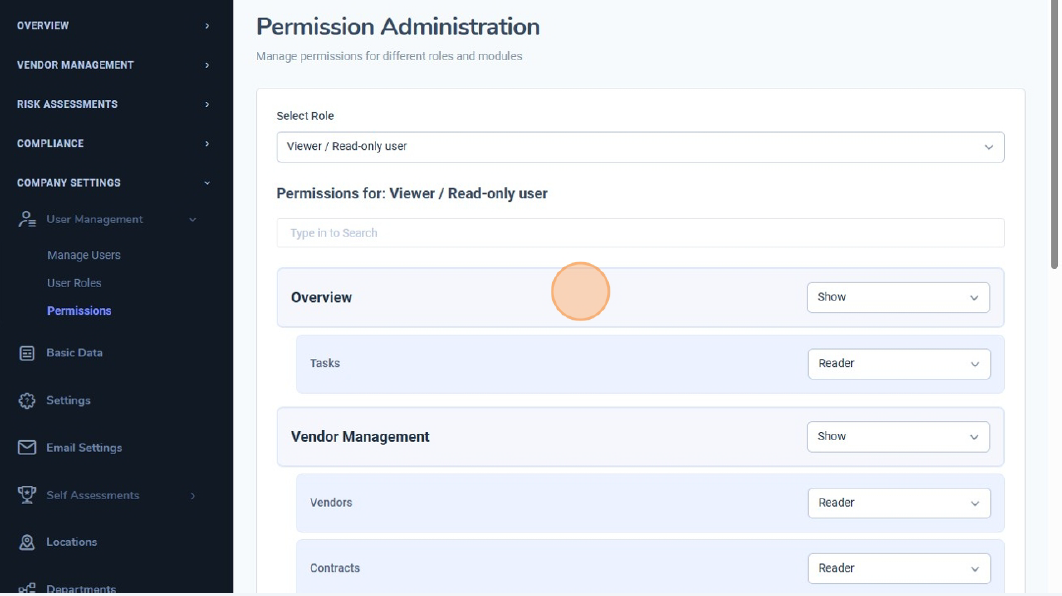
9. Finjustér underrettigheder
Når et modul er sat til Vis, kan du finjustere rettighederne for hvert underelement. De tilgængelige muligheder er:
• Skjul – brugeren kan ikke se undermodulet
• Læser – kun læseadgang
• Standardbruger – standardhandlinger
• Administrator – fuld adgang, herunder avancerede handlinger
Denne struktur gør det muligt at tilpasse hver rolle, så brugerne kun har adgang til det, de har behov for. 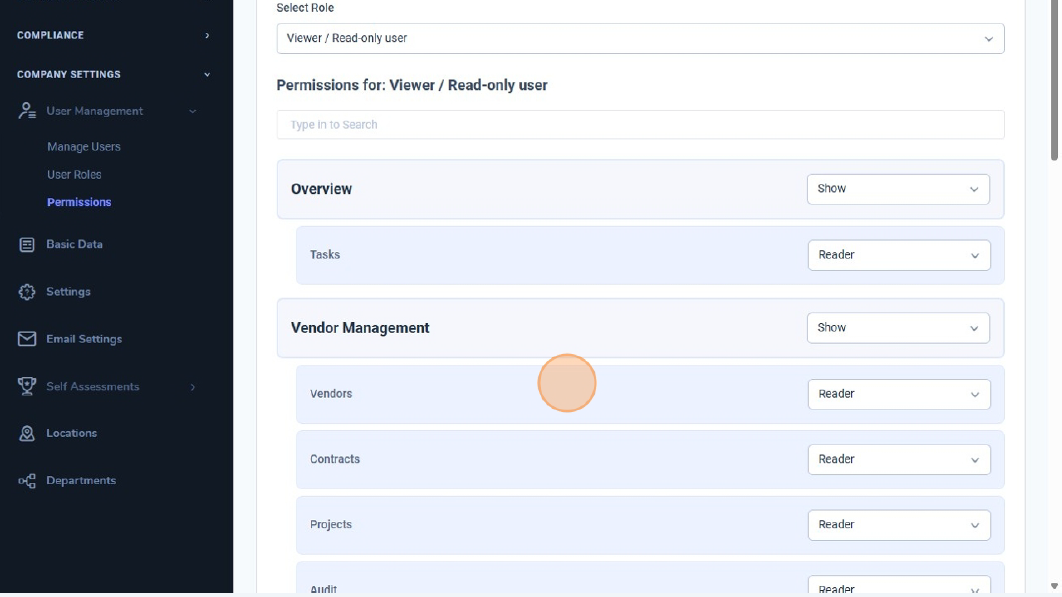
10. Sikr korrekt konfiguration
Korrekt konfiguration sikrer, at medarbejdere kun har adgang til relevante funktioner og data. 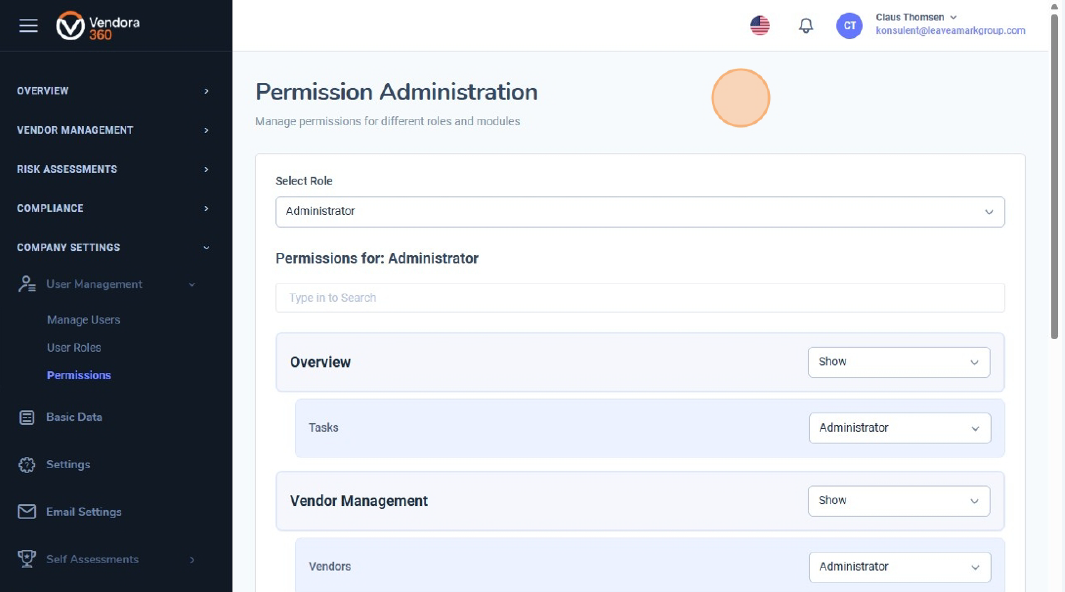
.
Denne guide gennemgår, hvordan du opretter en ny bruger i Vendora360, og hvordan roller og rettigheder anvendes til at styre adgangen til information.
1. Åbn Brugeradministration
Gå til Virksomhedsindstillinger i menuen til venstre, og klik på Brugeradministration for at få adgang til organisationens brugeroversigt. 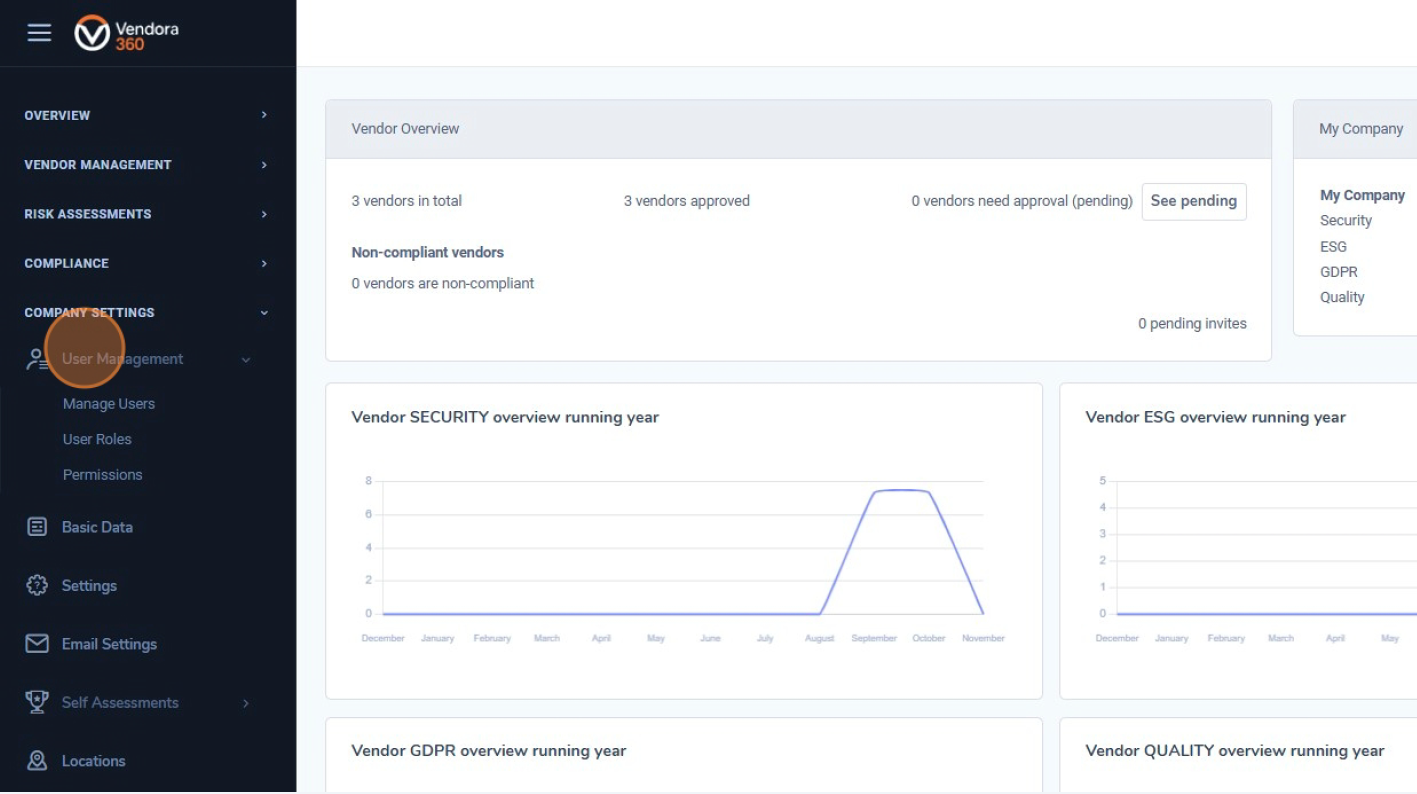
2. Klik på “Administrér brugere”
Vælg “Administrér brugere” for at se en fuld liste over eksisterende brugere, herunder deres verifikationsstatus, telefonnumre og tildelte roller. 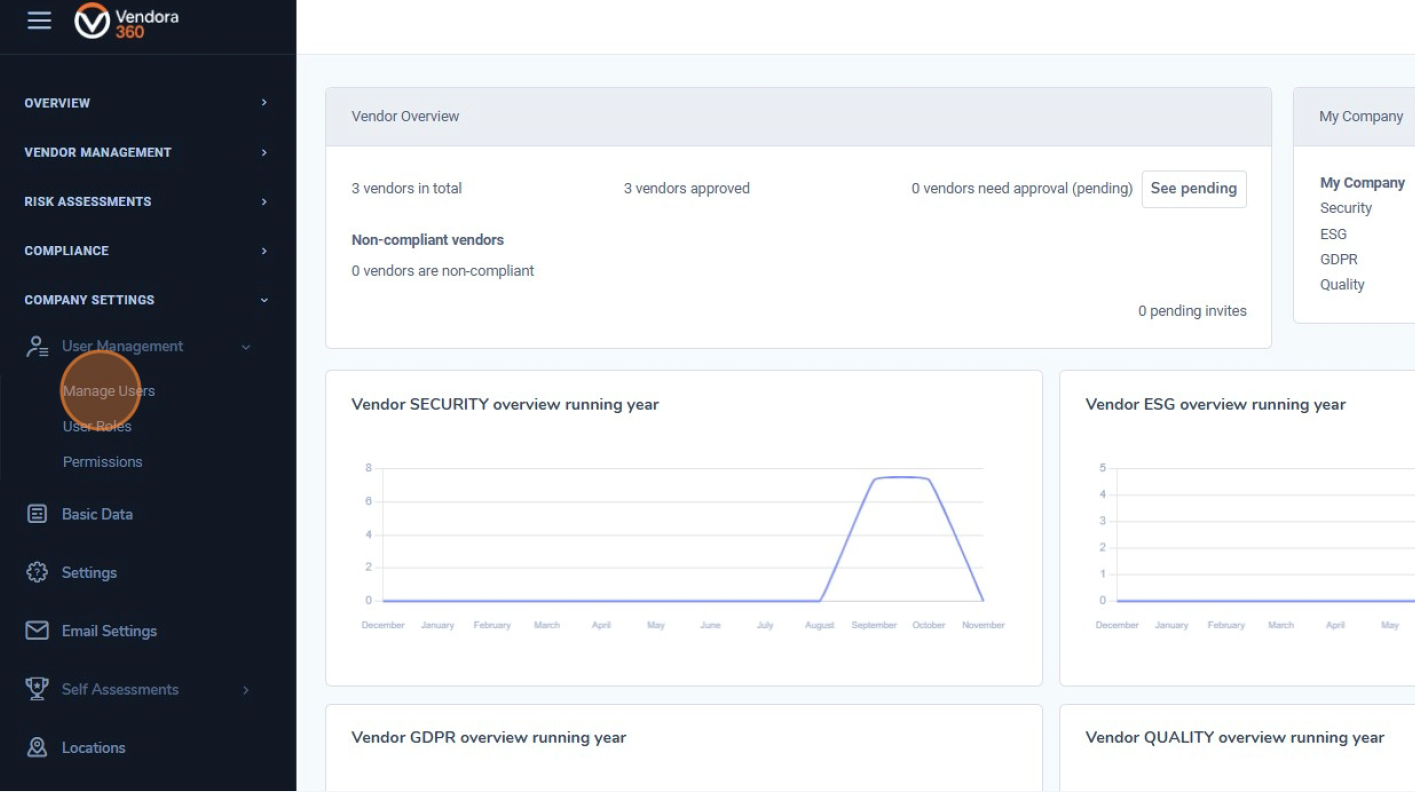
3. Klik på “Tilføj bruger”
Klik på knappen Tilføj bruger” i øverste højre hjørne for at begynde oprettelsen af en ny brugerprofil. 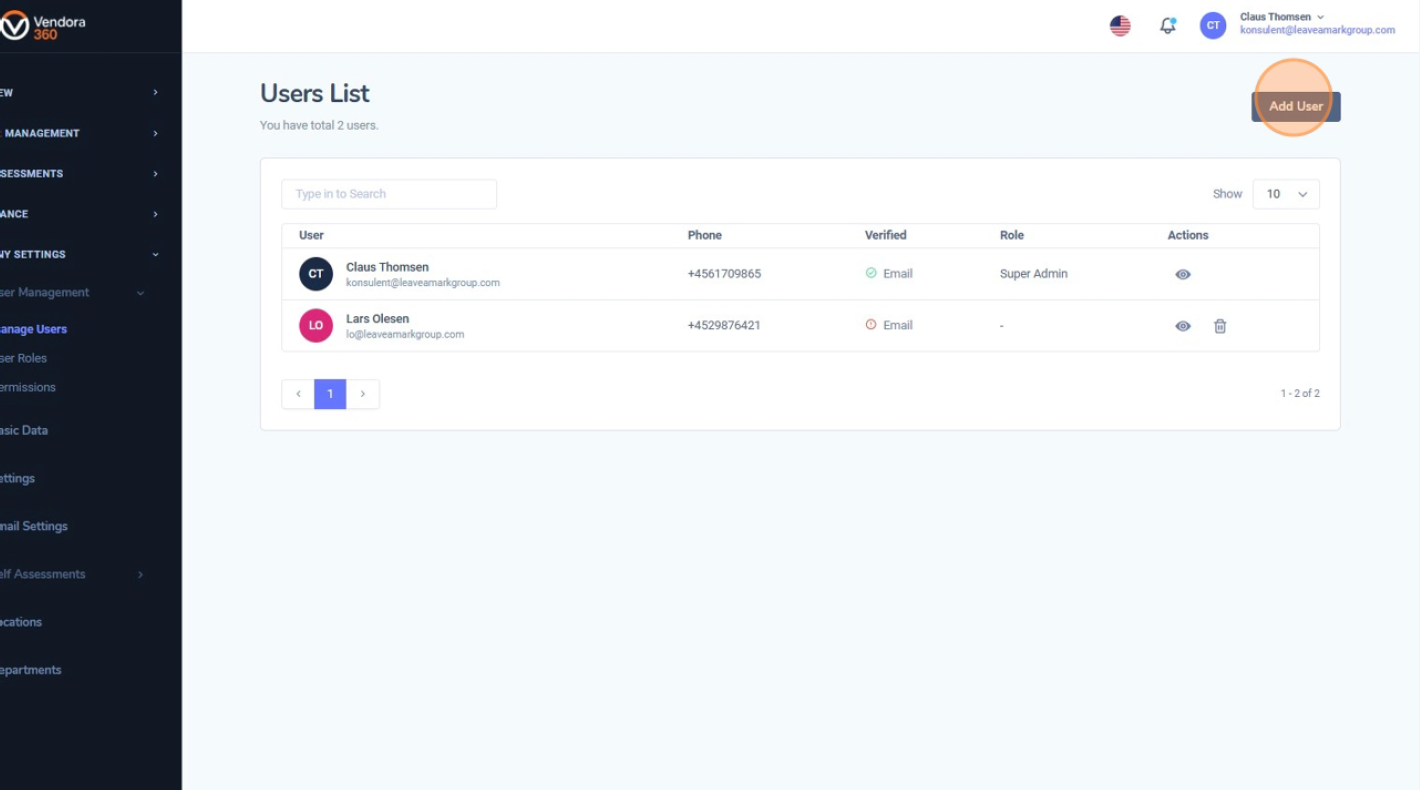
4. Udfyld brugeroplysningerne
Indtast den nye brugers oplysninger, herunder fornavn, efternavn, jobtitel, e-mailadresse, telefonnummer og afdeling. Alle felter markeret med * er obligatoriske. 
5. Gem den nye bruger
Klik på “Tilføj og fortsæt” for at oprette brugeren. Brugeren vises herefter på brugerlisten. 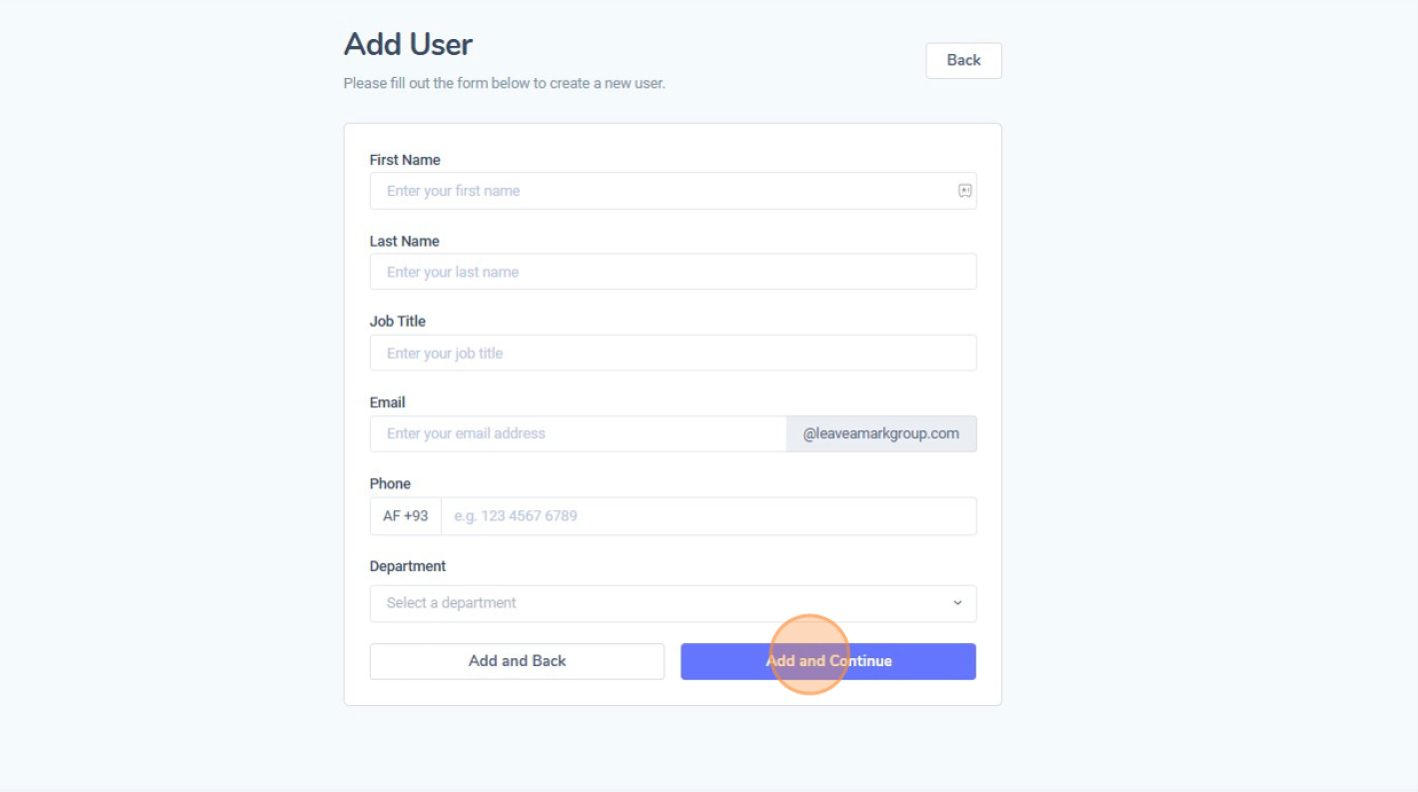
Den nye bruger er nu oprettet og kan tildeles roller og rettigheder, så adgangen matcher organisationens struktur og behov.
I denne guide lærer du, hvordan du gennemfører virksomhedens interne selvevalueringer i Vendora360.
Der er fire vurderingsområder under Selvevalueringer: Sikkerhed, ESG, GDPR og Kvalitet. For hvert område besvarer du en række spørgsmål med Ja, , Delvist eller nej og indsender dine svar.
1. Åbn Virksomhedsindstillinger
Gå til Virksomhedsindstillinger i menuen til venstre for at få adgang til konfigurationsområdet for din organisation. 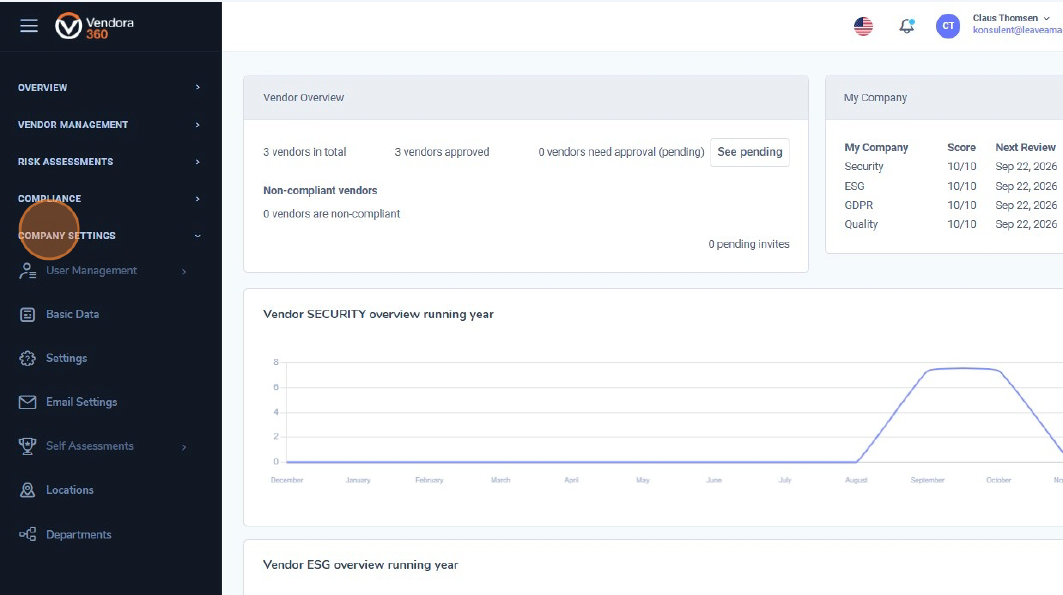
2. Gå til Selvevalueringer
Under Virksomhedsindstillinger, klik Selvevalueringer. Her kan du se de fire tilgængelige vurderingskategorier: Sikkerhed, ESG, GDPR og Kvalitet. 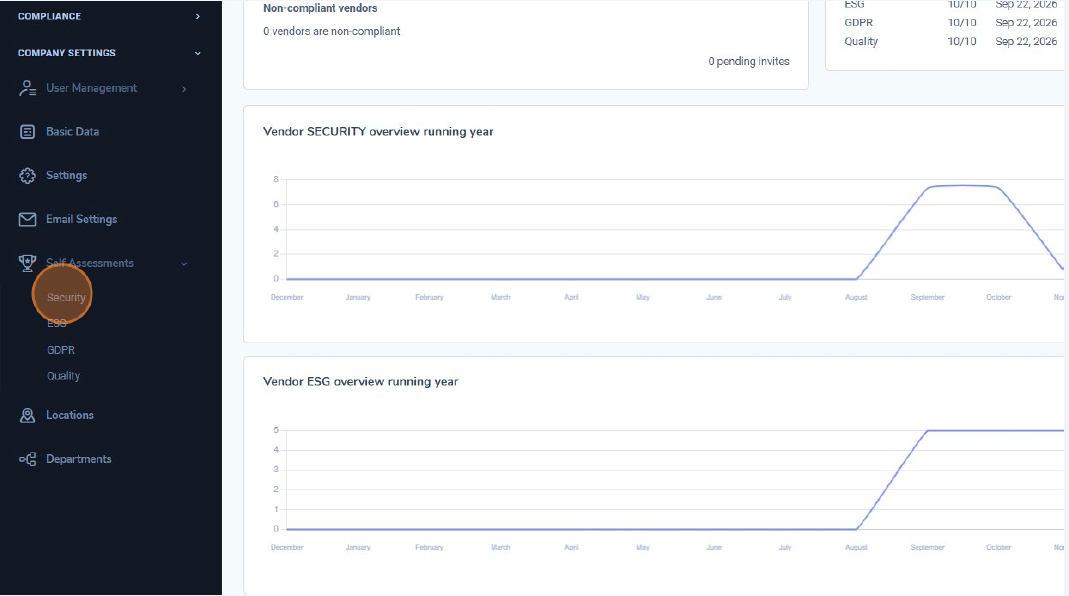
3. Åbn selvevalueringen for Sikkerhed
Start med at klikke på Sikkerhed hvorefter den relevante vurdering åbnes (fx Vurdering | Sikkerhed CIS v8). Dette viser en liste over sikkerhedskontroller med tilhørende spørgsmål, som du skal besvare. 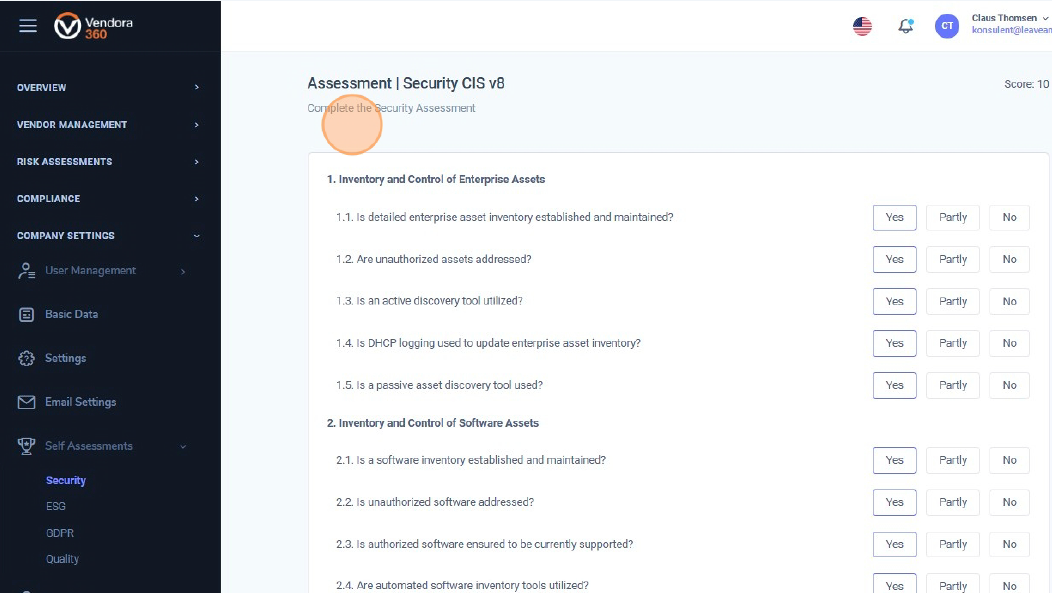
4. Besvar spørgsmålene (Ja / Delvist / Nej)
For hvert spørgsmål i vurderingen skal du vælge én af de tre muligheder: Ja, , Delvist eller nej. Gennemgå listen fra top til bund, så hver kontrol har et valgt svar. Den samlede score beregnes på baggrund af dine svar.
Når du har besvaret alle spørgsmål, skal du scrolle til bunden af siden og klikke på "Tilmeld". Dine svar gemmes, og sikkerhedsscoren i oversigten opdateres herefter. 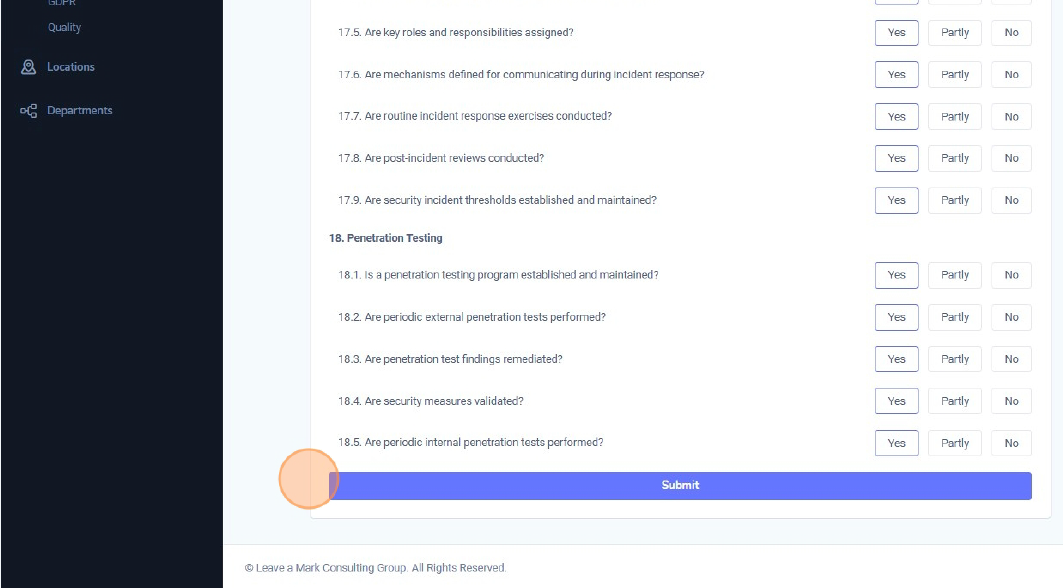
5. Gentag for ESG, GDPR og Kvalitet
Gå tilbage til Selvevalueringer i menuen til venstre, og gentag samme proces for de resterende kategorier:
For hvert område åbner du vurderingen, besvarer alle spørgsmål med Ja, , Delvist eller nej, og klikker på "Tilmeld" nederst, når du er færdig. 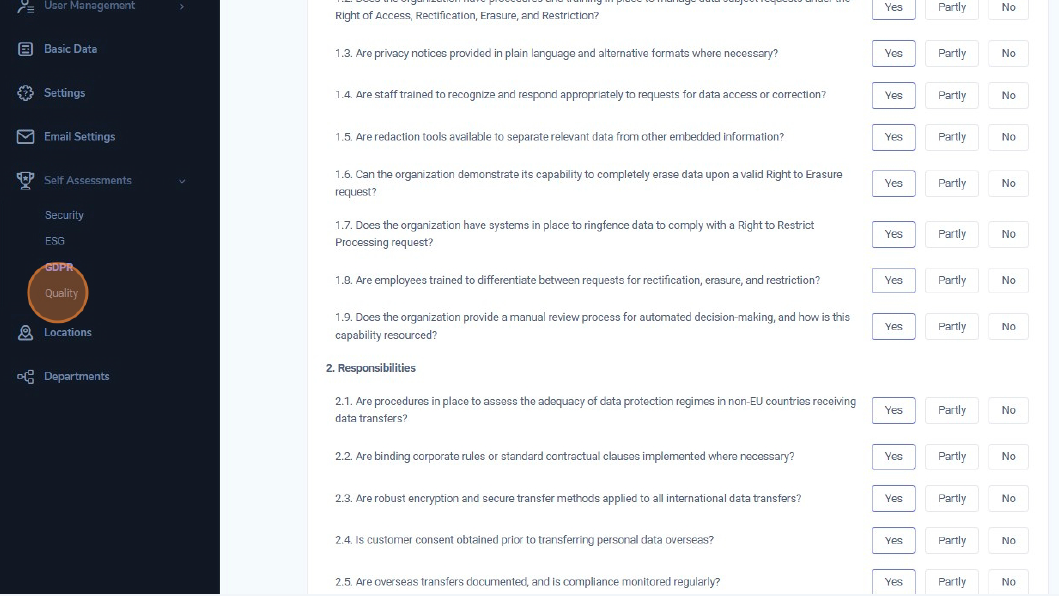
Når alle fire selvevalueringer er afsluttet og indsendt, afspejles organisationens resultater for Sikkerhed, ESG, GDPR og Kvalitet i Vendora360s dashboards og rapporter.
I denne guide lærer du, hvordan du tilføjer din første leverandør i Vendora360. Følg trinnene nedenfor for at oprette og invitere en ny leverandør til din organisation.
1. Gå til Leverandørstyring
Klik på Leverandørstyring i menuen til venstre for at få adgang til alle leverandørrelaterede funktioner i Vendora360.

2. Åbn leverandørlisten
Under Leverandørstyring skal du klikke på “Leverandører" for at se alle eksisterende leverandører og administrere deres oplysninger.
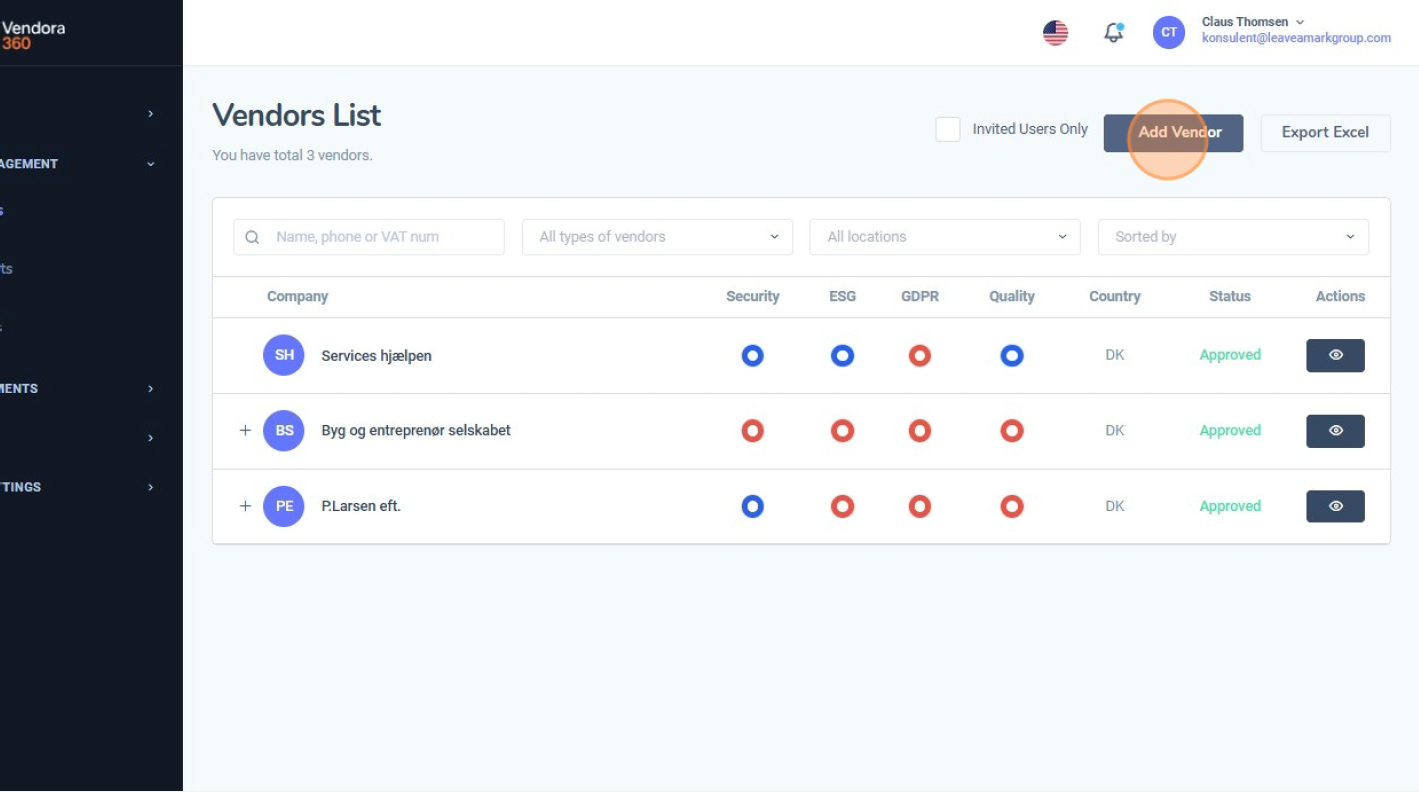
3. Klik på “Tilføj leverandør”
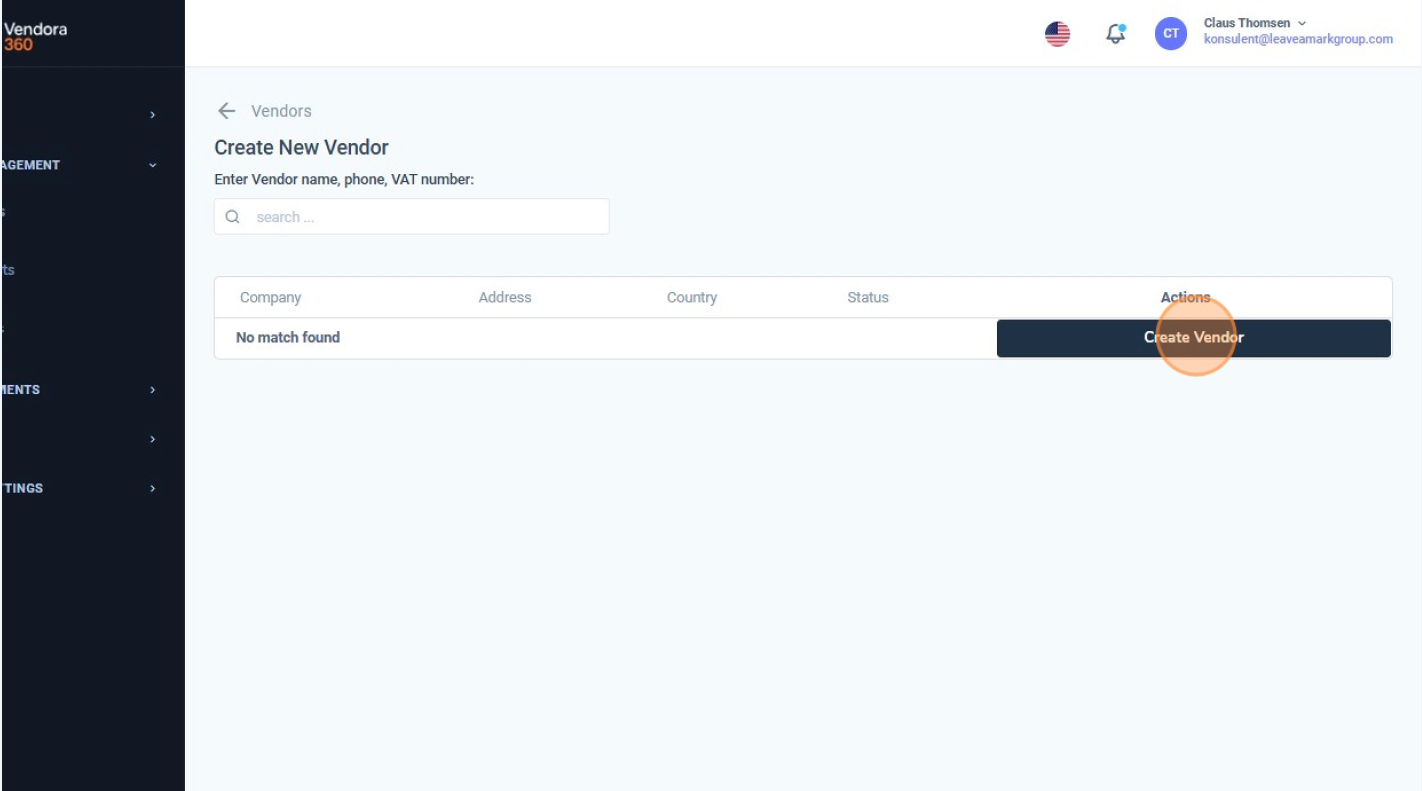
Leverandørlisten viser alle nuværende leverandører. Klik på “Tilføj leverandør” i øverste højre hjørne for at begynde oprettelsen af en ny leverandør.
4. Klik på “Opret leverandør”
Søg efter leverandøren først. Hvis den ikke findes, kan du oprette en ny ved at klikke på “Opret leverandør”, for manuelt at oprette en ny.
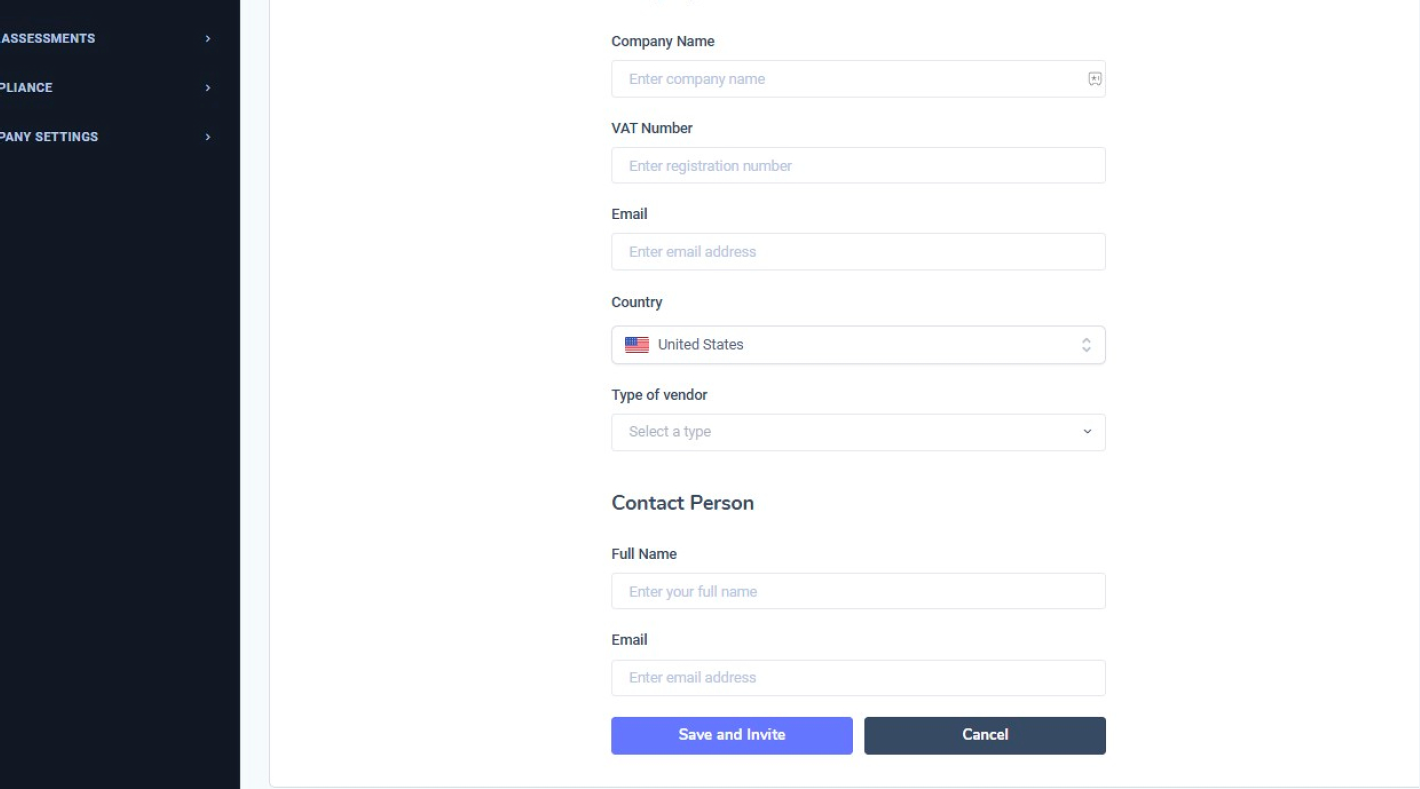
5. Udfyld leverandøroplysninger
Du skal nu udfylde leverandørens virksomhedsoplysninger, herunder:
- Virksomhedsnavn
- CVR-nummer
-
Email
- Land
- Leverandørtype
Kontaktpersons navn og e-mailadresse
Når oplysningerne er udfyldt, skal du klikke på “Gem og invitér” for at sende en invitation til leverandøren.
6. Invitér leverandøren
Gennemgå oplysningerne, og bekræft ved at klikke på “Gem og invitér”for at sende en invitation til leverandøren.
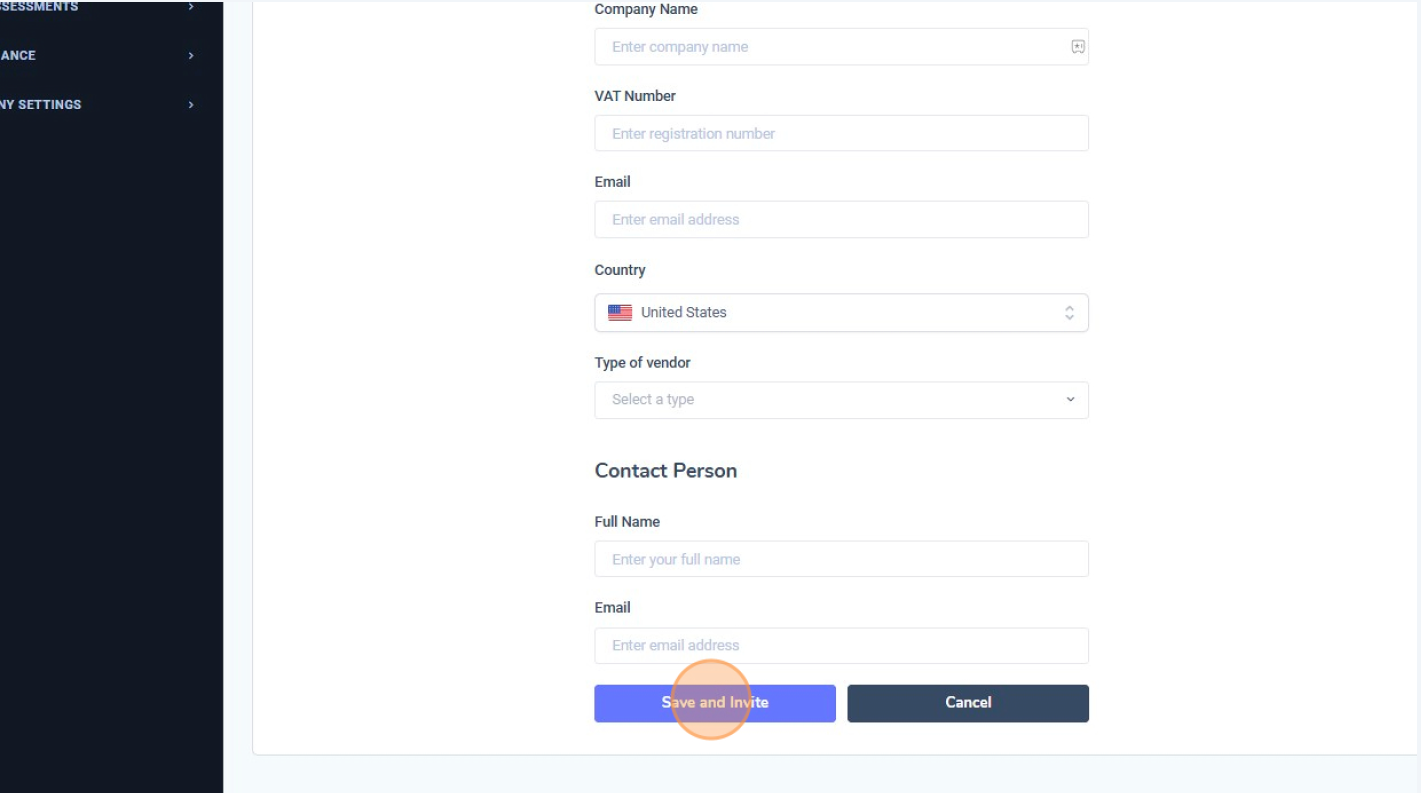
Leverandøren er nu tilføjet og vises i leverandørlisten. Når invitationen accepteres, opdateres compliance- og vurderingsstatus automatisk i Vendora360.
I denne guide lærer du, hvordan du tilføjer en ny kontrakt i Vendora360. Følg trinnene nedenfor.
1. Åbn kontraktmodulet
Klik på “Contracts” i menuen Leverandørstyring for at få adgang til virksomhedens kontrakter. 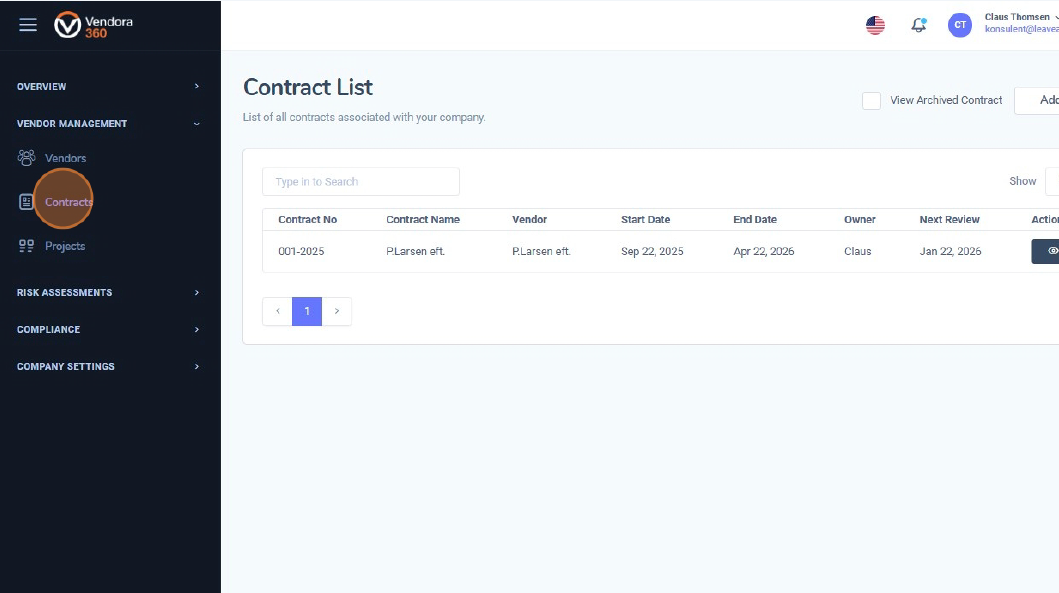
2. Klik på “Add Contract”
Brug knappen øverst til højre for at oprette en ny kontrakt. 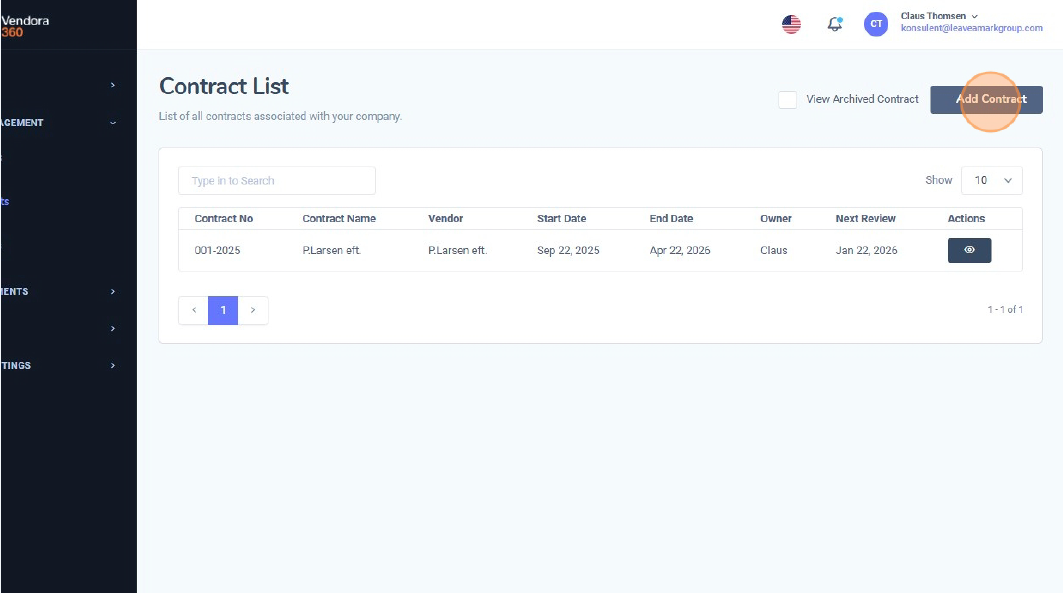
3. Udfyld kontraktoplysningerne
Indtast de nødvendige oplysninger, herunder:
Disse felter hjælper med at definere, klassificere og korrekt knytte kontrakten i Vendora360. 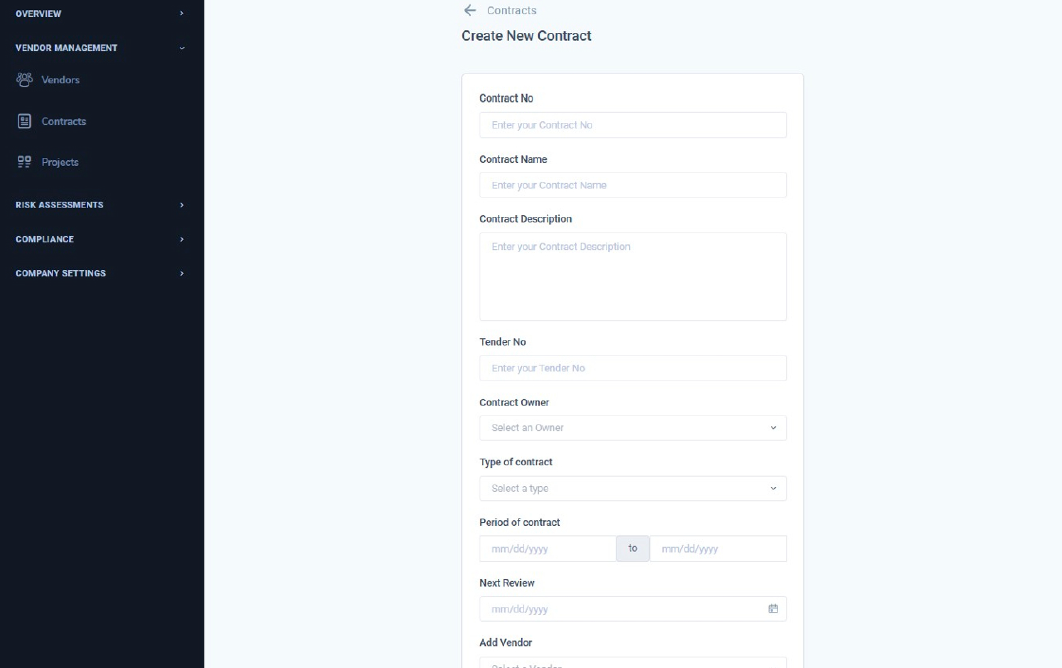
4. Upload kontraktdokumentet
Vedhæft kontraktfilen ved at klikke på “Choose file”. Dette sikrer, at kontraktversionen opbevares sikkert og er tilgængelig ved fremtidige gennemgange. 
5. Gem kontrakten
Afslut ved at klikke på “Save”. Din kontrakt er nu tilføjet i Vendora360 og vil fremgå af kontraktlisten samt den relevante leverandøroversigt.
Vendor Overview er det standarddashboard, du ser, når du logger ind i Vendora360. Det giver et samlet overblik over dit leverandørlandskab, herunder godkendelser, compliance-status og performance på tværs af året. Følg guiden nedenfor for at forstå, hvad du kan se, og hvordan du navigerer i overblikket.
1. Adgang til overblikket
Når du logger ind, åbner Vendora360 automatisk Overview dashboardet. Du kan altid vende tilbage hertil ved at klikke på “Overview” i menuen. 
2. Åbn Vendor Overview-sektionen
Under Overview-menuen skal du klikke på “Vendor” for at se leverandørspecifikke nøgletal og grafer. 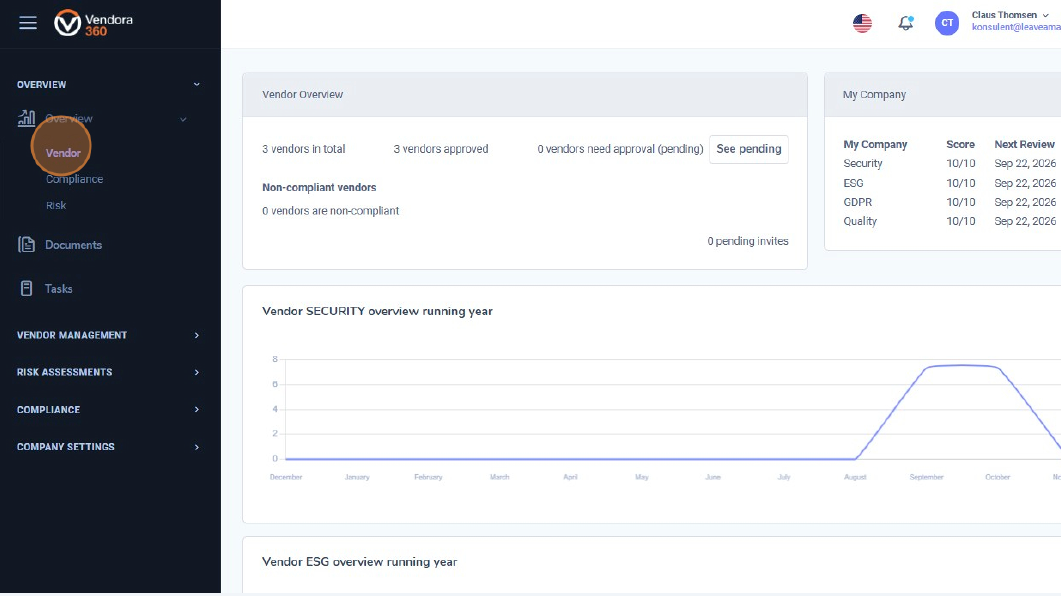
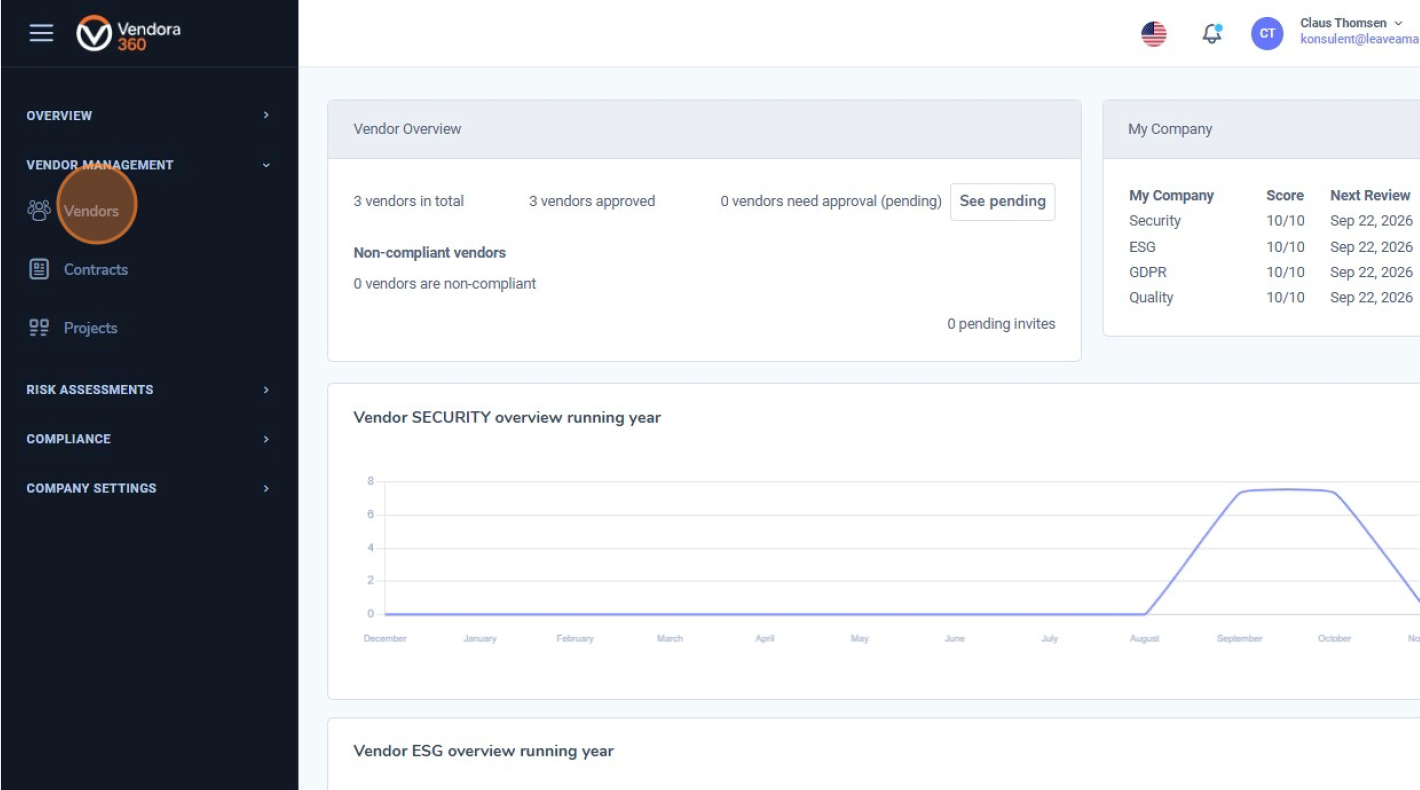
3. Overordnede leverandør metrics
Øverst på siden finder du centrale oversigter, herunder:
I højre side vises også My Company, som viser organisationens seneste SECURITY-, ESG-, GDPR- og QUALITY-scorer, samt datoer for næste gennemgang. 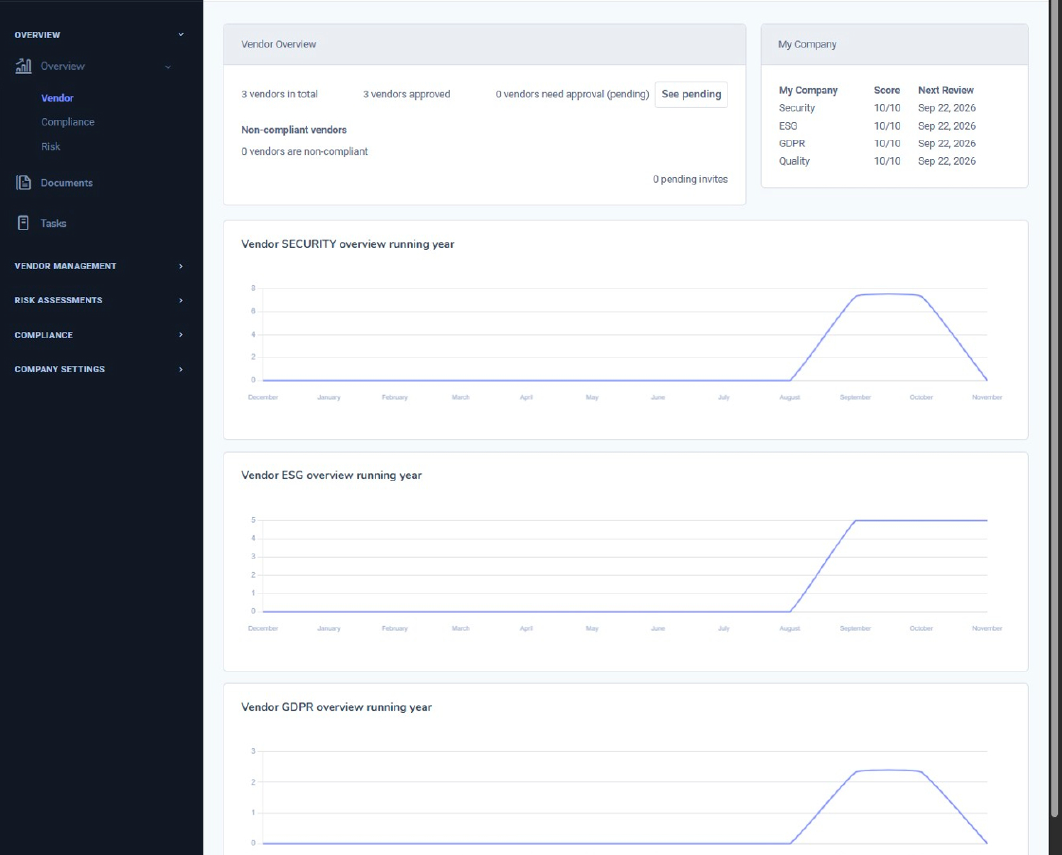
4. Årlige performancegrafer
Når du scroller ned, kan du se udviklingen i leverandørperformance for det igangværende år:
Disse grafer hjælper dig med at følge ændringer over tid og hurtigt identificere forbedringer eller fald i leverandørernes performance. 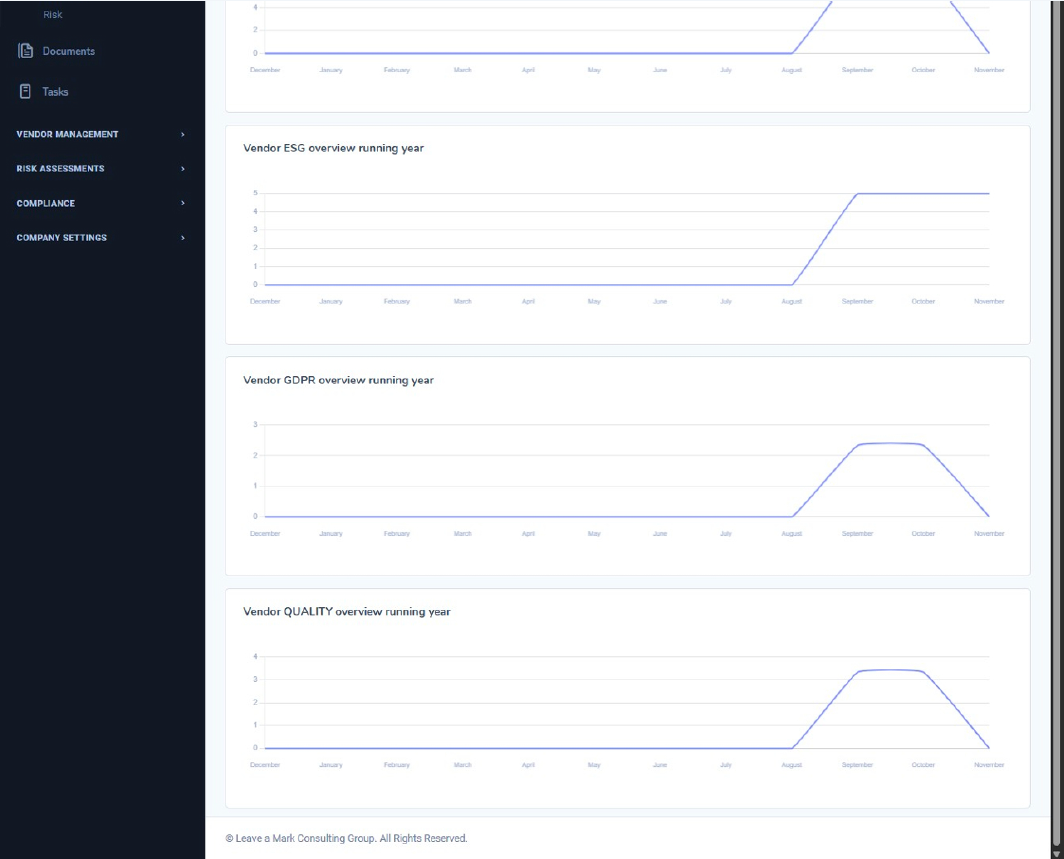
Vendor Overview giver dig et klart overblik over dit leverandørlandskab og hjælper dig med hurtigt at navigere videre til leverandører, kontrakter, compliance-områder eller risikovurderinger for yderligere handling.
5. Visning af afventende leverandører
For at se leverandører, der kræver godkendelse eller endnu ikke har accepteret deres invitation, skal du klikke på “Vendors” under Vendor Management-menuen. I leverandørlisten kan du identificere leverandører med status Pending , som er markeret med gult. Disse leverandører afventer enten godkendelse eller har en udestående invitation. 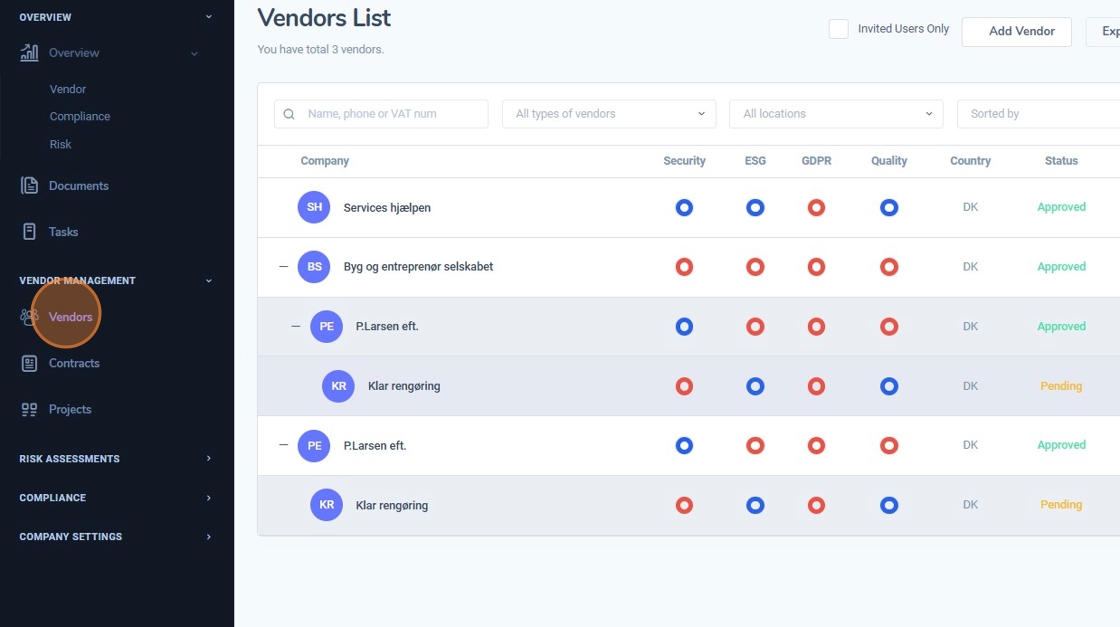
I dette afsnit gennemgår vi den udvidede information, der er tilgængelig i Vendor Overview – herunder Supply Chain Overview samt virksomhedens samlede scorer for Security, ESG, GDPR og Quality,inklusive datoer for næste planlagte gennemgang..
1. Åbn Vendor Overview
Navigér til Vendor Overview i menuen i venstre side. Her får du et samlet overblik over din leverandørportefølje, herunder godkendte leverandører, afventende invitationer og ikke-compliant leverandører. 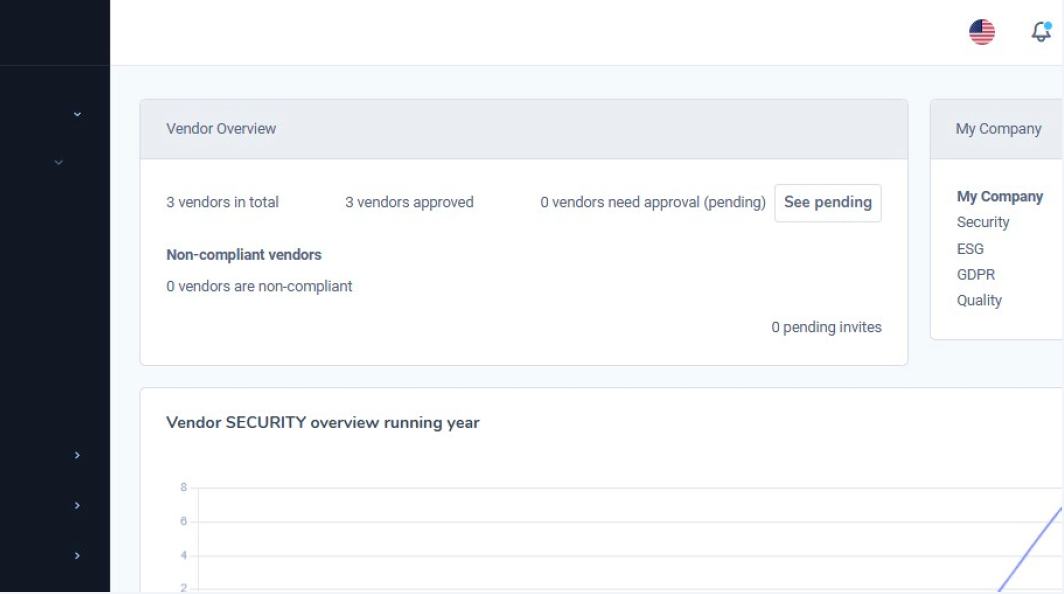
2. Se virksomhedens sikkerheds- og compliance-performance
I højre side af overblikket kan du klikke på My Company for at se en samlet oversigt over organisationens scorer inden for Sikkerhed, ESG, GDPRog Quality. scores.
Hvert område vises med en numerisk score samt en planlagt Next Review Date, som hjælper dig med at se, hvornår den næste vurdering skal gennemføres. 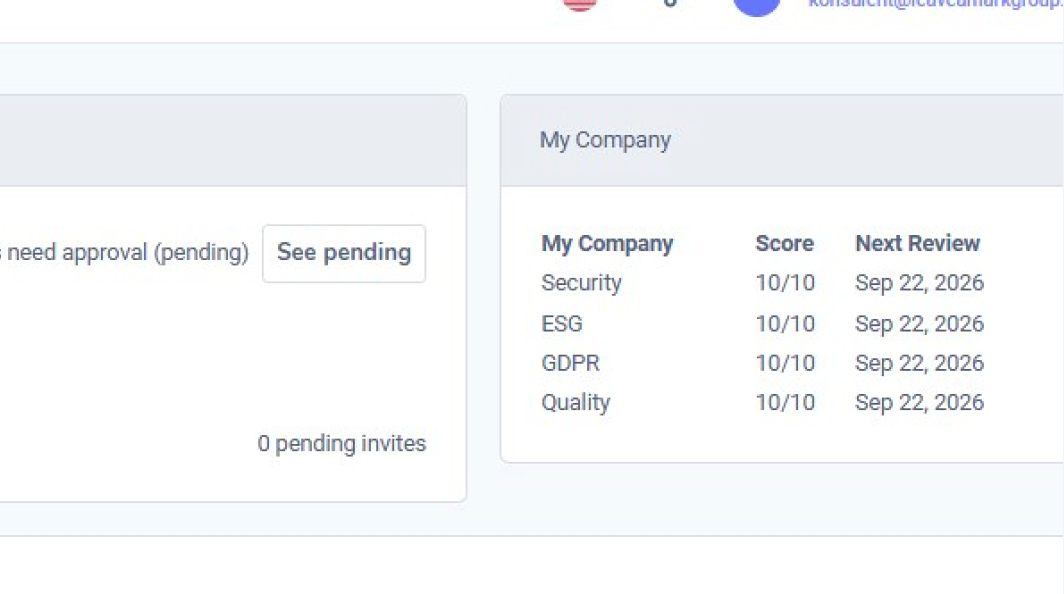
Hvad dette giver dig mulighed for
Dette afsnit hjælper dig med at bevare et stærkt overblik over både dine leverandører og din egen organisations compliance-status, hvilket gør det lettere at planlægge forbedringer og kommende gennemgange.
Vendor Risk Assessment-sektionen giver dig et overordnet overblik over hver leverandørs sikkerhedsniveau baseret på deres udfyldte leverandør selvvurderinger og den dokumentation, de har indsendt.
This is not Dette er ikke stedet, hvor du gennemfører en fuld risikovurdering – det sker senere i Afsnit 3: Risk Assessments. I stedet hjælper denne side dig med at forstå leverandørens grundlæggende modenhed, før du udfører den formelle risikovurdering.
1. Gå til leverandørlisten
Navigér til Vendor Management → Vendors for at se alle dine leverandører. Her kan du hurtigt gennemgå deres godkendelsesstatus, land samt deres fire scoreområder (Security, ESG, GDPR og Quality).
2. Åbn en leverandørprofil
Klik på visningsikonet (øje-ikonet) i højre side af en leverandør for at åbne den fulde leverandørprofil. Denne side indeholder alle registrerede oplysninger om leverandøren.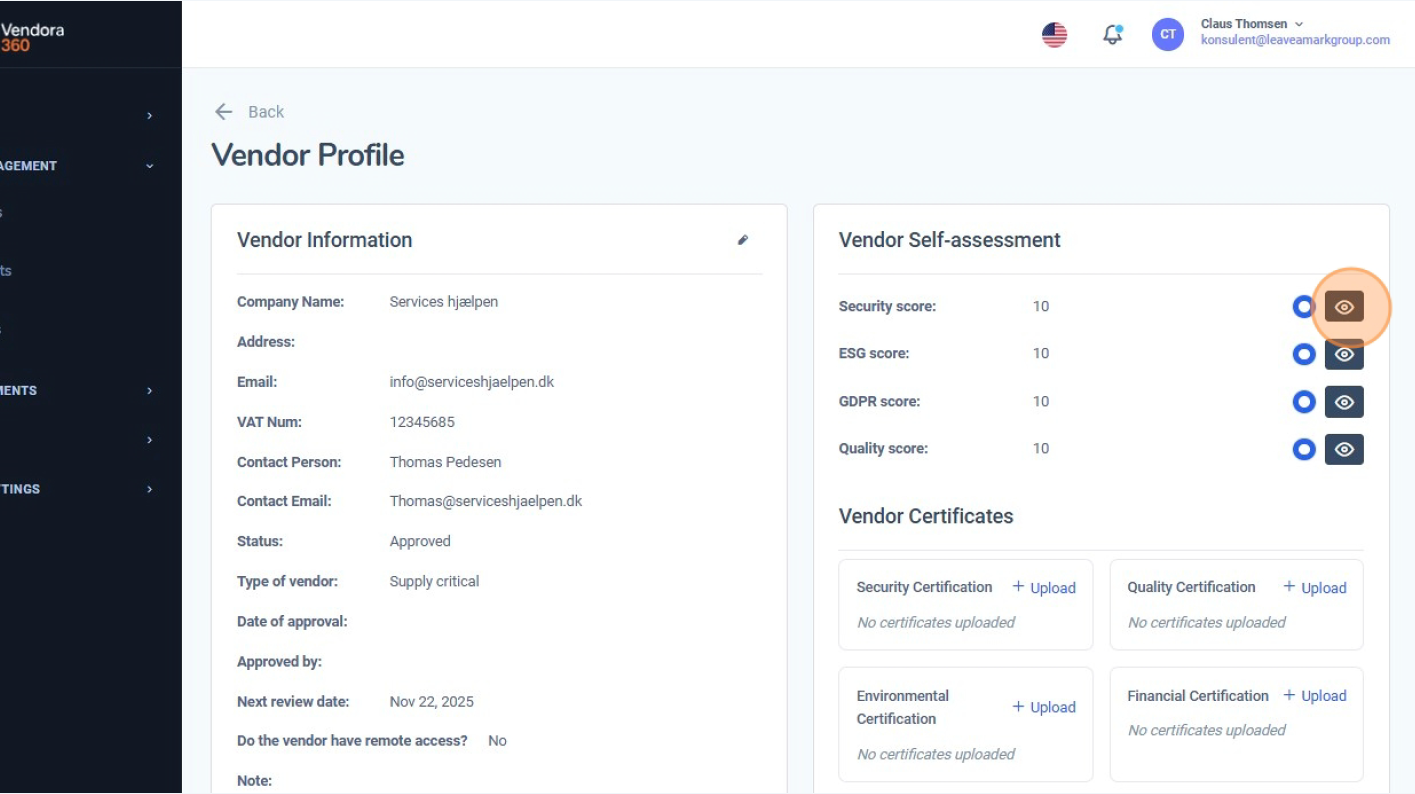
3. Gennemgå leverandørens selvvurderingsscorer
I højre side ser du fire scoreområder:
Disse scorer stammer direkte fra leverandørens udfyldte Self Assessment (se Afsnit 1.6: Vendor Self Assessment).
Det betyder, at leverandøren allerede har besvaret et struktureret spørgeskema, og at scorerne opsummerer deres modenhedsniveau.
4. Åbn de detaljerede selvvurderingssvar
Klik på øje-ikonet ud for en score for at se hele spørgeskemaet, som leverandøren har udfyldt. Denne visning viser hvert spørgsmål samt det valgte svar (Ja / Delvist / Nej).
Dette hjælper dig med at forstå, hvorfor leverandøren har opnået den pågældende score.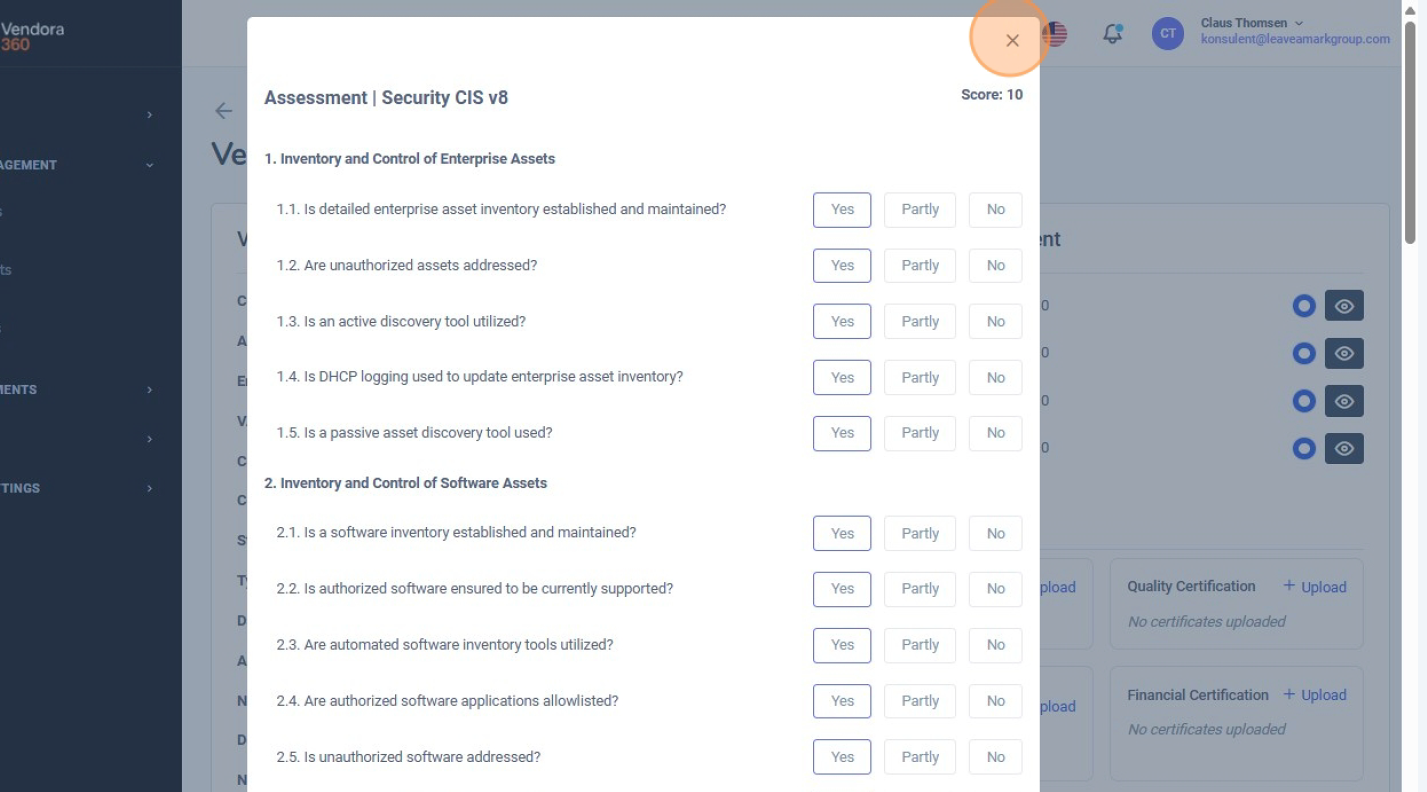
Under scorerne finder du leverandørens uploadede certifikater. Disse bruges til at validere de udsagn, der er afgivet i selvvurderingen.
6. Brug leverandøroversigten som input til dit risikarbejde
Samlet set giver scorerne, de detaljerede svar, certifikaterne samt kontrakter og projekter knyttet til leverandøren et solidt grundlag for at forstå leverandørens risikoprofil.
Du kan anvende denne information som input, når du arbejder med organisationens formelle risikovurderinger.
Vendor Risk Assessment-visningen viser det færdige vurderingsresultat – herunder scorer og alle underliggende svar. Hvis du vil se, hvor og hvordan de enkelte spørgsmål besvares trin for trin,skal du fortsætte til den næste guide, som forklarer vurderingsspørgeskemaet og hvordan det udfyldes. Med andre ord: Dette afsnit bruges til at gennemgå og fortolke leverandørrisiko, mens næste afsnit viser, hvordan selve vurderingen gennemføres i systemet..
I denne guide lærer du, hvordan du opretter en ny risikovurdering i Vendora360 – fra åbning af Risk Assessments-modulet til kobling af vurderingen med leverandører, projekter og kontrakter.
1. Klik på “Risk Assessments”
I menuen i venstre side skal du klikke på “Risk Assessments” for at åbne oversigten over alle eksisterende risikovurderinger i din organisation. 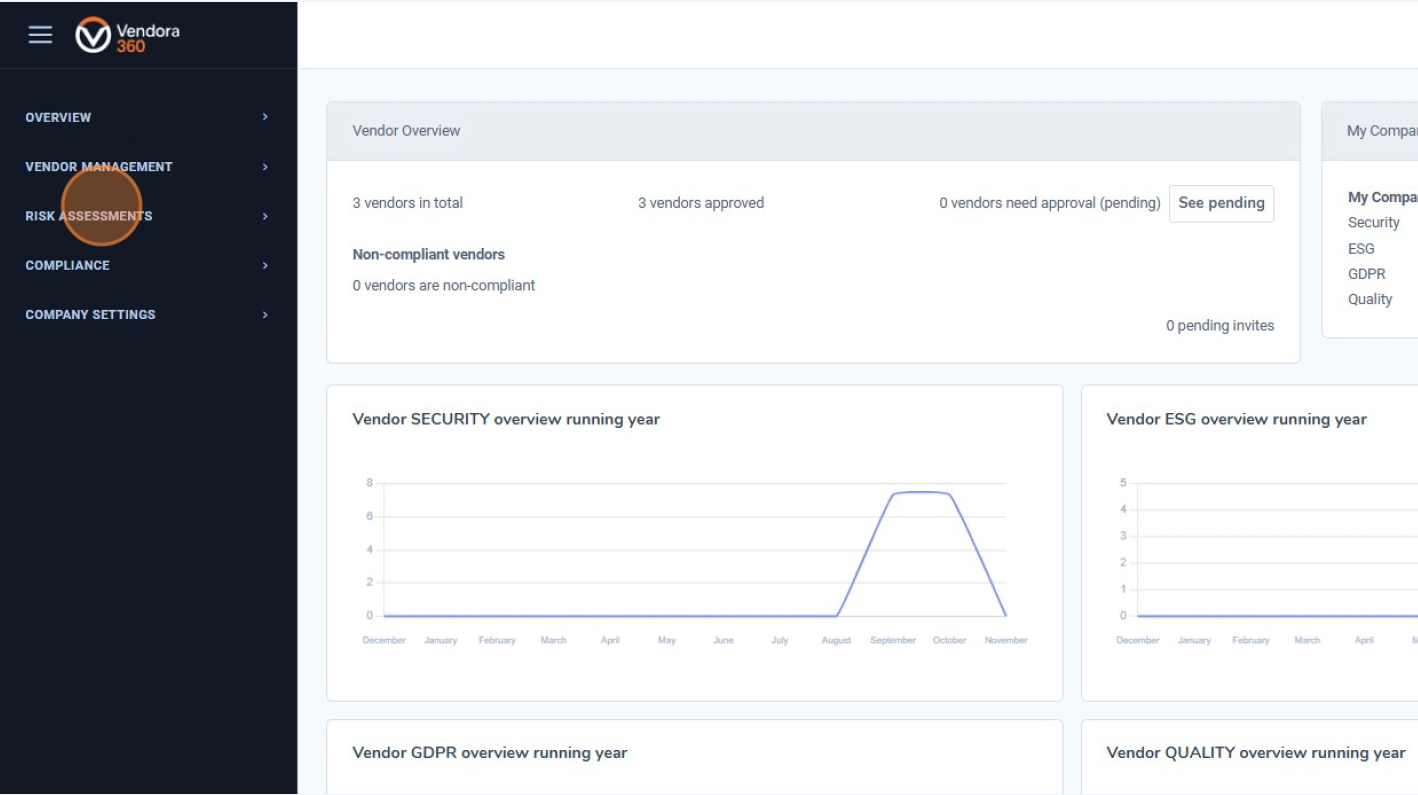
2. Åbn fanen “Assessments”
Øverst på siden skal du klikke på fanen “Assessments” . Denne visning viser alle registrerede risikovurderinger og giver mulighed for at filtrere efter ejer, afdeling, risikoniveau og status. 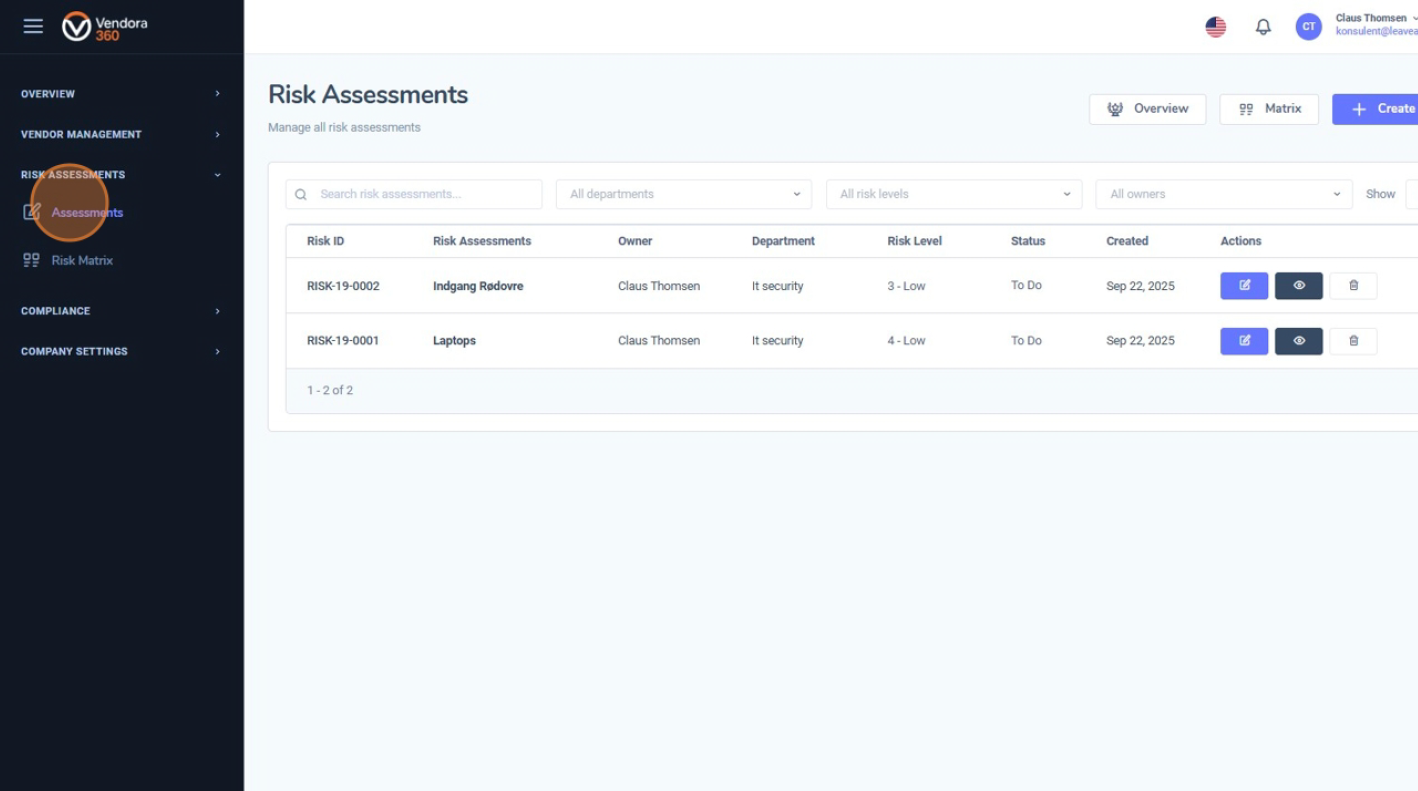
3. Klik på “Create New Risk”
For at oprette en ny risikovurdering skal du klikke på “Create New Risk” øverst til højre. Dette åbner formularen Create Risk Assessment, hvor du indtaster alle relevante oplysninger. 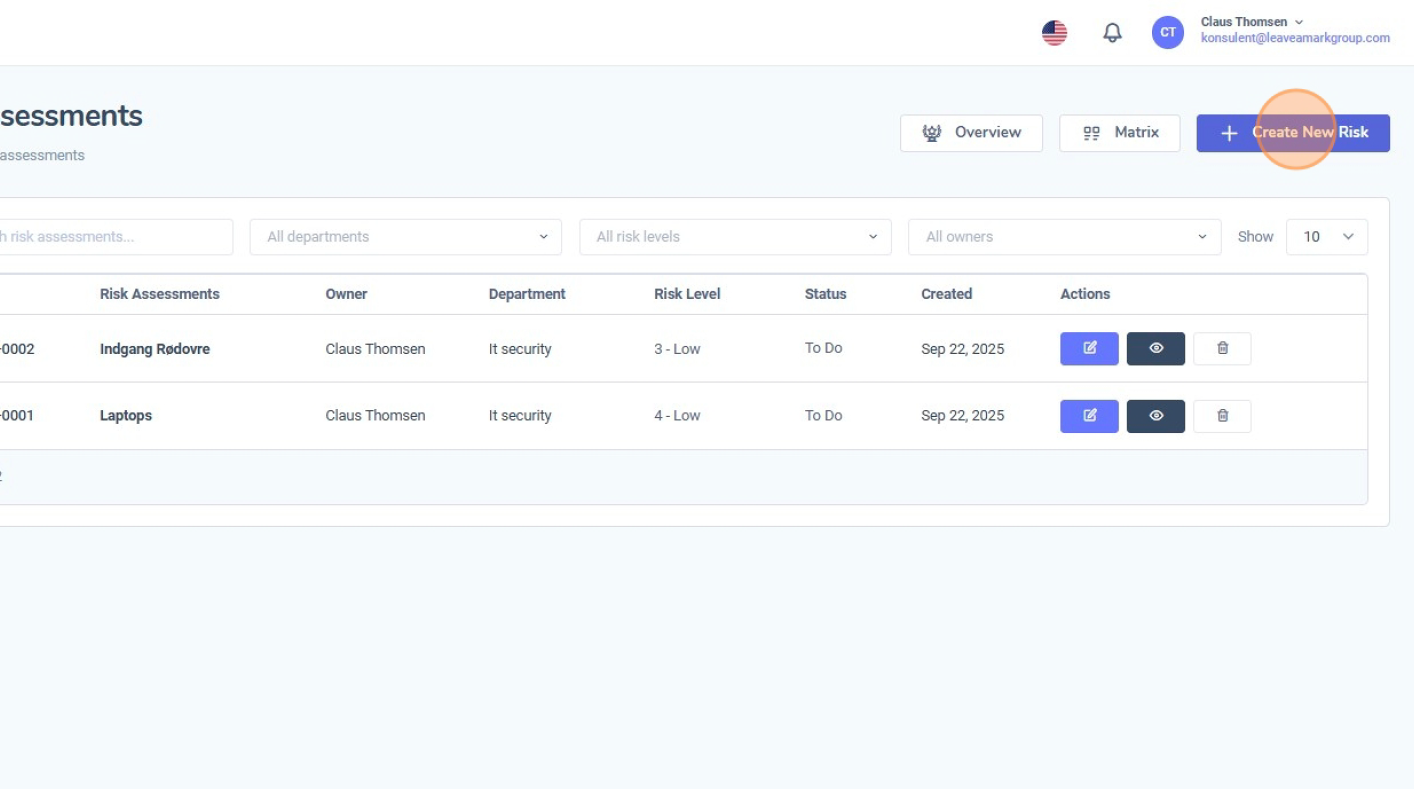
4. Udfyld de overordnede risikoplysninger
I den første del af formularen skal du indtaste de centrale oplysninger om risikoen. Typiske felter omfatter:
Dette afsnit danner grundlaget for hele risikovurderingen. 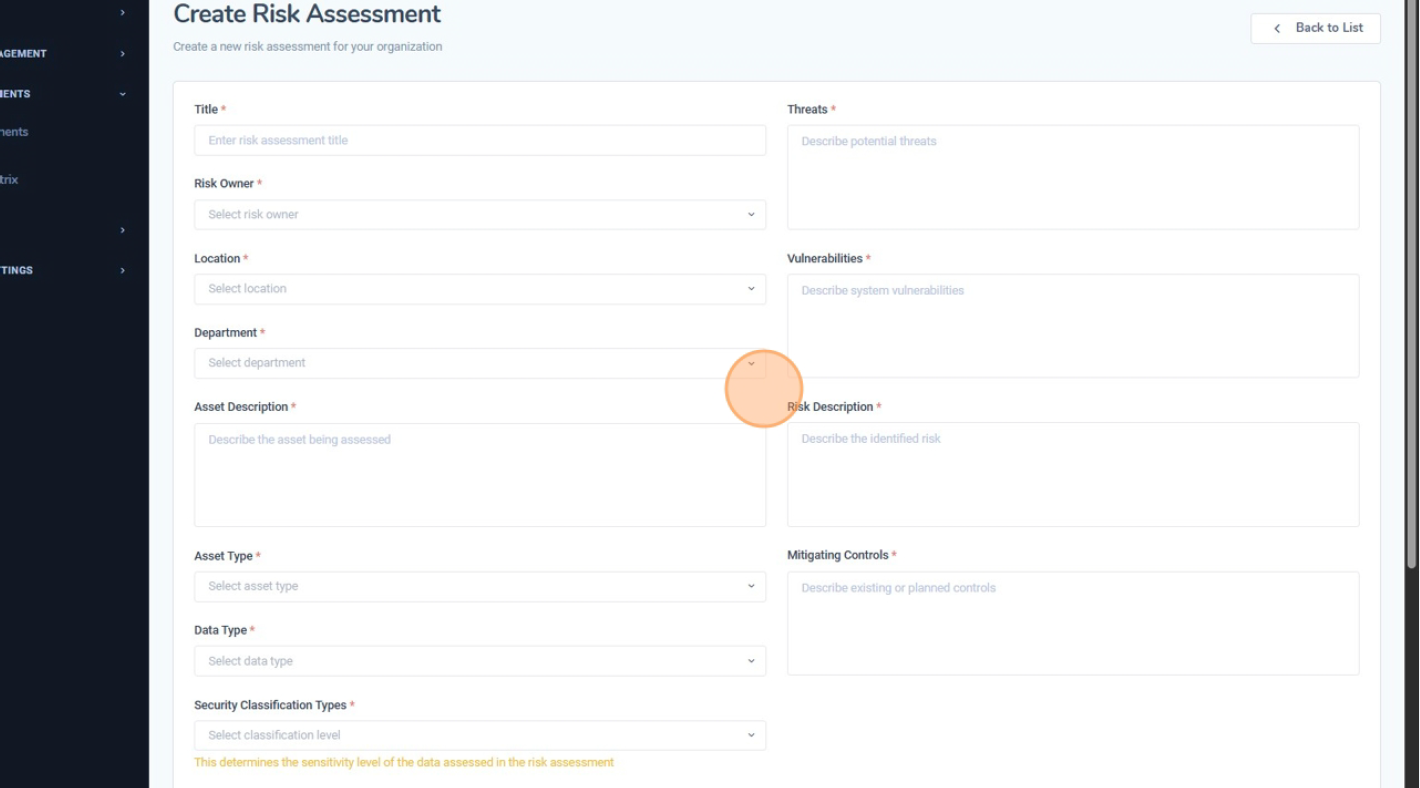
5. Gennemfør risikoberegningen
Scroll ned til afsnittet “Risk Calculation” . Her vurderer du risikoens alvor ved at angive:
Vendora360 beregner automatisk en Calculated Risk score baseret på disse input. Du kan også tilføje kommentarer, der forklarer dine vurderinger af impact og likelihood. 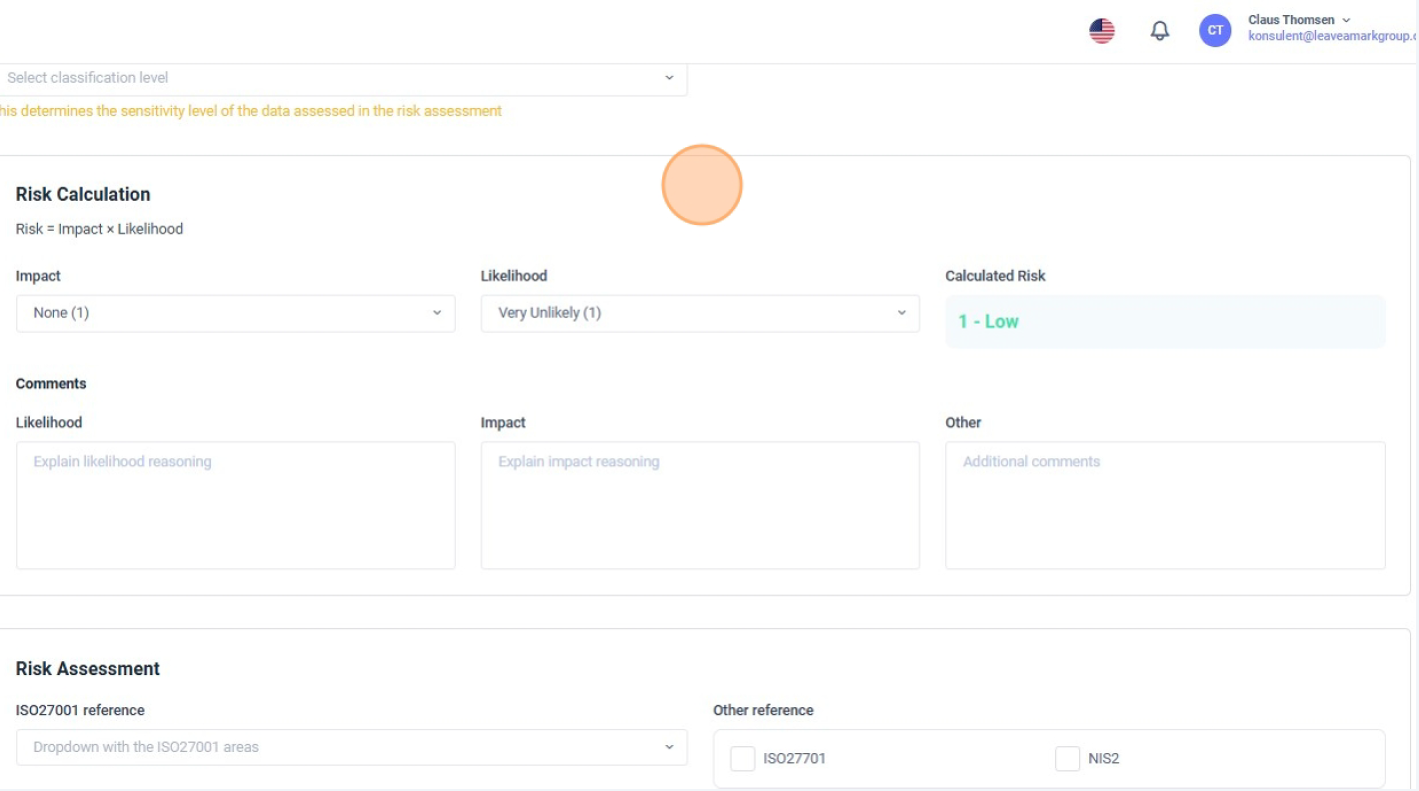
6. Knyt risikoen til ISO27001
I “Risk Assessment” kan du knytte risikoen til relevante ISO27001 kontroller. Brug rullemenuen ISO27001 reference til at vælge den Annex A-kontrol eller det område, der bedst matcher risikoen. Dette skaber en tydelig sammenhæng mellem risikoen og compliance-kravene og gør det lettere at dokumentere overensstemmelse med ISO27001 under audits. 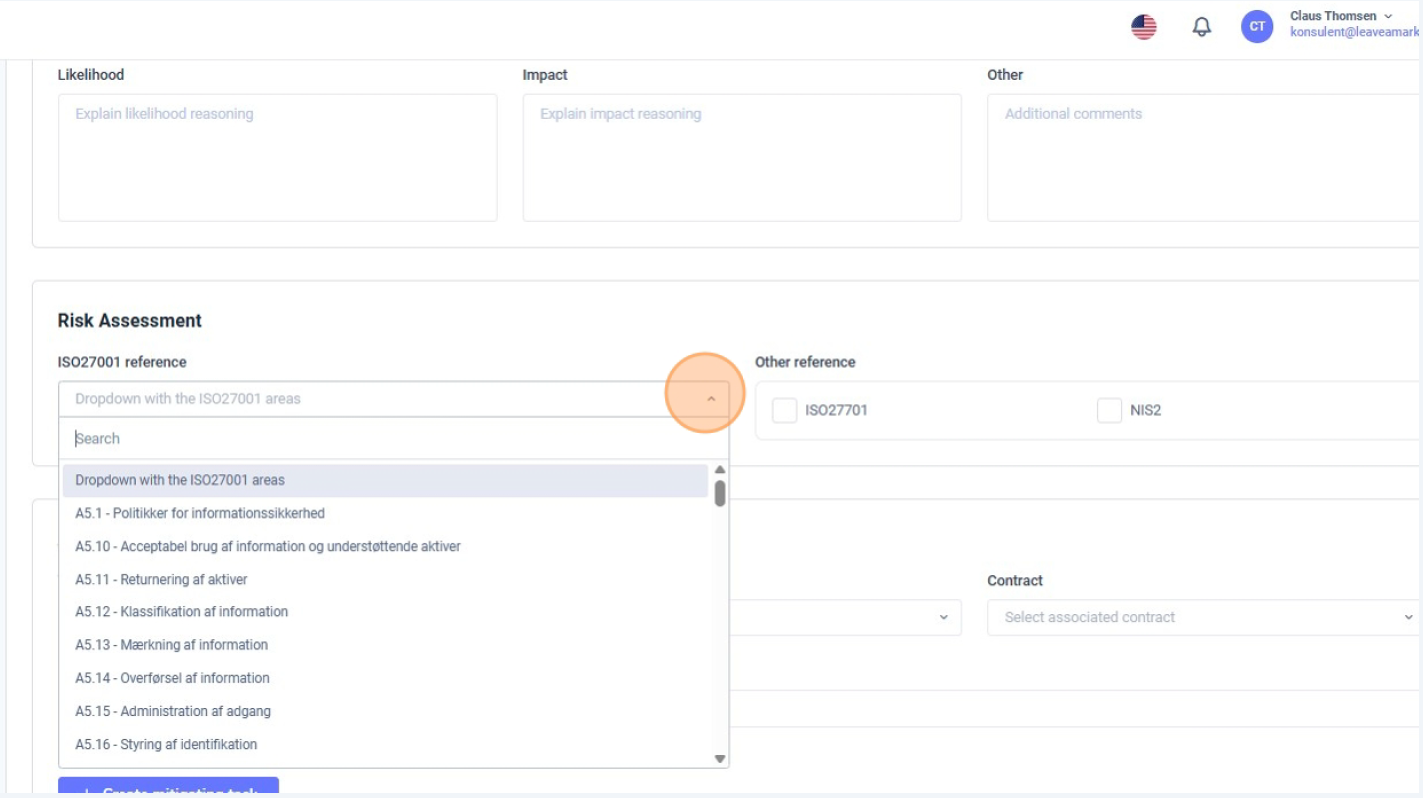
7. Brug afsnittet “Associations”, og gem
Scroll til afsnittet “Associations” . Her kan du knytte risikovurderingen til:
Du kan også angive en Expected Cost of Mitigation for at estimere omkostningerne ved at behandle eller reducere risikoen.
Når du er færdig, skal du klikke på Save. Risikovurderingen vil nu fremgå i Risk Assessmentsoversigten, hvor den kan overvåges, opdateres og anvendes i rapportering. 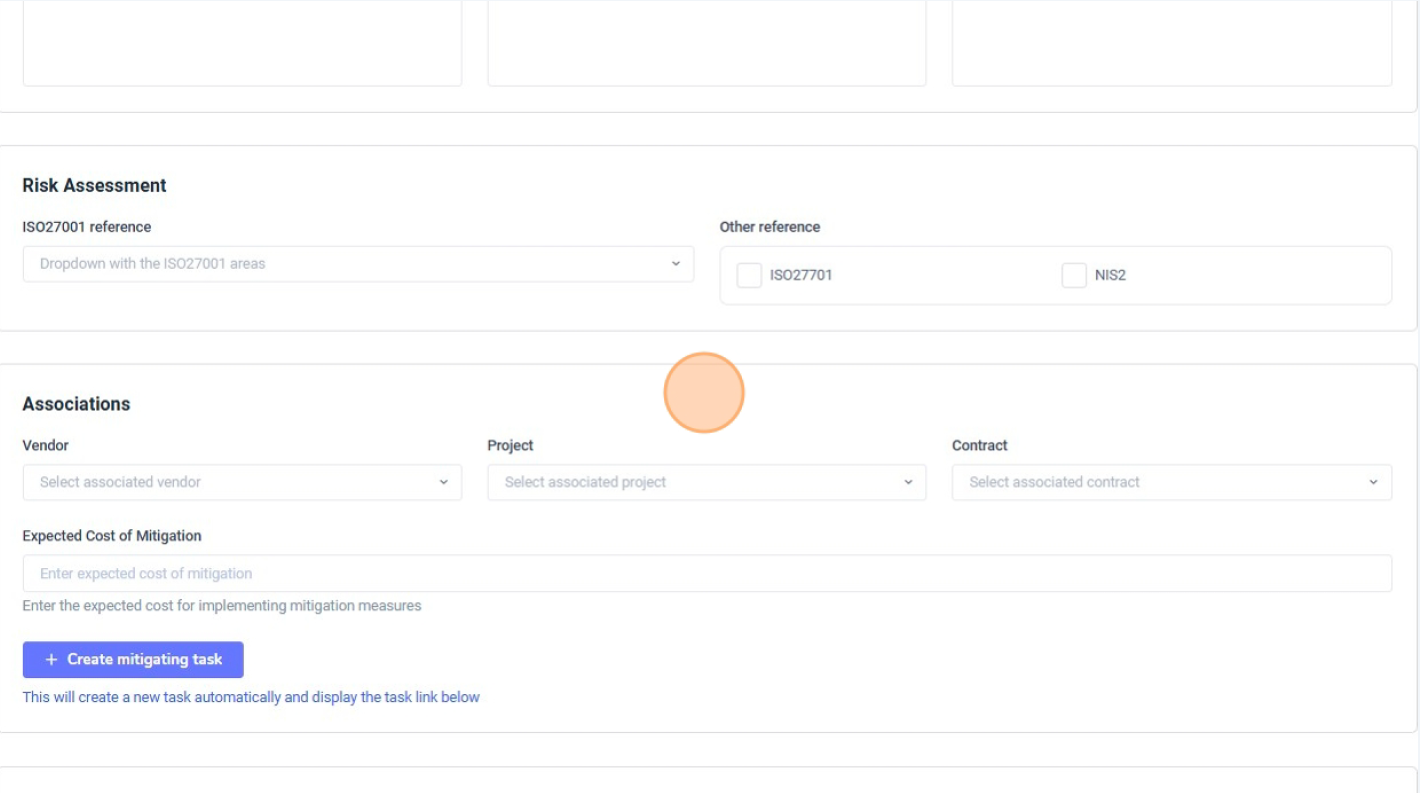
Når du har oprettet én eller flere risikovurderinger (se afsnit 3.1 Create a Risk Assessment), kan du bruge Risk Overview til at få et visuelt og samlet overblik over alle risici i din organisation.
1. Klik på “Overview”
Gå til Risikovurderinger og klik på fanen “Overview” øverst. Dette åbner siden Risk Overview, hvor alle risikovurderinger vises samlet ét sted. 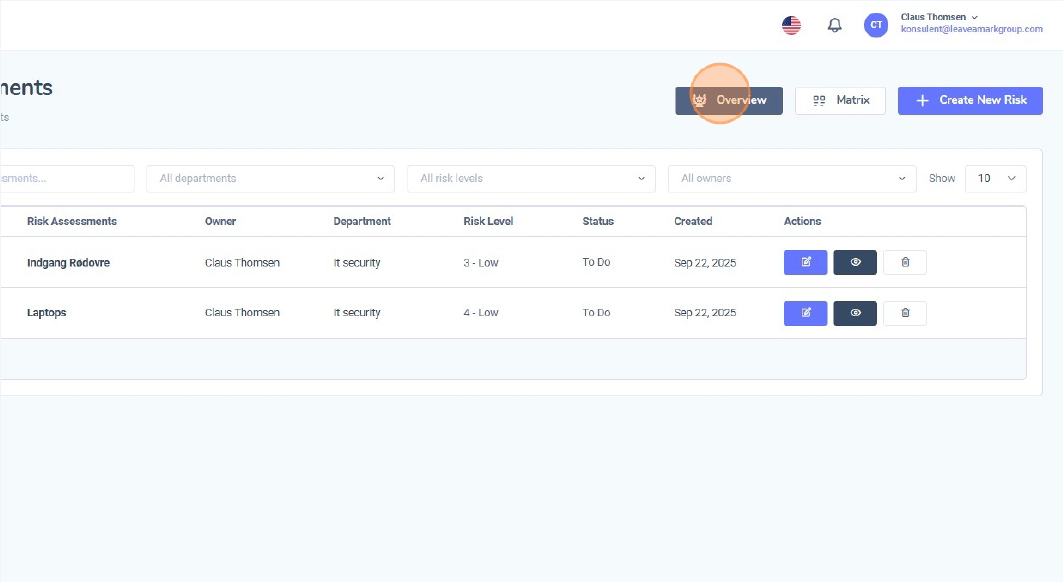
2. Forstå Risk Overview-siden
Øverst på siden ser du oversigtsfelter med det samlede antal risici fordelt på niveauer (Høj, Moderat, Lav osv.).
Nedenfor vises et søjlediagram, som viser den samlede risikopåvirkning før og efter afhjælpning (mitigation).
Nederst på siden findes en detaljeret tabel, der viser hver risikovurdering med ejer, afdeling, lokation, risikoniveau, status og handlinger. Du kan bruge filtrene over tabellen til at indsnævre visningen efter risikoniveau, ejer, afdeling m.m. 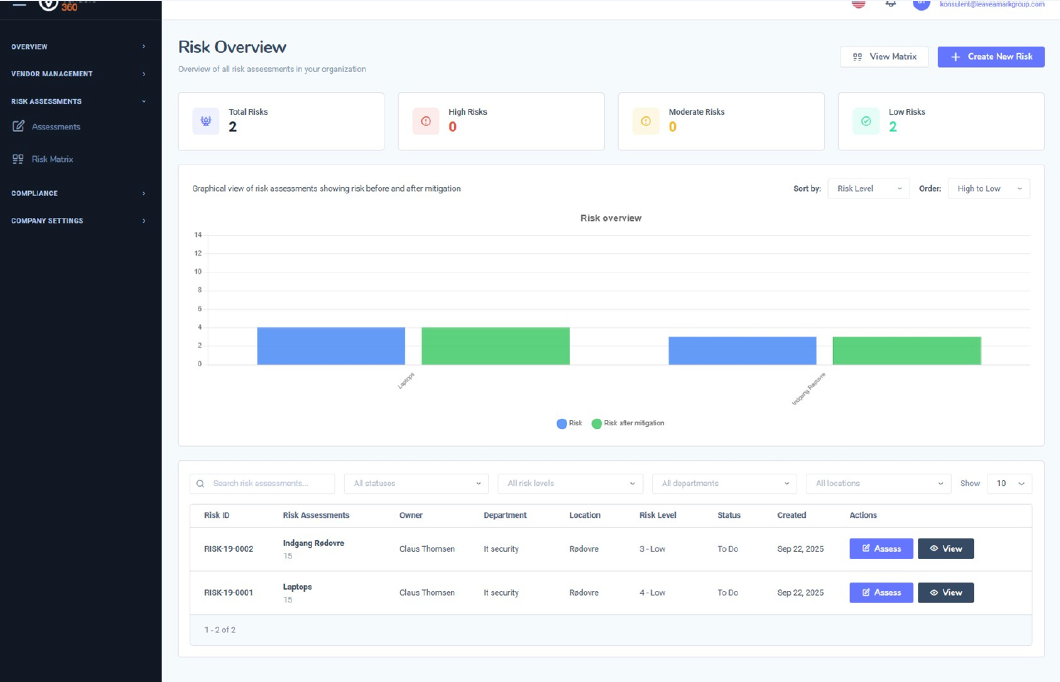
3. Åbn risikomatricen (Risk Matrix)
For at se dine risici visuelt placeret efter Impact og Likelihood, skal du klikke på “View Matrix” øverst til højre på Risk Overview-siden. 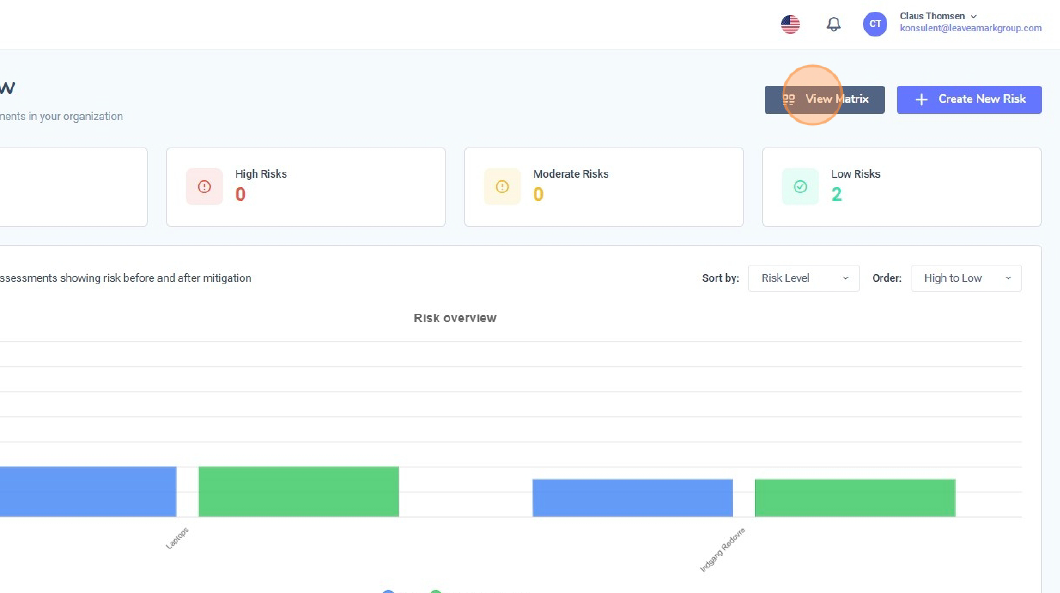
4. Læs risikomatricen
Vinduet Risikomatricen viser, hvor mange risici der falder i hver kombination af Impact (rækker) og Likelihood (kolonner).
Cellerne er farvekodet fra grøn (lav risiko) til gul (moderat risiko) og rød (høj risiko). Dette gør det nemt hurtigt at se, hvor de mest kritiske risici er koncentreret. Hver celle viser også antallet af registrerede risici i den pågældende kombination af impact og likelihood. 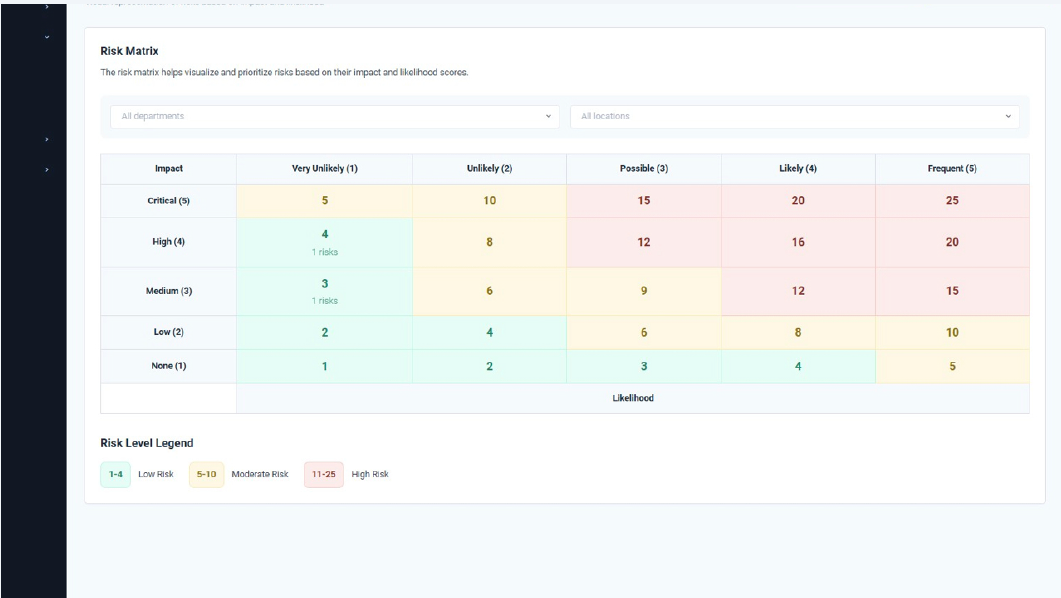
5. Filtrér og fortolk matricen
Brug filtrene over matricen til at indsnævre visningen til specifikke afdelinger eller lokationer.
Under matricen hjælper Risk Level Legend dig med at forstå, hvordan de beregnede scorer svarer til Lav, Moderat og Høj risiko.
Risikomatricen giver et klart visuelt overblik og hjælper dig med hurtigt at identificere, hvilke risici der kræver opmærksomhed først, hvilket understøtter effektiv prioritering af afhjælpningstiltag på tværs af organisationen.
Risikodetaljer
Når du klikker direkte på en risiko i matricen, vises de detaljerede oplysninger for denne risiko nedenfor. Her kan du se aktivnavn, risikoejer, afdeling, lokation, samt beregnet risikoscore og kategori. Fra dette afsnit, kan du vælge “View Details” for at åbne den fulde risikovurdering, hvor du kan gennemgå alle data, opdatere oplysninger eller tilføje afhjælpende handlinger efter behov. 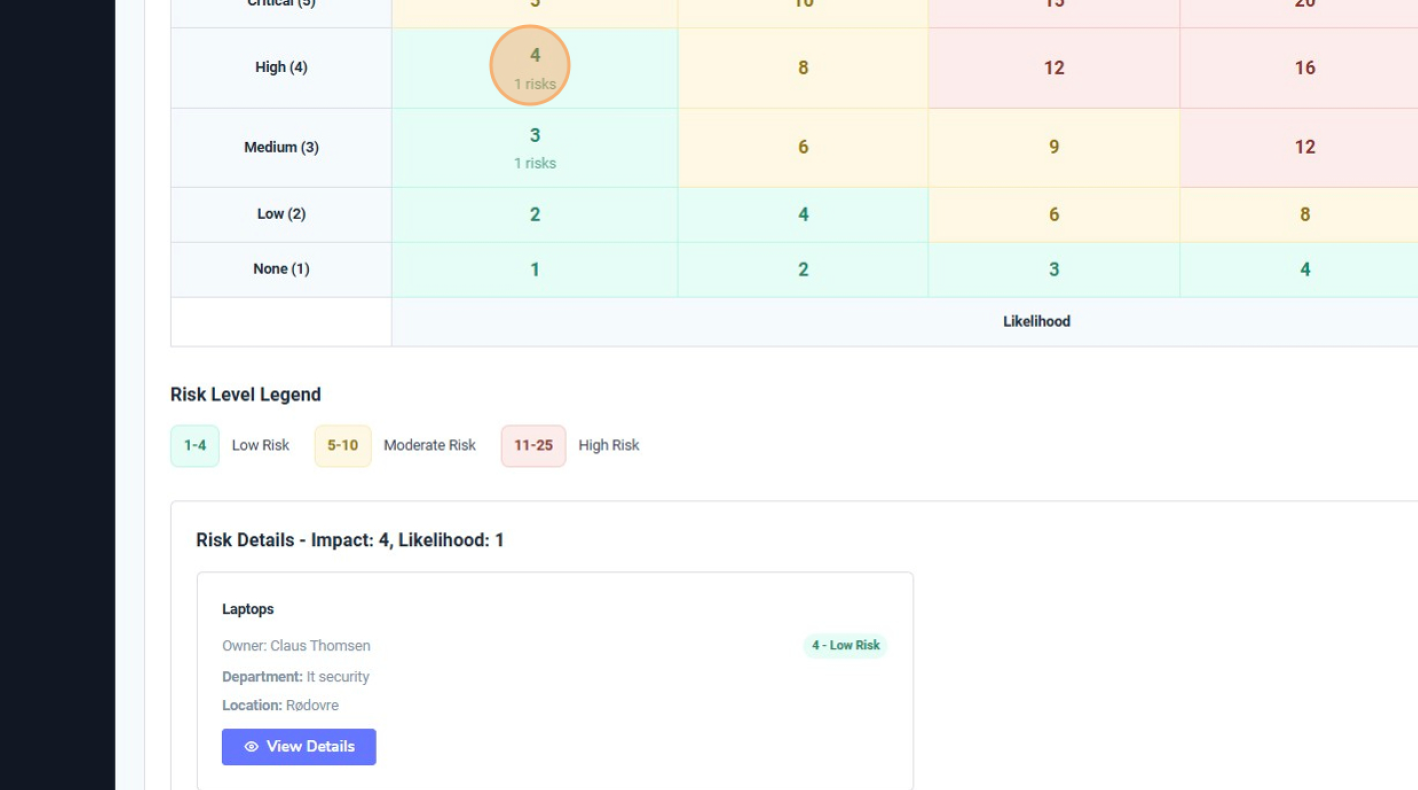
.
I denne guide lærer du, hvordan du opretter en afhjælpende opgave (mitigating task) ud fra en eksisterende risikovurdering i Vendora360. Afhjælpende opgaver sikrer, at identificerede risici følges op af konkrete handlinger.
1. Åbn den relevante risikovurdering
Gå til Risikovurderinger og åbn den risikovurdering, du vil arbejde med (enten ved at klikke på navnet eller på vis/redigér-ikonet).
Inde i risikovurderingen skal du scrolle ned til afsnittet “Associations” nederst i formularen. 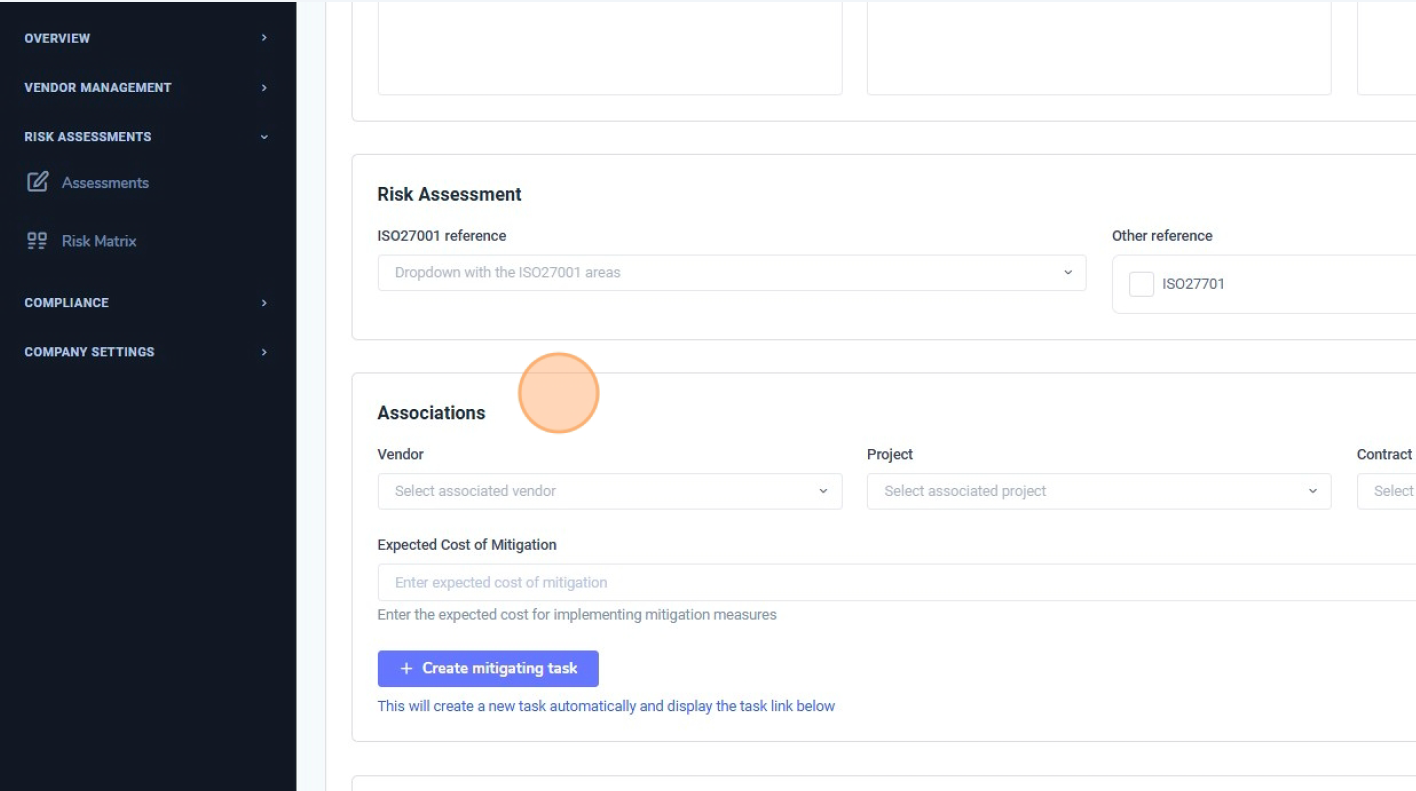
2. Klik på “Create mitigating task”
I afsnittet Associations skal du klikke på knappen “+ Create mitigating task”Vendora360 opretter automatisk en ny opgave, som er knyttet til denne risikovurdering, og åbner dialogboksen Mitigating Task. 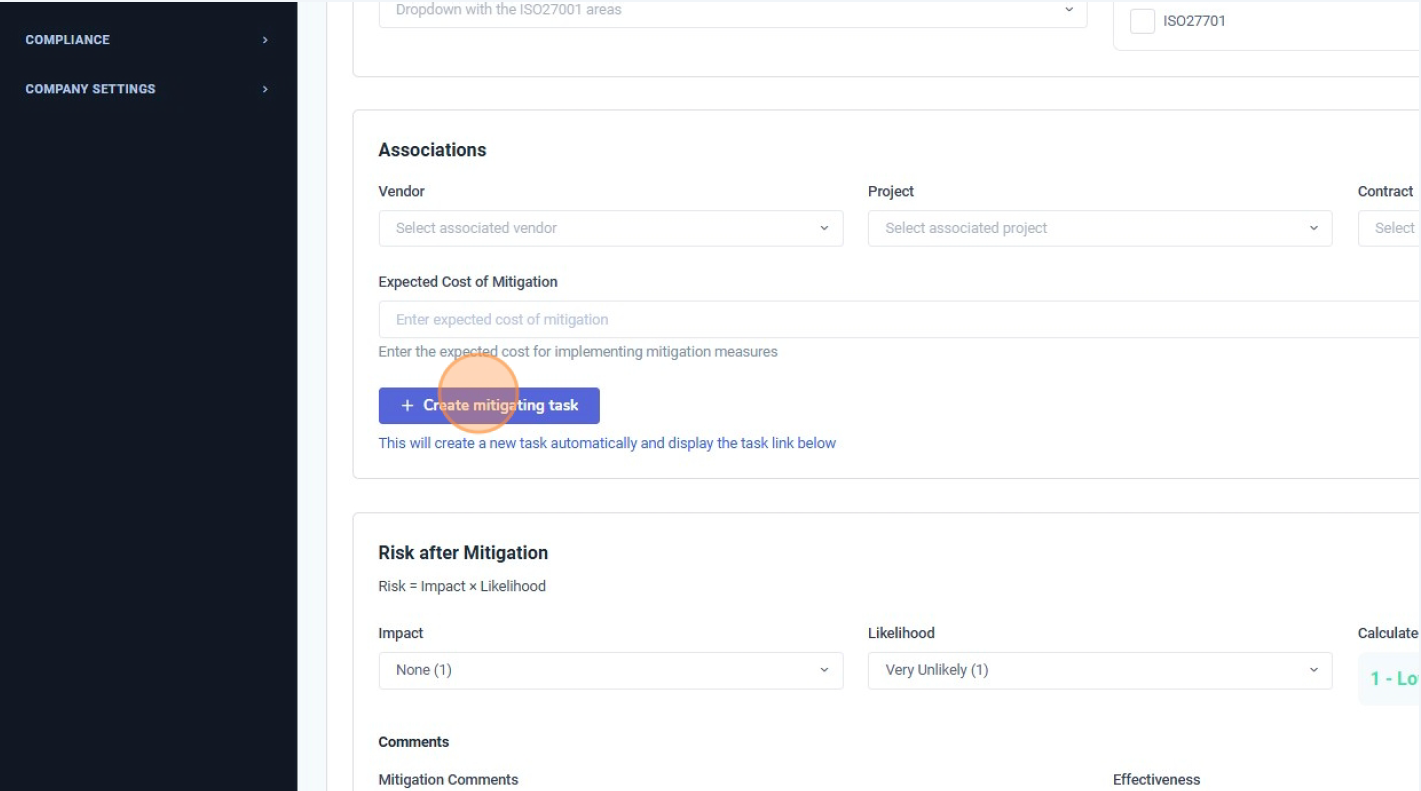
3. Gennemgå de forudfyldte opgaveoplysninger
Vinduet Mitigating Task er forudfyldt baseret på risikovurderingen. Typisk udfyldes følgende felter automatisk:
Du kan tilpasse disse felter efter behov, men i de fleste tilfælde skal du blot angive datoerne.
Angiv:
og opdatér om nødvendigt Status (fx To do, In progress eller Done). 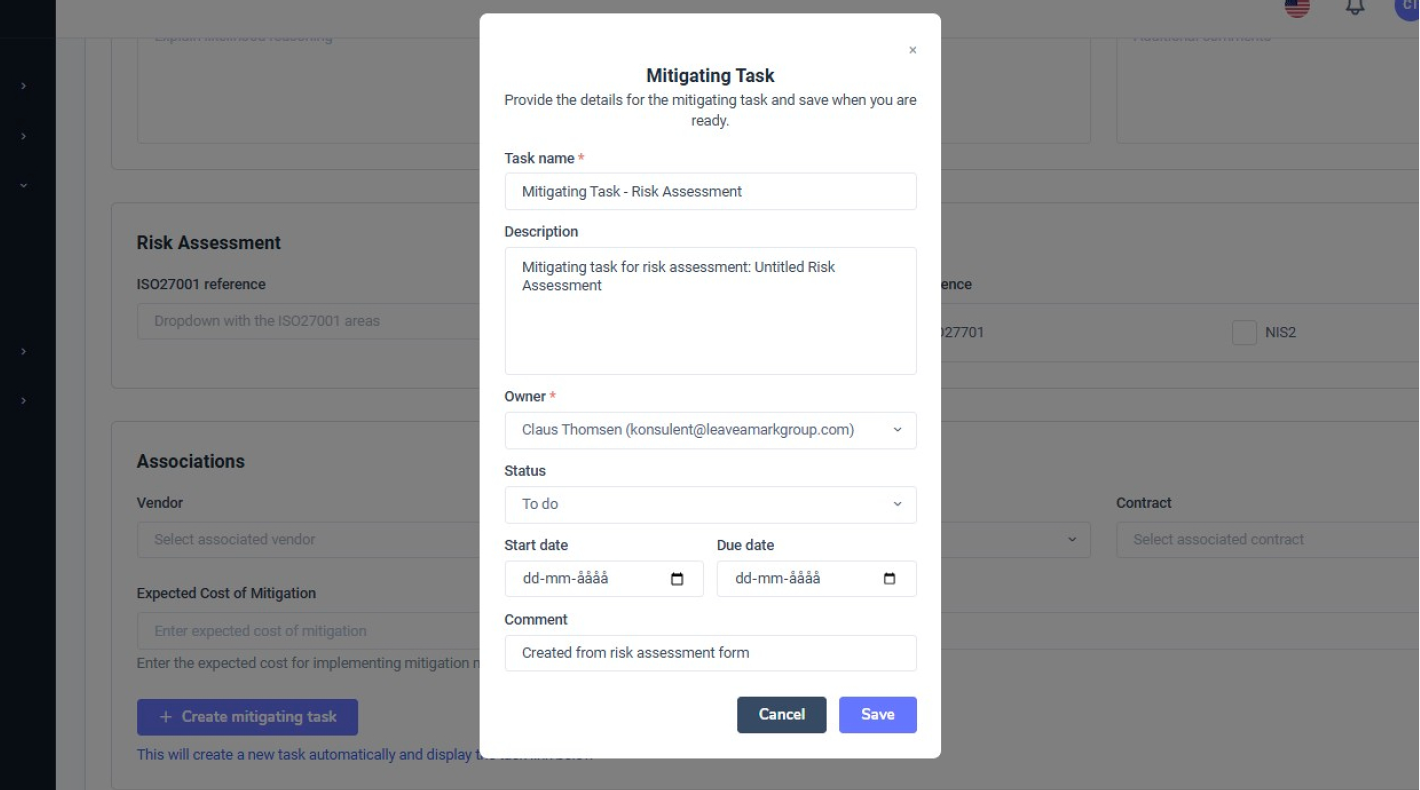
4. Gem og følg den afhjælpende opgave
Klik på “Save” for at oprette den afhjælpende opgave. Opgaven er nu knyttet til risikovurderingen og vil være synlig:
Fra disse visninger kan du følge fremdrift, opdatere status og sikre, at afhjælpningstiltagene bliver gennemført. 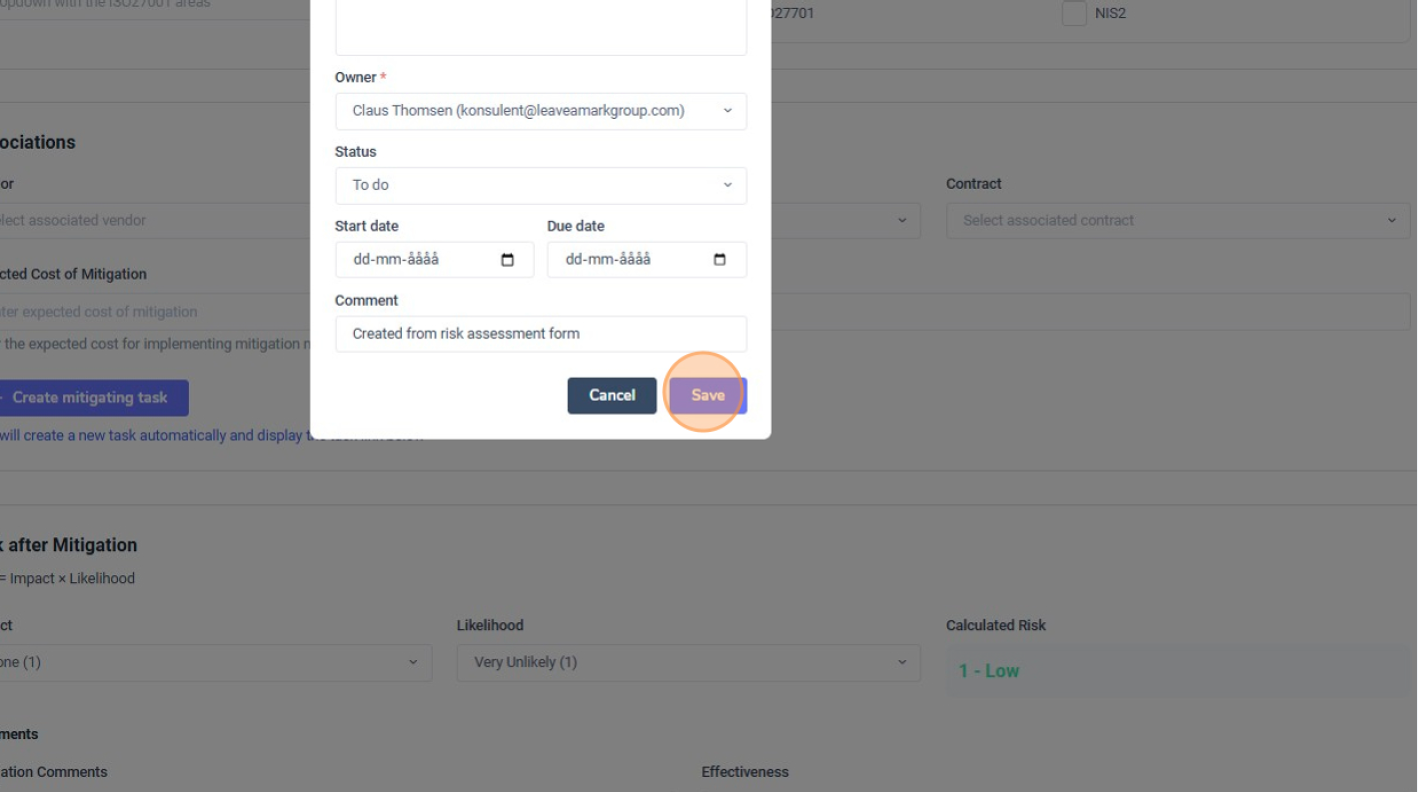
Den afhjælpende opgave er nu aktiv og udgør en del af organisationens strukturerede risikostyringsproces i Vendora360.
Formålet med denne proces er at sikre, at virksomheden opretholder compliance på tværs af alle operationelle områder – i overensstemmelse med gældende lovkrav samt principperne og kontrollerne fastlagt i Informationssikkerhedspolitikken.
Oprettelse af interne kontroller hjælper med effektivt at overvåge, evaluere og dokumentere compliance-aktiviteter.
1. Trin 1 – Klik på “Compliance”
Gå til hovedmenuen og vælg “Compliance”.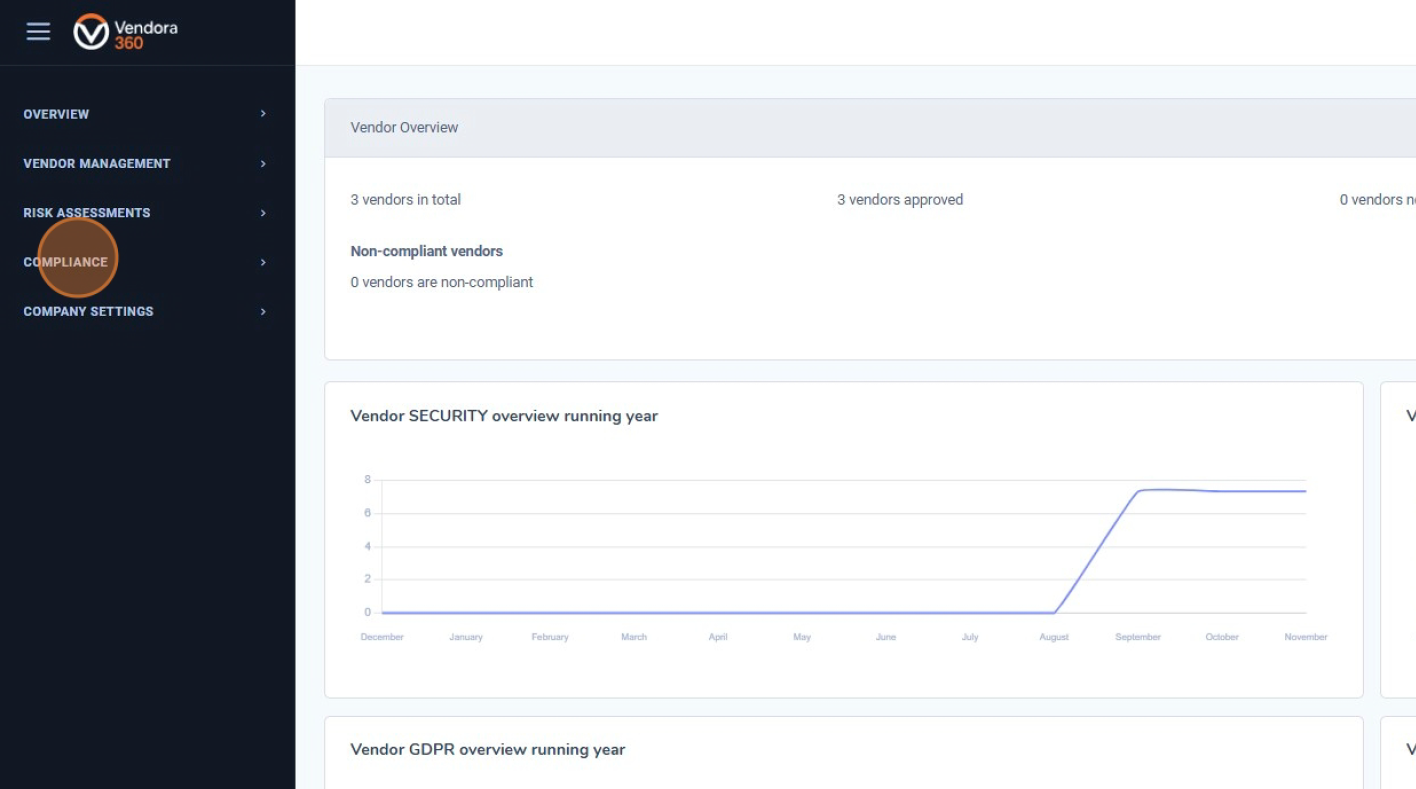
2. Trin 2 – Klik på “Controls”
Inden for Compliance-modulet skal du vælge “Controls” for at få adgang til listen over eksisterende interne kontroller.
Her kan du gennemgå alle aktuelle kontroller, herunder deres type, ansvarlige person, lokation, afdeling og tilbagevendende frekvens.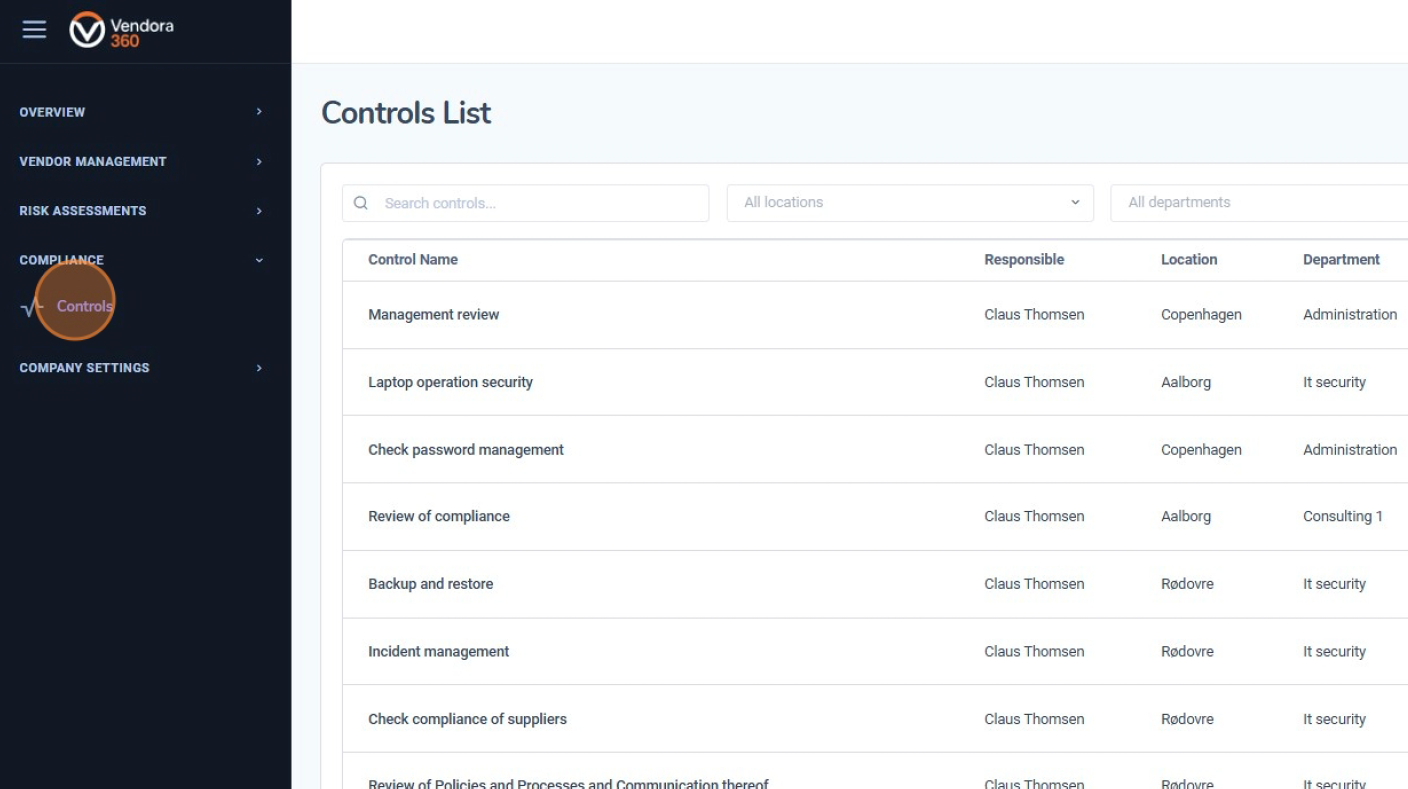
3. Trin 3 – Klik på “Create Control”
Klik på knappen “Create Control” for at begynde oprettelsen af en ny kontrol.
Dette åbner en formular, hvor du kan indtaste oplysninger såsom kontrolens formål, ejer, frekvens og godkendelsesoplysninger.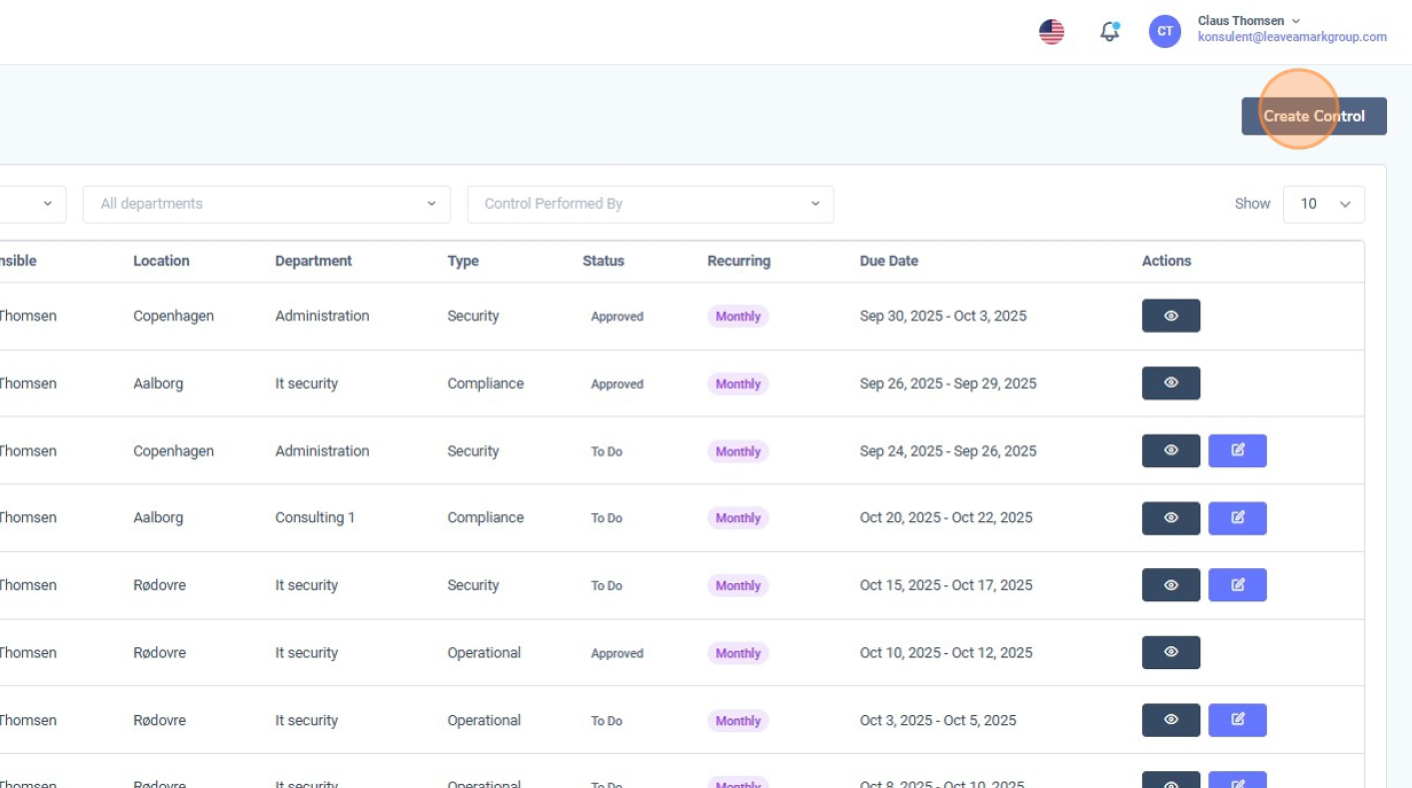
4. Trin 4 – Udfyld formularen
Udfyld alle obligatoriske felter i formularen. Dette omfatter typisk:
Upload eventuel nødvendig dokumentation som understøttende evidens for at dokumentere compliance.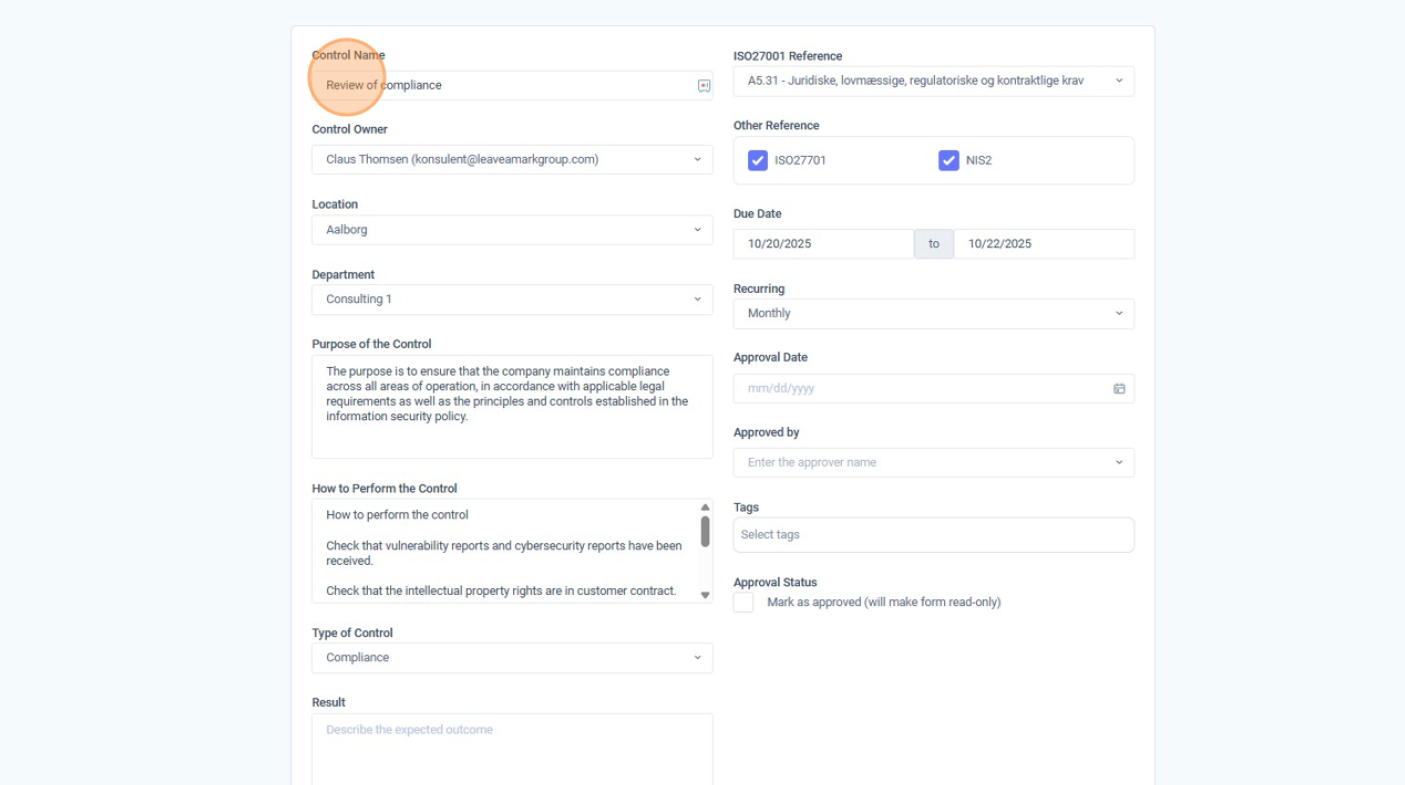
5. Trin 5 – Klik på “Save”
Når alle nødvendige oplysninger er indtastet, skal du klikke på “Save” for at færdiggøre og registrere kontrollen.
Kontrollen bliver herefter tilgængelig til opfølgning, gennemgang og audit-formål.
Sørg for, at status opdateres korrekt (fx To do eller Approved).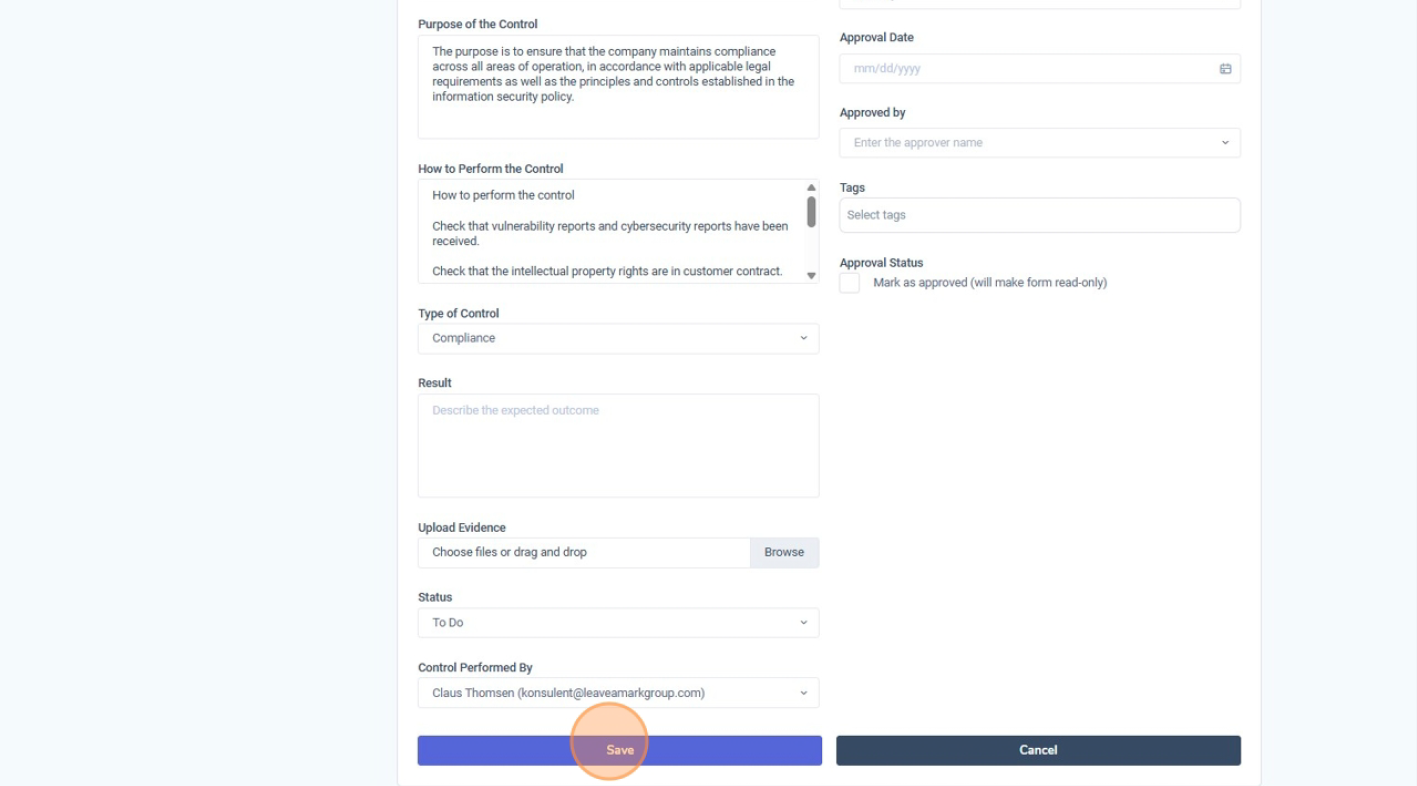
Internal Audit-modulet hjælper dig med effektivt at registrere og administrere interne audits. Denne guide viser, hvordan du opretter en ny audit og udfylder de vigtigste felter.
1. Navigér til Compliance-sektionen
Klik på “Compliance” i menuen i venstre side for at få adgang til alle compliance-relaterede funktioner, herunder interne audits.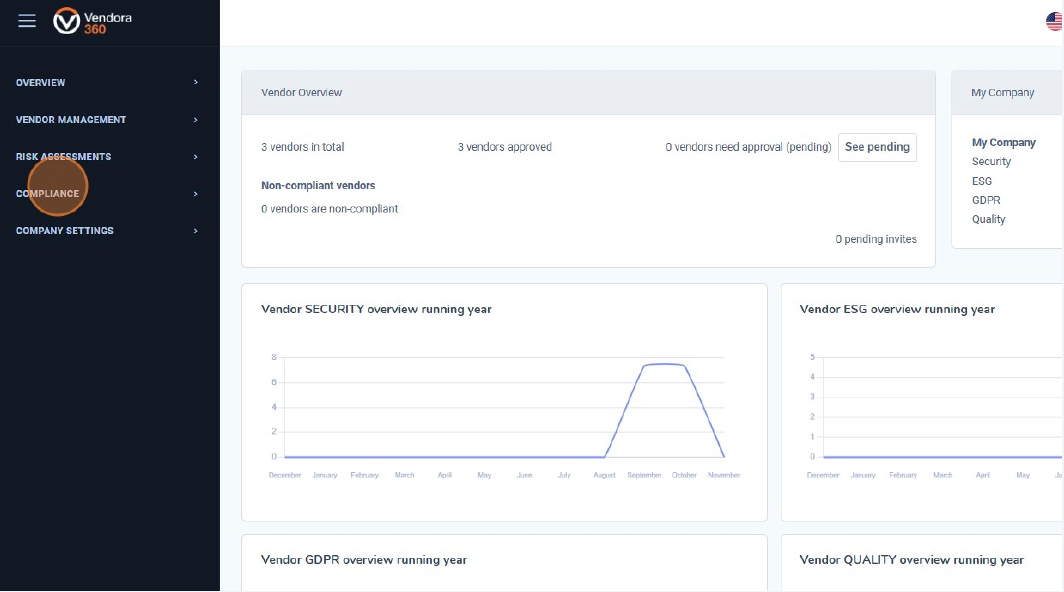
2. Åbn Audit-modulet
Vælg “Audit” under Compliance-menuen for at se dine eksisterende audits og oprette nye.
3. Start oprettelsen af en ny audit
Klik på “Add Audit” øverst til højre i Audit List for at begynde opsætningen af en ny intern audit.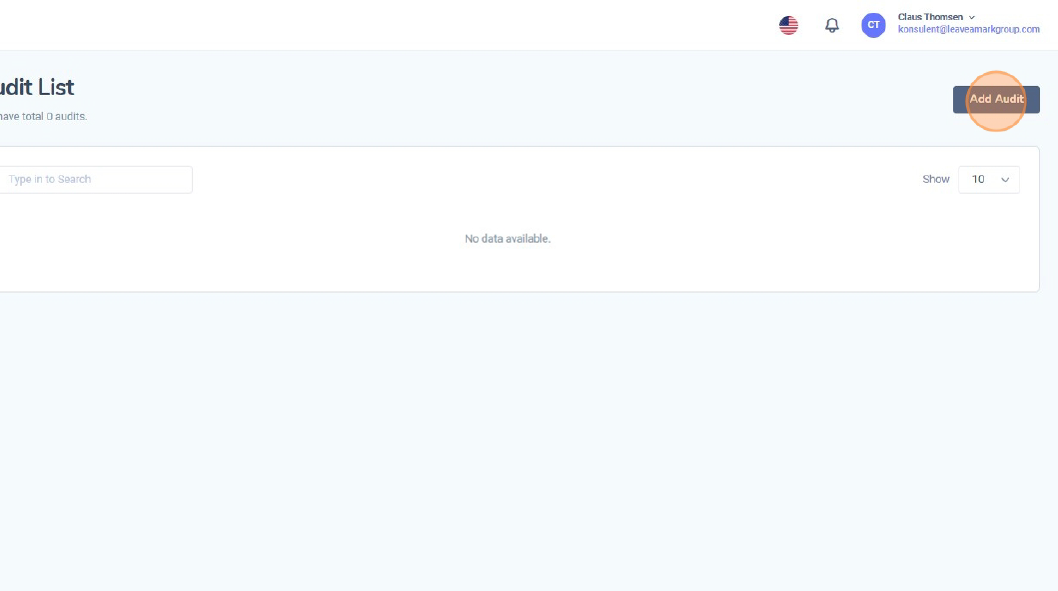
4. Indtast auditnavn
Klik i feltet “Audit Name”, og indtast en klar og beskrivende titel for auditten.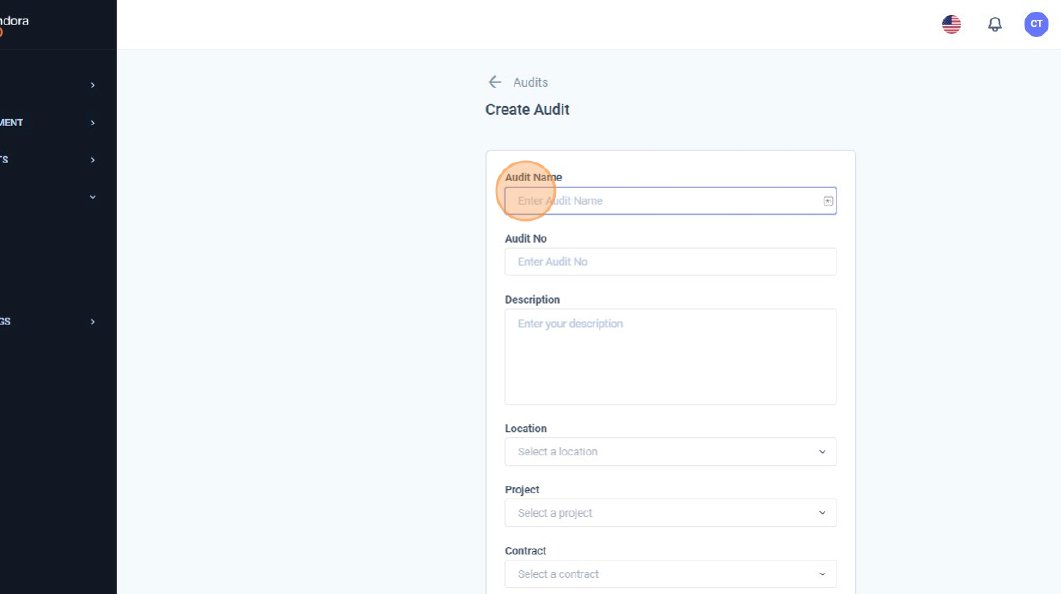
5. Indtast auditnummer
Klik i feltet “Audit No”, og indtast et unikt identifikationsnummer for auditten. Dette gør det nemmere at spore og referere til audits på en ensartet måde.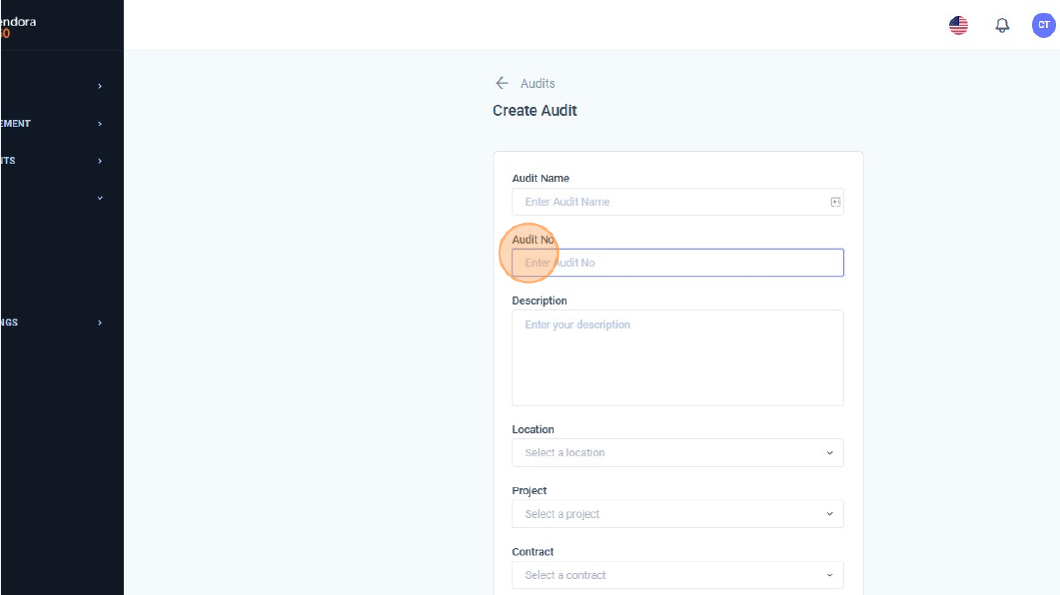
6. Tilføj en auditbeskrivelse
Klik i feltet “Description”, og angiv en kort og tydelig beskrivelse af auditens formål og/eller omfang.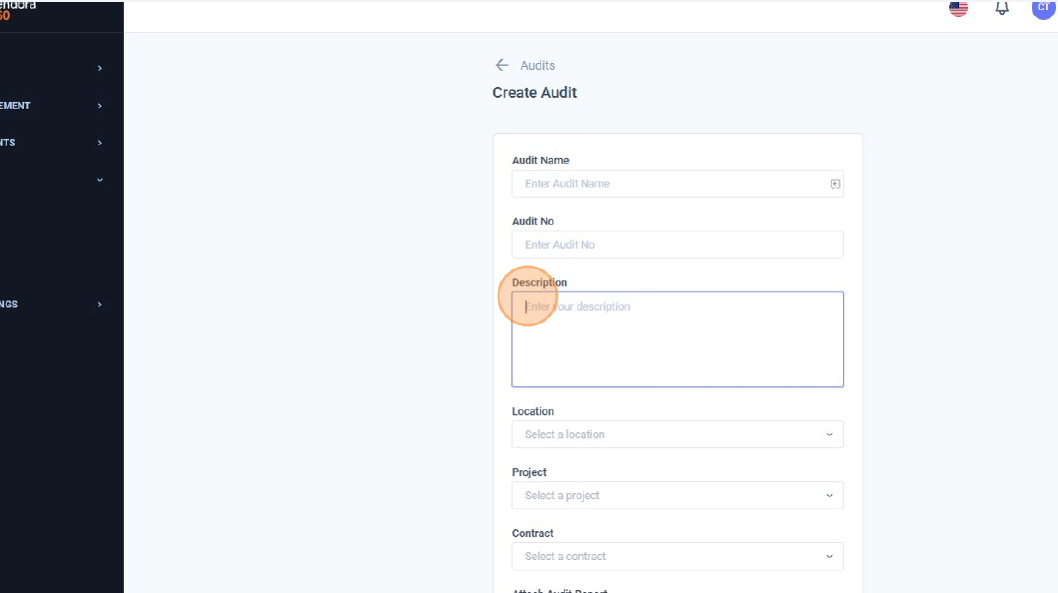
7. Vælg auditlokation
Åbn rullemenuen “Location” for at vælge, hvor auditten gennemføres.
8. Vælg tilknyttet projekt
Klik på “Select a project” for at knytte auditten til et specifikt projekt. Vælg det korrekte projekt fra listen.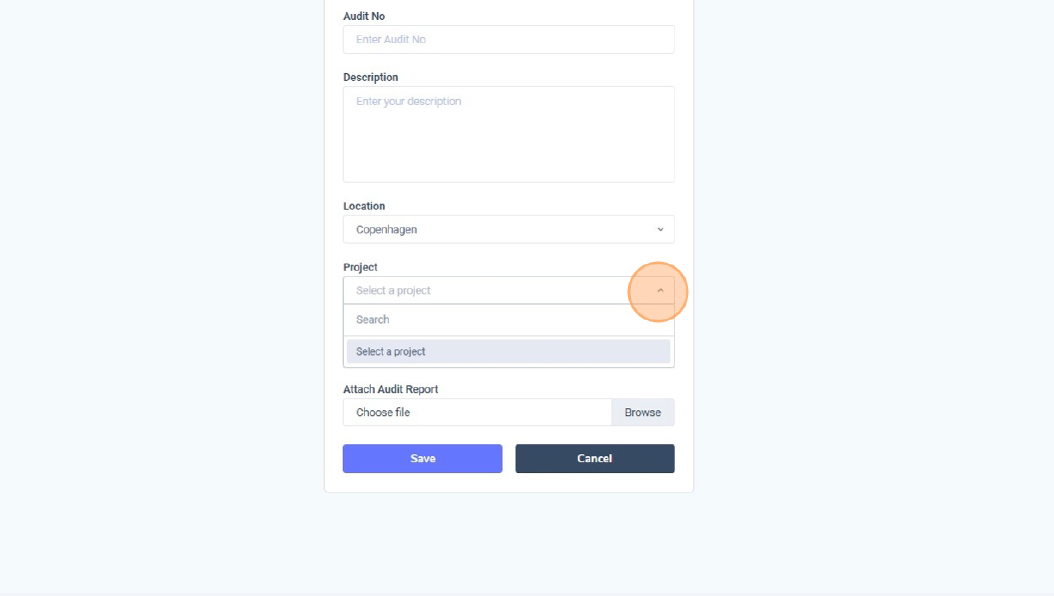
9. Vælg tilknyttet kontrakt
Brug feltet “Contract” til at knytte auditten til en specifik kontrakt, der er relateret til den leverandør eller det projekt, der gennemgås.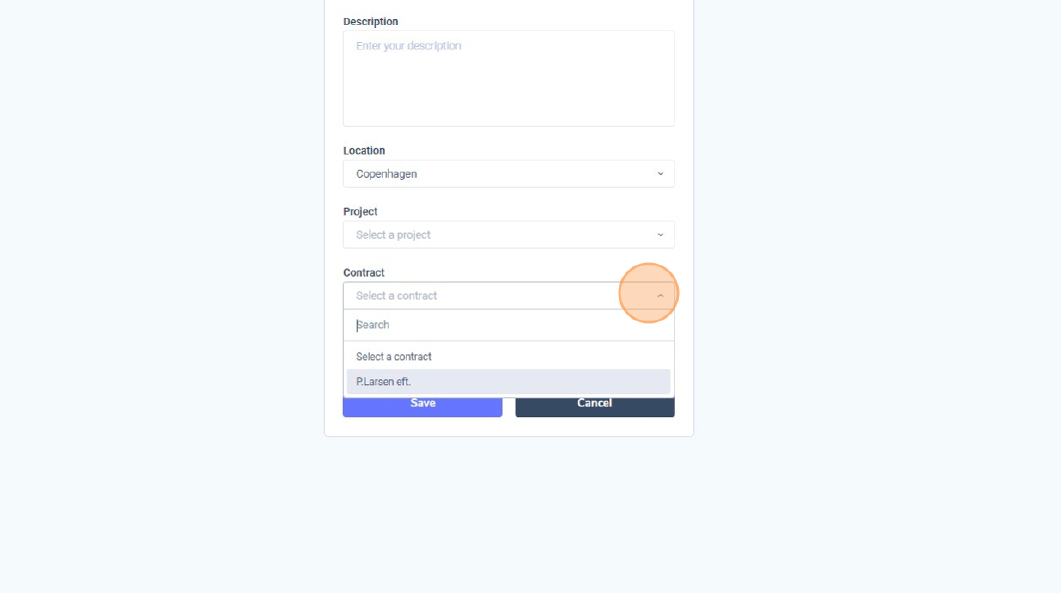
10. Vedhæft auditrapport
Under “Attach audit report” skal du klikke på “Choose file” for at uploade den endelige auditrapport eller anden understøttende dokumentation.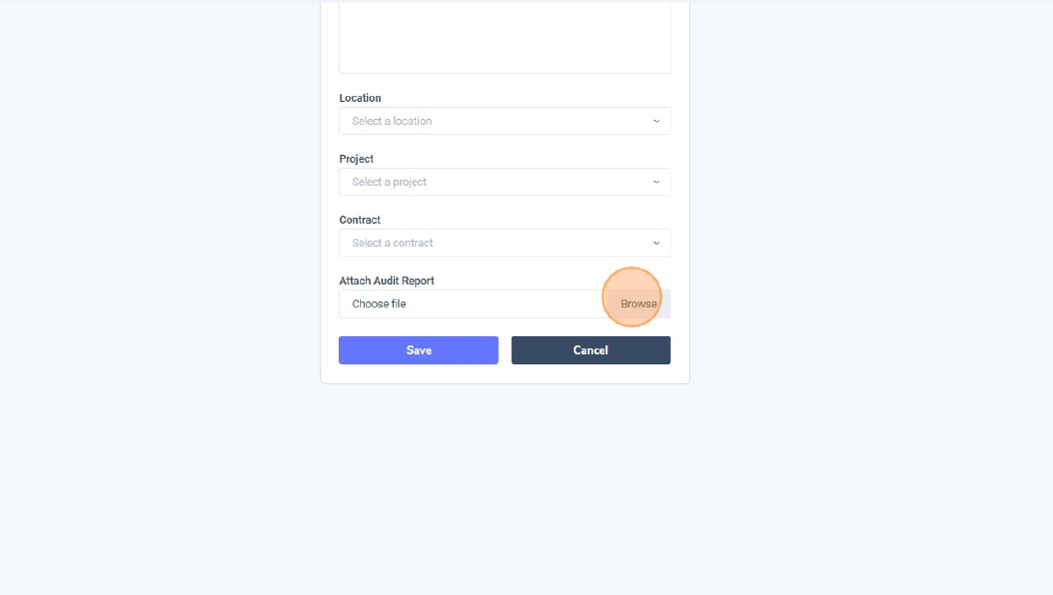
11. Gem auditten
Klik på “Save” for at oprette auditten. Auditten vil nu fremgå i Audit List, hvor du kan tilgå den, opdatere oplysninger eller vedhæfte en auditrapport.
I denne guide lærer du, hvordan du arbejder med opgaver i Vendora3360 - fra at finde eksisterende opgaver til at oprette nye og opdatere deres status og godkendelse.
1. Klik på “Overview”
Start med at klikke på “Overview” i menuen i venstre side for at åbne hoveddashboardet. Her får du et hurtigt overblik over leverandører, godkendelser og igangværende aktiviteter. 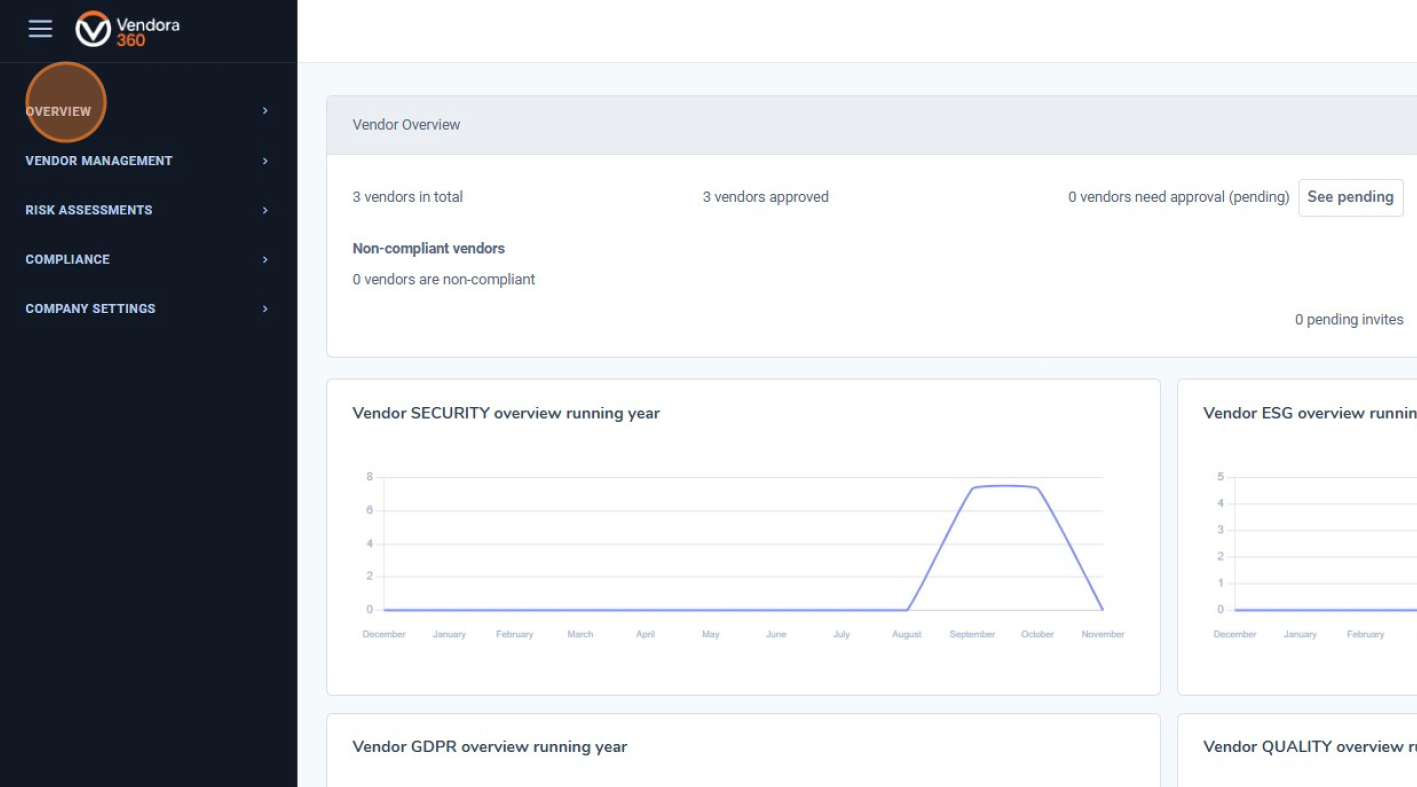
2. Åbn opgavelisten
Klik på “Tasks” i menuen for at åbne Task List. Denne side er det centrale sted til at administrere alle opgaver i Vendora360. 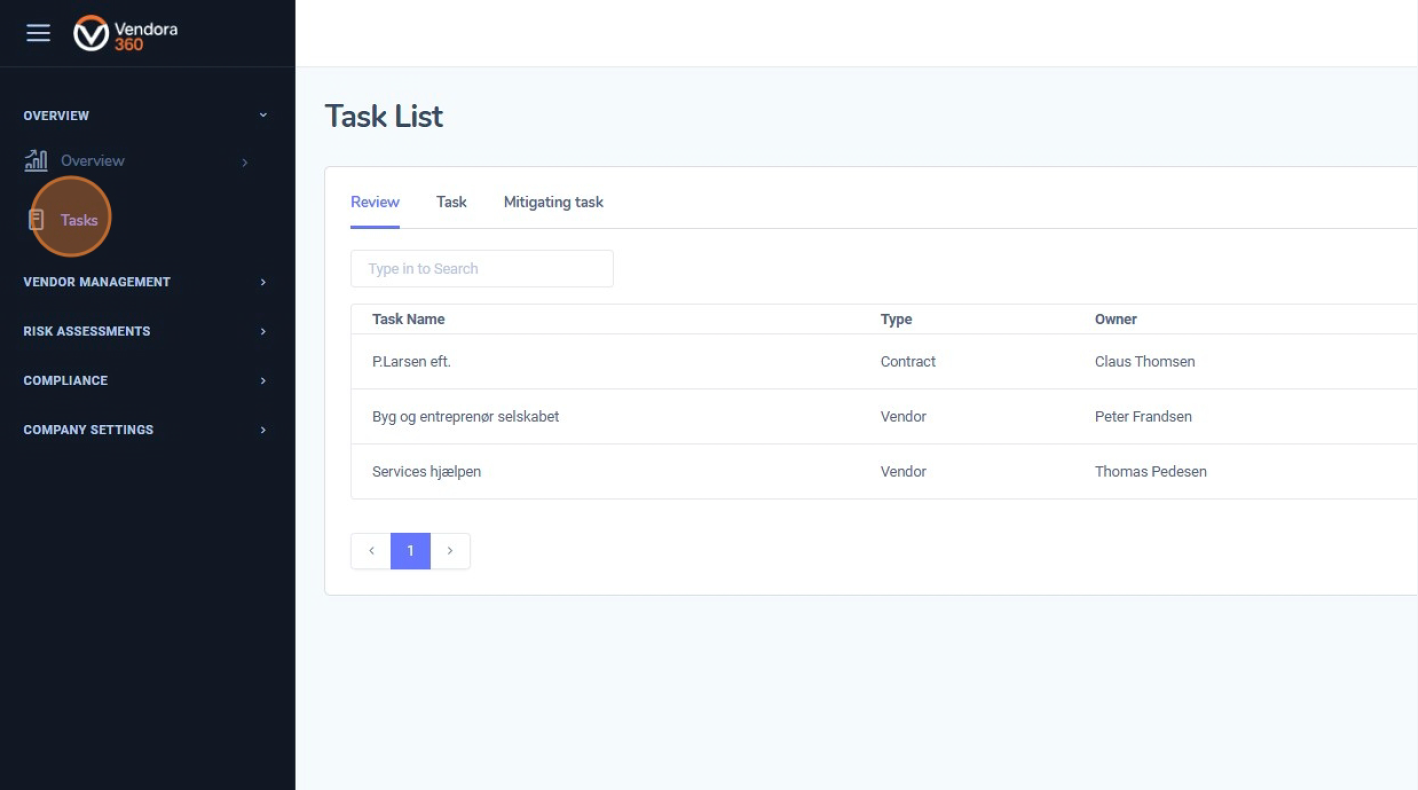
3. Forstå de tre opgavefaner
Øverst i Task List finder du tre faner:
Review – viser automatisk genererede review-opgaver, fx kommende leverandør- eller kontraktreviews, med angivelse af ansvarlig og næste reviewdato.
Task – indeholder alle manuelle opgaver, som er oprettet af brugere, såsom opfølgninger, påmindelser eller interne handlinger.
Mitigating task – viser opgaver, der er knyttet til risikovurderinger eller kontroller og bruges til at afhjælpe identificerede risici eller fund.
Brug søgefeltet til hurtigt at finde specifikke opgaver i den aktive fane. 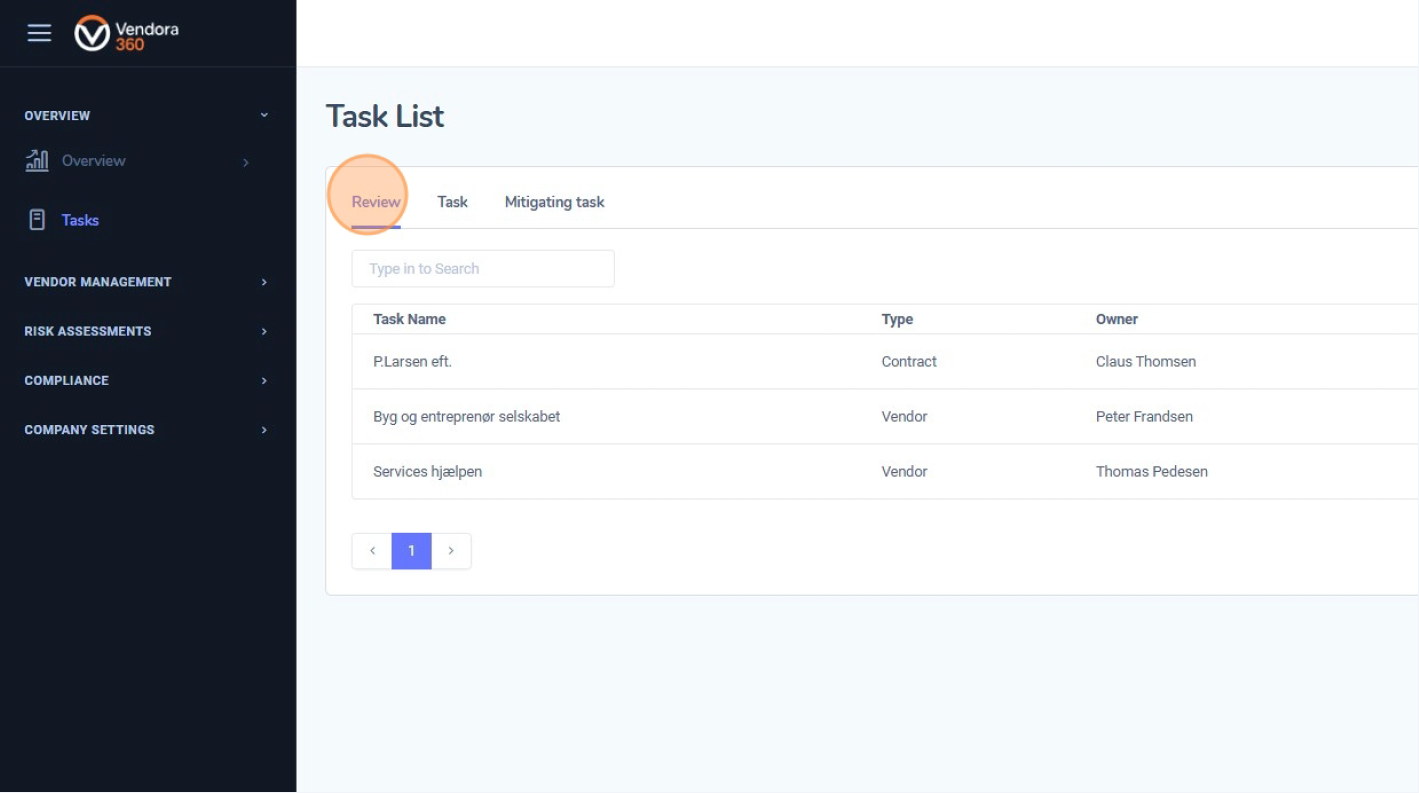
4. Klik på “Task”, og opret en ny opgave
Gå til fanen “Task” for at arbejde med manuelle opgaver.
Klik på “Create Task” øverst til højre for at oprette en ny opgave. 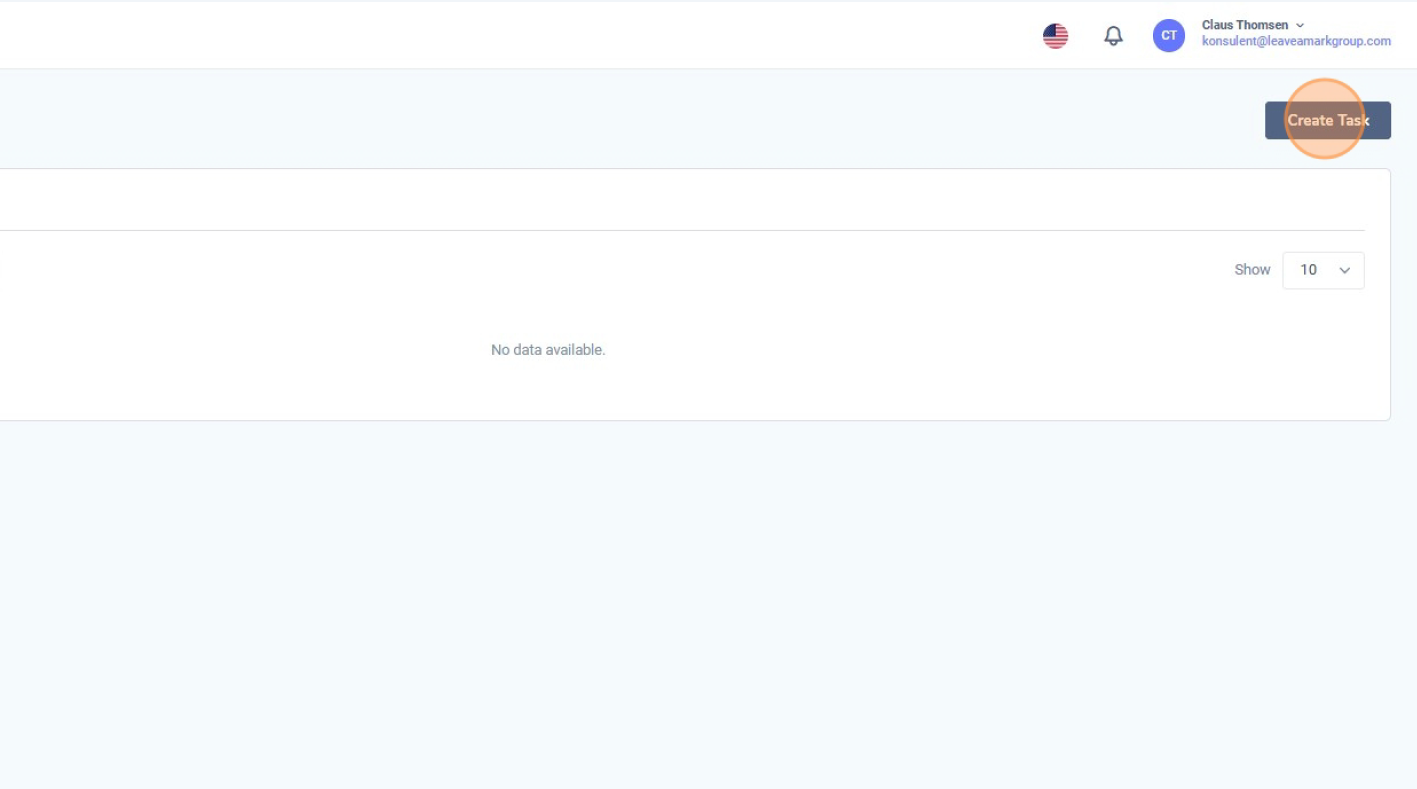
5. Udfyld opgaveoplysningerne
I Create Task formularen skal du indtaste følgende oplysninger:
Når alle felter er udfyldt, skal du klikke på “Save”. Opgaven vil nu fremgå i opgaveoversigten. 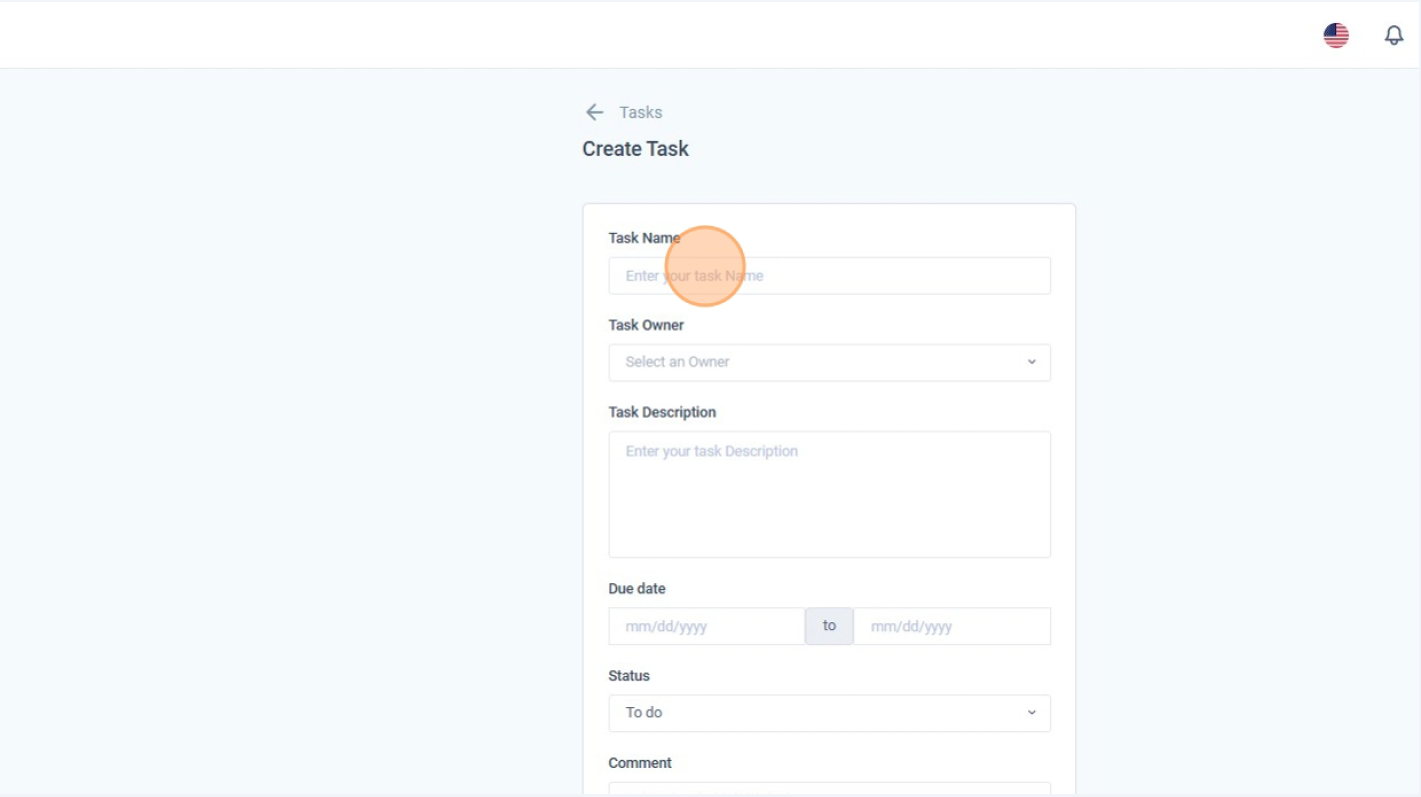
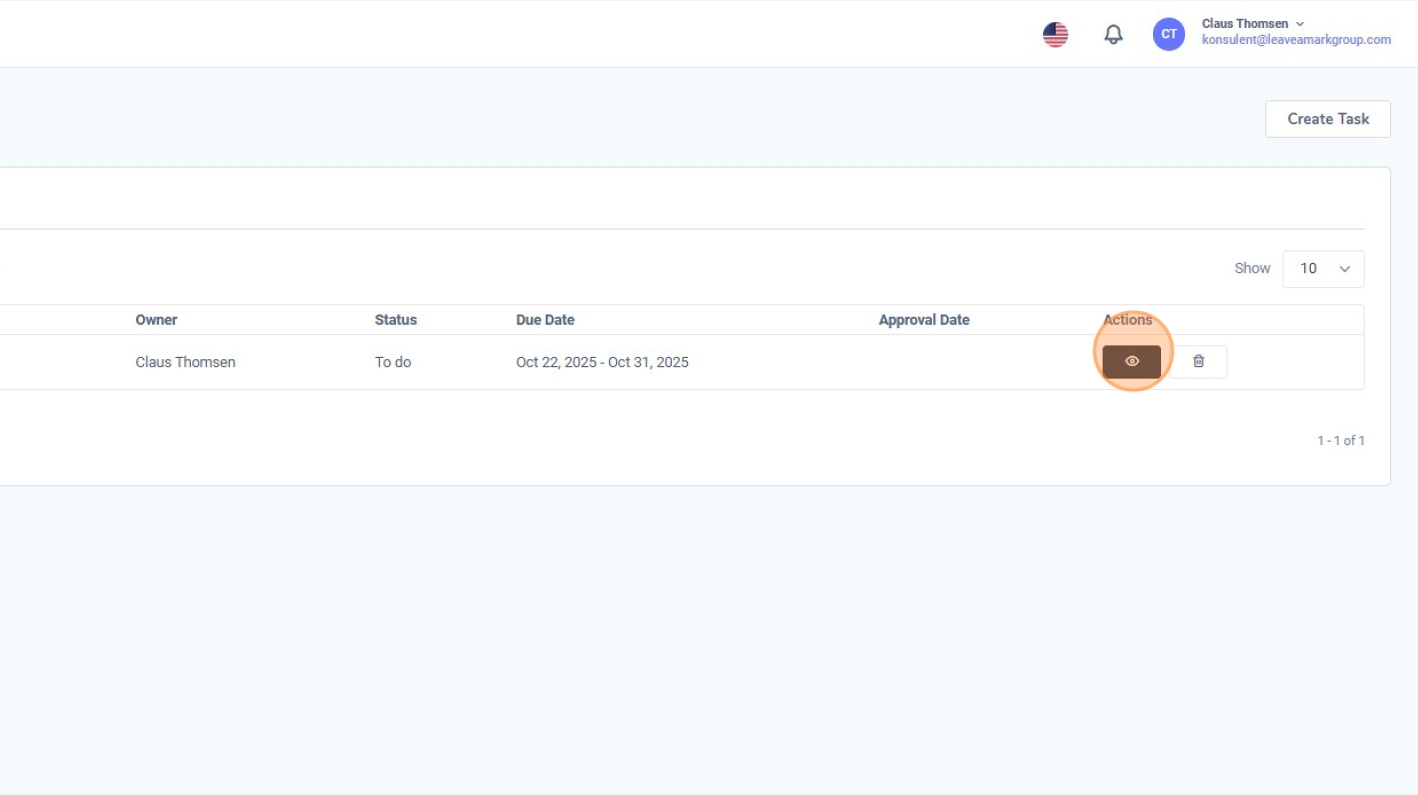
6. Åbn og gennemgå en eksisterende opgave
Du kan altid åbne en opgave for at se eller redigere dens detaljer.
I Task List skal du klikke på øje-ikonet under Actions ud for den relevante opgave. 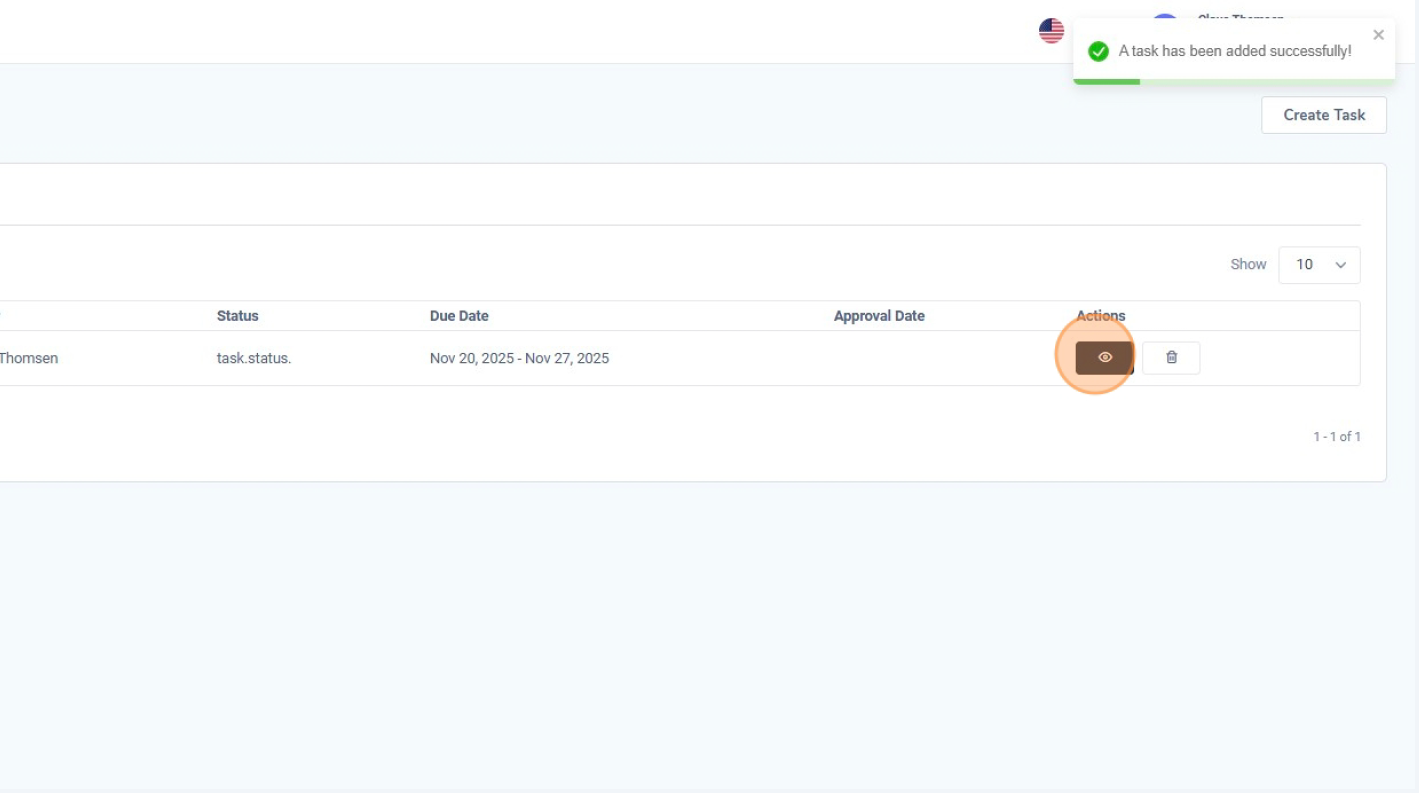
7. Opdatér opgavens status
Efterhånden som arbejdet med opgaven skrider frem, skal du opdatere feltet Status (fx fra To do til In progress eller Completed).
At holde status opdateret giver alle et korrekt overblik over fremdriften. 
8. Tilføj godkendelsesoplysninger og gem
Når opgaven er fuldført, kan du registrere godkendelsen ved at:
Klik på “Save” for at gemme den opdaterede status og godkendelsesoplysninger. 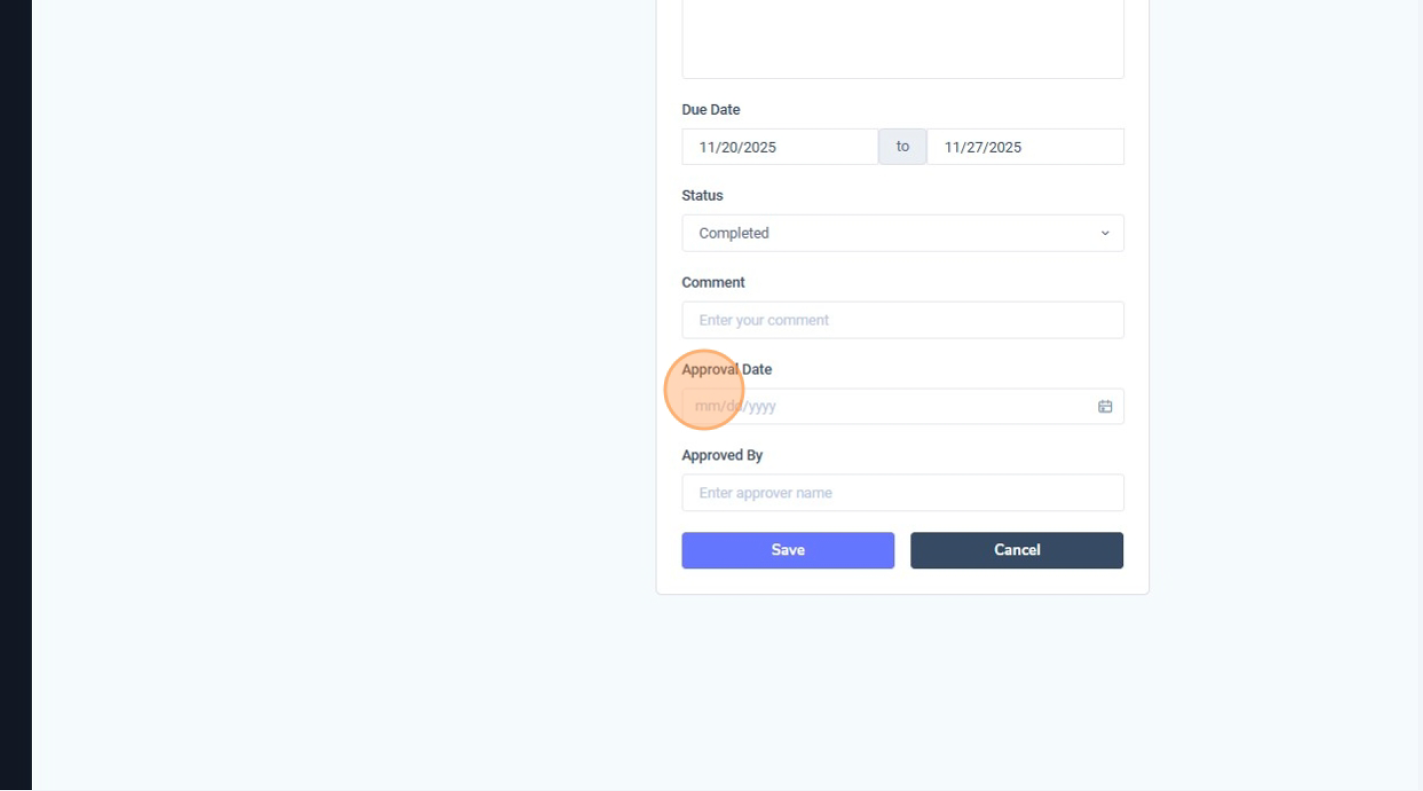 Gå herefter tilbage til Task List for at se den opdaterede opgave med dens nye status og godkendelsesinformation. Denne oversigt hjælper dig med at holde styr på både åbne og afsluttede opgaver på tværs af organisationen.
9. Gennemse afhjælpende opgaver (Mitigating tasks)
For at se opgaver, der er knyttet til risici eller fund, skal du klikke på fanen “Mitigating task”. Her kan du se alle afhjælpende opgaver og bruge øje-ikonet til at åbne en specifik opgave, gennemgå detaljerne og følge op på handlinger.